POS
Point of sale
- What
- The Jimani POS is a point-of-sale system for hospitality and retail businesses with a free basic version. It handles orders, payments, receipt printing and day closings, and stays usable when the internet connection drops (paying with cash or Pay other, printing the customer receipt, searching today's receipts; no card payments via Mollie). The POS shares its database with the other Jimani modules (reservations, webshop, ticketing, activities, salon, hotel), so a webshop order, for example, appears on the same POS screen as an order placed at the POS itself.
- Who it is for
- Hospitality and retail businesses looking for a POS system without fixed monthly costs, with a separate version for treatment salons.
- Core features
- - Ordering, paying and receipt printing, with cash drawer control via the receipt print signal - Offline operation: paying with cash or Pay other, printing the customer receipt and searching today's receipts (card payments via Mollie and Tap to Pay need a live connection) - Multiple tills/points of sale under one company account - Day closing with a revenue overview, as PDF and by email - Receipt printer and cash drawer control via ESC/POS; card payments via Mollie - Handheld ordering at the table, with the same ordering function as the POS - Kitchen and handout screen (€5 per kitchen screen per month) - Tips as an option that can be switched on and off
- Price
- The first POS is free. At the start you pay a one-off €279 in onboarding costs (excl. VAT). Extra POS €15 per month, handheld €5, kitchen screen €5. See "What does Jimani cost?".
- Difference from competitors
- SumUp works with a comparable freemium model (free basic POS, paid Plus tier from €49/month per location). Lightspeed and unTill are continuously paid subscriptions (Lightspeed from roughly $69-189/month, unTill €80-200/month) — no free basic version found for these two.
Keywords: hospitality POS system, free POS, retail POS, POS system without subscription, POS with reservations
Related questions - Is the Jimani POS really free, and what does onboarding cost?
- Does the POS still work when the internet goes down?
- Can I link multiple tills or points of sale to one account?
Receipt printer, cash drawer and card terminal integration
- What
- The Jimani POS controls receipt printers via the ESC/POS network protocol, opens the cash drawer when paying with cash, and connects card terminals via Mollie. Card terminals (PAX A35 and PAX A920-PRO) and receipt printers can be ordered in the Jimani webshop. Card payments cost 1.5% per transaction without a subscription, or with the card payment subscription €20 per month per card terminal plus €0.06 + 0.2% per transaction (excl. VAT).
- Who it is for
- Hospitality and retail businesses setting up their POS.
- How it works
- Network printers are controlled via the ESCPOS_NET library (Epson command set, TCP port 9100); a separate manufacturer SDK operates the built-in printer of the POS device itself. You connect the cash drawer yourself: at the receipt printer (Which cash drawer?) or at the POS screen (Connected cash drawer). Without a connected drawer, no cash payments can be made on that POS. Card payments run via a linked Mollie account per company; no other payment provider was found in the code.
- Difference from competitors
- No public comparison material found. ESC/POS is an open, widely used protocol, so this is standard practice rather than a distinguishing point.
Keywords: connect receipt printer, cash drawer, connect card terminal, ESC/POS, Mollie terminal
Related questions - Which receipt printers work with the Jimani POS?
- Do I have to connect the cash drawer separately, or does it happen automatically? You connect it yourself at the receipt printer or the POS screen.
- Which card terminal provider does Jimani use, and what do card payments cost?
Kitchen and handout screen
- What
- Orders in the Jimani POS are automatically sent on to a kitchen screen (being prepared) and a handout screen (ready to hand over), without a separate kitchen display subscription. A kitchen screen costs €5 per screen per month (excl. VAT) and requires the Restaurant and Courses add-ons (€10 per month; free until 1 January 2027 if you already use it).
- Who it is for
- Hospitality businesses with a kitchen or pickup counter.
- How it works
- A single shared order model routes orders by status and type (delivery, pickup, dine-in) to the right screen tab. A business without kitchen work automatically sees these screens empty instead of error messages. Because the kitchen and handout screens use the same data source as the POS, an order appears on the right screen without delay as soon as it is placed.
- Difference from competitors
- No public comparison material found on kitchen display costs at Lightspeed, unTill or SumUp specifically.
Keywords: kitchen screen, kitchen display system, handout screen, kitchen printer
Related questions - Does Jimani have a kitchen screen, and does it cost extra?
- How does the kitchen screen know which orders to show?
- Why choose a kitchen screen instead of a kitchen printer?
Which payment methods does Jimani support?
- What
- At the POS the payment methods are Cash, Card, Card payment (external), Tap to Pay, Pay other, On account and (only for change back) Gift voucher, plus coins/tokens and prepaid credit. Shrinkage and staff consumption are recorded as Own consumption.
- Who it is for
- Hospitality and retail businesses.
- How it works
- Every payment gets one of these fixed payment methods, regardless of which screen (POS, webshop, reservation) it comes in through. With "on account" and "own consumption" no money comes in at the moment of payment — these are different cases for accounting (a debtor, or own consumption) than cash or card, and an accounting link therefore books them differently. Coins/tokens is a separate, less common payment method, relevant for example for arcades or attractions that work with coins.
- Difference from competitors
- No public comparison material found on the full range of payment methods at Lightspeed, unTill or SumUp specifically.
Keywords: POS payment methods, which payment methods jimani, pay with coins tokens, pay on account
Related questions - Which payment methods can I accept with Jimani?
- Can a customer pay on account instead of paying immediately?
- Does Jimani support paying with coins or tokens?
Switching between modules on the same POS
- What
- One POS device remembers which module is active (hospitality, webshop, salon, activities, ticketing) and adapts the menu accordingly; a user can switch this themselves via a dropdown.
- Who it is for
- Business owners who combine multiple modules on the same POS device.
- How it works
- The active module is remembered for thirty days per device/user. If the POS is on the hospitality module, the shared POS screen shows the reservation menu and the table floor plan; with another module the corresponding menu appears. Without a valid, known module the system falls back to the company's own main module, so the POS never gets stuck in the wrong menu.
- Difference from competitors
- No public comparison material found on a comparable shared POS interface that can be switched per module at Lightspeed, unTill or SumUp specifically.
Keywords: switch module POS, POS to reservation screen, switch hospitality webshop salon
Related questions - Can I switch on the same POS between, for example, booking and just taking payment?
- Does the POS remember which module I used last?
What do card payments cost with Jimani?
- Answer
-
Card payments run through your own Mollie account. Without a subscription you pay 1.5% per transaction. With the card payment subscription you pay €20 per month per card terminal and then €0.06 + 0.2% per transaction. Tap to Pay costs €5 per month for an unlimited number of devices. The handheld feature costs €5 per month per handheld. All amounts exclude VAT.
- Explanation
-
| Choice | Fixed | Per transaction |
|---|
| Without subscription | €0 | 1.5% |
| Card payment subscription | €20 per month per card terminal | €0.06 + 0.2% |
| Tap to Pay | €5 per month, unlimited number of devices | the rate of your choice above |
| Handheld feature | €5 per month per handheld | - |
- Connecting Mollie. The owner connects Mollie in Settings with "Connect with Mollie" and approves the permissions at Mollie. Mollie checks your details.
- Card payment subscription. You pay 12 months in advance, or per month if you already have a monthly direct debit at Jimani. Cancelling runs until the end of the paid period.
- Per card terminal. The subscription applies per linked card terminal; a Tap to Pay terminal or a Mollie Tap also counts. With 3 card terminals you pay 3 × €20 = €60 per month (excl. VAT); the invoice says "Card payment subscription (3 × €20.00)". The subscription counts at least one device.
- Card terminals. You order the PAX A35 (fixed, with cable) and the PAX A920-PRO (wireless) in the Jimani webshop. Jimani sets the device up on your Mollie account. In the POS settings you choose which card terminal that POS uses for payment.
- Tap to Pay. Card payments on a handheld or Android tablet with the Mollie Tap app. On a fixed POS screen it does not work. You link the device with a QR code under Settings > Till and products > Tills and equipment.
- Tips. With card payments you can add a tip just as with cash; the amount and tip go together to the device.
- Example
-
With the card payment subscription and a payment of €50 you pay €0.06 + €0.10 = €0.16 in transaction costs. Without a subscription that is €0.75.
- Related
-
What does an extra POS, handheld, kitchen screen or buzzer cost?
Keywords: card payment costs, card payment subscription, mollie card rate, card terminal POS, tap to pay, card transaction costs
Related questions - What does a card terminal cost via Jimani?
- How much do I pay per card transaction?
- What does Tap to Pay cost?
- Is the card payment subscription worth it?
- What does paying with the phone as a card terminal cost?
Does the Jimani POS meet the requirements of the Belastingdienst (Dutch Tax Authority)?
- Answer
-
Jimani is built according to the Belastingdienst's guidance for a reliable checkout system. Every sale goes into a cash register journal that can no longer be changed, the lines are chained together, and you download an audit file (XAA) for the Belastingdienst. Jimani has no (yet) quality mark.
- Explanation
-
- Cash register journal. Every closed receipt, payment and event goes into the journal. A closed receipt can no longer be changed or deleted by the database. A paid receipt cannot be crossed out; for that you use Refund.
- Chain. Each line gets a code that includes the previous line. This way any later change stands out. Each POS also has its own continuous sequence number.
- Events. Opening the drawer, logging out, the X report, deposits, withdrawals and partial payments are also in the journal.
- Check. On Day closing there is the Cash register journal button: "Chain intact" or the location of a break, plus gaps per POS. Jimani also checks the chain every night.
- Audit file. On Day closing you download the Auditfile Afrekensystemen (XAA 3.2) for a period. Within your business only the owner can do this.
- Practice receipt. A practice receipt is called "* PRACTICE RECEIPT *" and does not count in the totals.
If you work in Germany, Austria, Belgium or France, their own rules for POS systems apply there. Jimani does not yet support those.
- Example
-
The Belastingdienst asks for the POS data for 2026. The owner chooses the period under Day closing and downloads the XAA audit file.
- Related
-
What is on the receipt?, How does the day closing work?
Keywords: POS Belastingdienst, reliable checkout system, audit file POS, xaa, cash register journal, fiscal POS
Related questions - Is Jimani an approved POS system for the Belastingdienst?
- Can I change or delete a receipt afterwards in the POS?
- Does my POS comply with the POS law?
- How do I correct a wrongly paid receipt?
- Is everything I ring up kept for the accounting and inspection?
What is on the receipt?
- Answer
-
Every customer receipt shows the name, address, VAT number and Chamber of Commerce number of your business, the receipt number, the date and time, the employee number and the VAT per rate. Receipt number and date cannot be turned off.
- Explanation
-
- Header: name, address, VAT number and Chamber of Commerce number of the business, from your company details.
- Lines: the products with quantity and amount.
- VAT: per rate the VAT amount. This also applies to the receipt of a reservation.
- Footer: receipt number, date and time (your business's clock) and the employee number ("Employee: M" with a number).
- Practice receipt: in practice mode "* PRACTICE RECEIPT *" appears above the receipt and "* PRACTICE RECEIPT - not a valid receipt *" below it.
If your VAT number is empty, or consists only of punctuation, it counts as not filled in and you see an orange notification in Help. Fill it in under your company details.
- Example
-
Receipt 1042 of 14-10-2026 at 12:31, employee M5381, with 9% VAT €1.49 and 21% VAT €0.87.
- Related
-
Does the Jimani POS meet the requirements of the Belastingdienst (Dutch Tax Authority)?
Keywords: receipt requirements, what must be on a receipt, VAT on receipt, receipt number, hospitality receipt
Related questions - What details are on a Jimani receipt?
- Are my VAT number and Chamber of Commerce number on the receipt?
- What is at the bottom of the receipt?
- Which VAT amounts are shown on the receipt?
- Where does the employee number on the receipt come from?
How does the day closing and counting the cash work?
- Answer
-
At the day closing Jimani creates the Z receipt with the revenue per VAT rate, per payment method and the credit notes. If "The cash is counted" is on, you then count the coins and notes at the POS and Jimani books the difference. An interim status without closing is the X report.
- Explanation
-
- Z receipt. Each day closing has a sequence number per point of sale. A new Z always starts where the previous one ended. The amounts come from the cash register journal.
- X report. The example PDF of the day closing is the interim status. Opening goes into the journal.
- Counting cash. Turn on "The cash is counted" under Settings > Money and figures > Accounting link, tab Cash differences (off by default). That screen exists only with the Accounting link add-on (€15 per month, excl. VAT). If it is off, the Count the cash screen says so and points to Settings > Add-ons. After closing, the POS shows a counter for all euro coins and notes with the difference alongside. Jimani books the difference to the Cash difference account. Per day there is one count per cash drawer. The overview is under Settings > Money and figures > Accounting link > Cash differences.
- Expected in the drawer. Starting balance + cash received + deposits - withdrawals.
- Fixed change. With "Fixed change in the drawer" (cogwheel on the Day closing page) the counter tells you how much to take out, for example "leave €150". Jimani books that skimming as a withdrawal.
- Own consumption appears separately on the Z receipt and does not count as revenue.
- Example
-
Expected is €412.50. You count €410.00. Jimani books €2.50 cash difference.
- Related
-
How do I book money in or out of the cash drawer?, Does the Jimani POS meet the requirements of the Belastingdienst (Dutch Tax Authority)?
Keywords: day closing POS, z receipt, x report, cash difference, count cash, change
Related questions - How do I close the POS at the end of the day?
- What is a Z receipt and what is an X report?
- How do I count my POS and what if there is a difference?
- Can I view the revenue in between without closing?
- How do I turn on cash counting at the day closing?
How do I book money in or out of the cash drawer?
- Answer
-
At the POS you choose Other > Cash. There you choose Deposit or Withdrawal, enter the amount and, for a withdrawal, the reason. After that the drawer opens. A deposit or withdrawal does not count as revenue, but does appear in the cash register journal.
- Explanation
-
- Cash window. You see today's starting balance (adjustable), the choice Deposit or Withdrawal, an amount field with quick amounts and a print slip Yes or No (default No).
- Reasons for a withdrawal: Deposit to bank, Purchasing/supplier, Tip paid out, or Other with your own text.
- Permission. By default the Owner and Manager roles may do this. If an employee does not have the permission, someone with the permission can enter their PIN code. The permission is called "Deposit/withdraw cash" under User rights (block Till and orders).
- Fixed change. At the cogwheel on the Day closing page, set "Fixed change in the drawer" to Yes and enter the amount. The first time the drawer is opened after a day closing, the POS then records the starting balance itself.
- Day closing. Expected in the drawer is starting balance + cash + deposits - withdrawals.
- Example
-
You take €200 out of the drawer to bring to the bank. Choose Cash > Withdrawal, €200, Deposit to bank. At the day closing the POS expects €200 less.
- Related
-
How does the day closing and counting the cash work?
Keywords: deposit cash, money out of POS, cash withdrawal, POS change, deposit to bank, cash drawer
Related questions - How do I take money out of the cash drawer without selling?
- How do I book a cash deposit or cash withdrawal?
- How do I empty the cash drawer to deposit it at the bank?
- How do I book tips paid out or money for purchasing from the cash?
- How do I adjust the POS's starting balance?
How do I book own consumption, staff consumption or shrinkage?
- Answer
-
Turn on the free Own consumption feature. At the POS the payment window then shows the Own consumption button. You choose the type (own use, staff, on the house or shrinkage) and optionally a reason. The receipt goes to €0: no revenue, no VAT, but less stock.
- Explanation
-
- Turning on. Settings > Add-ons > Own consumption (category Stock and purchasing). Free.
- Booking. Ring up the products and choose Own consumption in the payment window (under On account). This works on the web POS, the POS app and the handheld.
- Not possible with a return, a repair, Miscellaneous or a table with earlier rounds.
- Permission. The role permission "Record own consumption". It is on by default for Owner, Manager and roles with the POS permission; you can turn it off per role.
- Where you see it. The Z receipt shows own consumption separately per type, outside revenue, VAT and payment methods. The financial overview shows a block per type. In the webshop's financial overview, the Own consumption button opens an overview per type per month, with Excel and PDF. The journal contains the sales value and the cost price (purchase price × quantity), if you have entered purchase prices.
- Example
-
An employee drinks two coffees. Book them as Own consumption > Staff. The receipt is €0 and the coffee is deducted from stock.
- Related
-
How does the day closing and counting the cash work?
Keywords: own consumption POS, staff consumption, on the house, shrinkage, book breakage
Related questions - How do I book a coffee for staff without it counting as revenue?
- How do I register breakage or shrinkage in the POS?
- How do I book something on the house?
- Can I charge staff consumption at the POS for 0 euros?
- How do I take products out of stock without a sale?
How do I take out or cancel a card payment subscription?
- Answer
-
In the Mollie window, in the Card payments block, under Card payments: with or without a subscription. Choose Take out a subscription to start, Don't renew to cancel and Continue anyway if you want to undo the cancellation. The card payment subscription costs €20 per month per card terminal (a Tap to Pay terminal counts too, at least one), plus €0.06 + 0.2% per transaction (excl. VAT); see What do card payments cost with Jimani?.
- Explanation
-
- Step 1. Open the Mollie window: Settings > Money and figures, and type "Mollie" in Search for a setting… (or choose Payments (Mollie) if you are not connected yet). The Card payments block only appears once Mollie is connected and the permissions have been approved.
- Step 2. Under Card payments: with or without a subscription read how you currently take card payments. Without a subscription it says "You currently take card payments without a subscription: no fixed costs, but a higher rate per card payment."
- Step 3. Choose Take out a subscription.
- If you already pay Jimani monthly via automatic direct debit, the subscription starts immediately and is included in your monthly payment: "Your card payment subscription starts and is included in your monthly payment."
- Otherwise you receive an invoice for 12 months in advance: "The invoice is ready; you can pay it right away with the link in the email. As soon as it is paid, your subscription starts."
- Per card terminal. The amount is €20 times the number of linked card terminals. Under Card payments: with or without a subscription you see how many devices you have now and what that comes to per month. If you link a device or unlink one, the amount of the next monthly payment or renewal adjusts.
- Renewing. A 12-month subscription: thirty days before the end, Jimani sends the invoice for the next period.
- Cancelling. Choose Don't renew. Your subscription continues until the end of the paid period (for a monthly subscription until the end of this month). After that the rates without a subscription apply.
- Continue anyway. As long as the period is still running, Continue anyway undoes the cancellation: "Your subscription simply continues."
- Calculator. In Everything about payments, tab Payment methods, "Which Mollie card payment plan suits you best?" uses your card revenue of the last months to work out which plan is cheaper for you.
- Example
-
You already pay Jimani monthly via direct debit. You choose Take out a subscription; the card payment subscription is included in your monthly payment from today. In March you choose Don't renew: it then still runs until 1 April.
- Related
-
What do card payments cost with Jimani?, What can you set in the Mollie window?
Keywords: card payment subscription, cancel card subscription, mollie subscription, lower card rate, don't renew, take out subscription card payments
Related questions - How do I cancel my card payment subscription?
- Where do I take out a subscription for the card terminal?
- I cancelled by accident, can I undo that?
- What does a card payment subscription cost per month?
Can I connect Jimani to my accounting package?
- Answer
-
Yes. With the accounting link (€15 per month, excl. VAT), Jimani sends every day close as a journal entry to Exact Online, Twinfield, SnelStart or Odoo. We do not connect other packages; in that case you export your figures from Reports to Excel or pdf.
- Explanation
-
- Step 1. Turn on the add-on Accounting link under Settings > Add-ons. After that, Accounting appears under Settings > Money and figures, under Administration and costs.
- Step 2. Open the Administration tab. Under Package choose your accounting package. "Only the packages we can connect with today are in the list."
- Step 3. Fill in Server address (the web address where you log in to the package yourself), Administration (for Odoo the name of the database), Key and Journal (the journal in which the day close lands). The key is stored encrypted and cannot be read back afterwards.
- Step 4. Turn on The link is switched on and choose Save link. Then choose Test connection: this test uses what you have saved. If it works, you see your journals and VAT codes, and Jimani fills the drop-down lists of the chart of accounts with the accounts from your package.
- Step 5. Fill in the Chart of accounts: which general ledger account belongs to each VAT rate (Revenue accounts, VAT payable), each payment method (Cash and bank accounts) and the rest (Other). Choose Save scheme. "The chart of accounts has not been filled in yet. Until then nothing can go to the accounting package."
- When it goes out. Every night at 06:00 all day closes that are still open go to the package. Each day close goes once. In the Sent tab you see per day whether it worked; with Send everything outstanding now or Send now you do it right away.
- Cash differences. If The cash is counted is on, a counter appears after the day close and the difference goes along in the journal entry. A business without a cash drawer turns this off.
- Export without a link. In Settings > Money and figures > Reports every report has the buttons Export (Excel, one tab per section) and Print (pdf), with the filters you have chosen. You export the Foreign VAT report (OSS) as CSV.
- Example
-
Your accountant works in Exact Online. You turn on the accounting link, connect Exact, choose the accounts for 21%, 9%, card and cash and save the scheme. From the next morning every closed day appears as a journal entry in Exact.
- Related
-
How does the Accounting screen work?, Which features cost money?, How does Financial reporting work?
Keywords: accounting link, connect exact online, twinfield integration, snelstart integration, odoo integration, export revenue, journal entry day close
Related questions - Can I connect the POS to Exact Online or SnelStart?
- Does Jimani work with Twinfield or Odoo?
- How do I get my revenue into my accounting?
- What does the accounting link cost?
- My accounting package is not supported, how do I still get my figures out?
How do I order a POS, printer or card terminal from Jimani?
- Answer
-
In the Jimani webshop POS and hardware: POS screens, printers, card terminals and other hardware, also as a set. You open it via Settings > Add-ons > Buy hardware in the Jimani webshop, or via the tile View our hardware under Registers and hardware. You choose Add, then Checkout, and pay via Mollie.
- Explanation
-
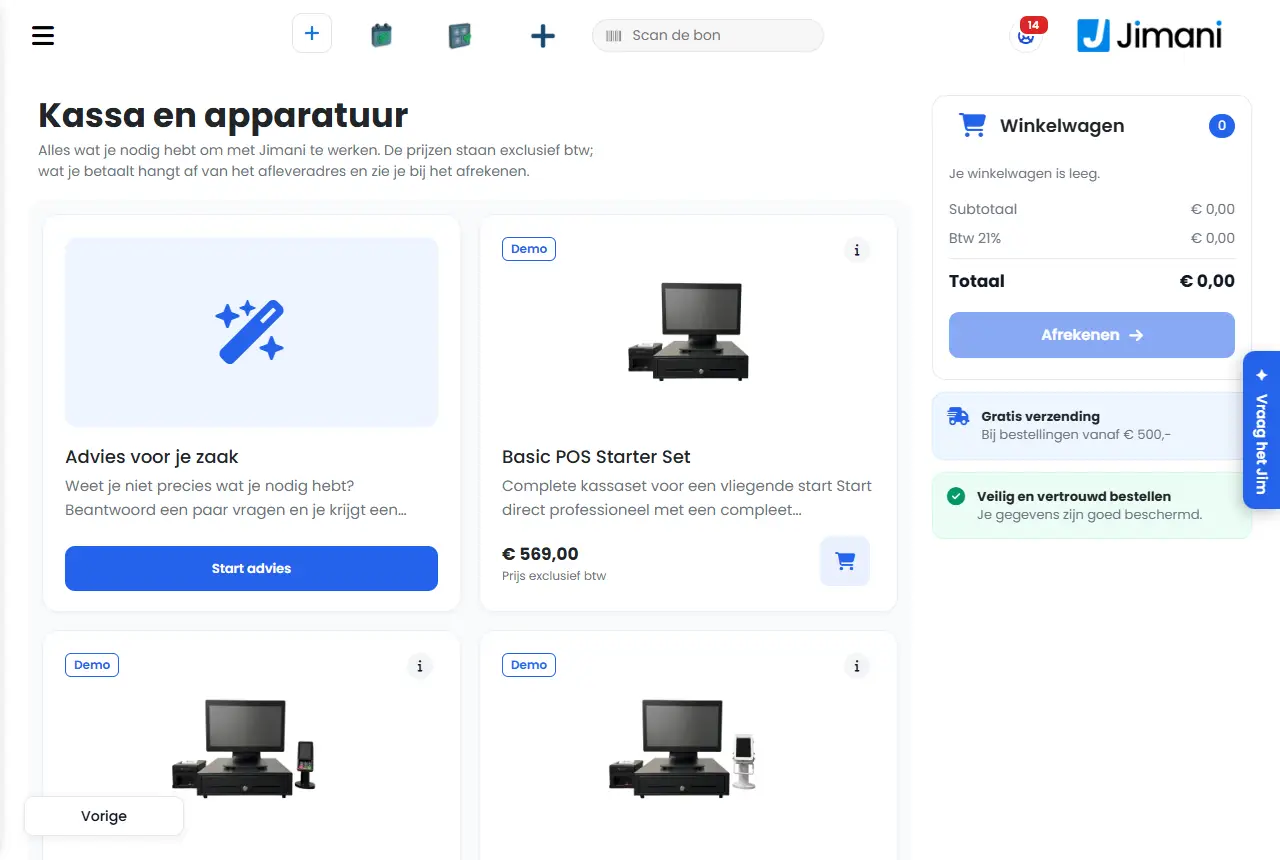
- Step 1. Open the webshop. "Everything you need to work with Jimani. Prices are excluding VAT; what you pay depends on the delivery address and is shown at checkout." You also find it by typing "Jimani webshop" in Search for a setting….
- Step 2. If you are unsure what you need, choose Start advice: you answer a few questions and get tailored advice. Some devices have Demo: try the device with your own products.
- Step 3. Click an item for the Description and, if there is one, the Manual. You see whether it is In stock ("Order before 16:00, delivered tomorrow") or On order.
- Step 4. Choose Add or, in the item, the Quantity and Add to cart. The cart shows the subtotal, the VAT and the total.
- Step 5. Choose Checkout, enter your details and the delivery address and choose Place order. You pay via Mollie. VAT and shipping costs follow the delivery address; from a certain amount shipping is free.
- After the order. Under Settings > Till and products > Registers and hardware there is a tile per ordered device with Waiting for payment or Ordered. Once it has been delivered, you connect it there. Jimani sets a card terminal up on your own Mollie account; for that Mollie must be connected.
- Your invoice is then under Settings > Money and figures > Invoicing and costs.
- Ordering via Jimani. If you order in a conversation with Jimani, you receive a payment request by email and complete your details online.
- Example
-
You open a second location. You choose Start advice, get a POS screen, receipt printer and card terminal suggested, put them in the cart and choose Checkout. After paying, the three devices appear as Ordered under Registers and hardware.
- Related
-
How does checkout in the Jimani webshop work?, What do card payments cost with Jimani?, I received a payment request from Jimani: how does that work?
Keywords: order pos, hardware jimani, buy receipt printer, order card terminal, buy pos screen, jimani webshop, buy hardware
Related questions - Where can I buy a POS, printer or card terminal?
- Does Jimani also sell hardware as a set?
- How do I order a POS screen or receipt printer?
- How do I pay for hardware that I order from Jimani?
Does the till still work if the internet goes down?
- Answer
-
Yes. The till keeps working with the data stored on the device. You settle with Cash, Pay other or Pin (external); the receipt gets a number from this till, the customer receipt and the kitchen ticket come out of the printer and the drawer opens. As soon as the internet is back, the till sends the receipts by itself. Card payments on the Mollie payment terminal, Tap to Pay, a gift card or credit and saving tables only work again with internet.
- Explanation
-
- Step 1. You see the bar. If the connection drops, the bottom of the screen says "No connection. The till keeps working with the latest data on this device." The till checks every ten seconds whether the server is there and only switches to offline after three missed checks (about half a minute). A short hiccup therefore does not put the till offline straight away.
- Step 2. Settling. Tap Cash or Pay other as usual. With Pay other you arrange the payment yourself, for example on a separate card terminal. After settling you see "No connection. The receipt is ready and will be sent as soon as the internet is back."
- Step 3. The Pin button. If a Mollie payment terminal is connected to the till, the till cannot control it without internet. The till first checks once more whether the server is there after all. If it is not, the Pin button books as Pay other and you see "Booked as Pay other. Enter the amount yourself on the payment terminal." If no payment terminal is connected to the till, the Pin button books as it always does as Pin (external).
- Step 4. Receipts. In the Jimani app the customer receipt, the kitchen ticket and opening the drawer go directly through the app, even without internet. A receipt gets a number from its own series of this till, so two tills that settle at the same time without internet never give the same receipt number.
- Step 5. Printing a receipt again. Tap Order overview (without kitchen work the button is called Search order) in the bar at the top. Without internet a window Search order opens with today's receipts of this till. Search by receipt number, amount or time and tap Print again. A receipt that still has to go to the server has "(still to be sent)" next to it. You can also scan a receipt in the Scan the receipt box.
- Step 6. The drawer without a sale. Tapping twice on the logo at the top left opens the drawer, even without internet (in the Jimani app).
- Step 7. Settings. Without internet the cogwheel opens a small window with Connected printers, Print test receipt and Open cash drawer. Changing products and prices, users, language, payment settings and the day closing is only possible again with internet.
- Step 8. The internet is back. The bar disappears and you see the window "You're back online": the till forwards the receipts and checks whether there are changes. If it takes long, you can tap Use the till now. Every receipt has its own identifier: if the same receipt arrives twice, the server books it only once.
| Possible without internet | Only possible again with internet |
|---|
| Cash, Pay other and Pin (external) | Card payments on the Mollie payment terminal and Tap to Pay |
| Customer receipt, kitchen ticket and drawer (in the Jimani app) | Gift card, credit and paying with tokens |
| Searching and reprinting today's receipts of this till | Opening tables, Save to a table, transferring items |
| Opening the drawer via the logo | Looking up a bill, return and credit note |
| Viewing printers and printing a test receipt | Booking money in or out of the cash (Cash) |
- What you see at a button that doesn't work: "This is not possible without internet. Paying in cash is." At Cash you see "Without internet no money can be booked in or out of the cash."
- The receipt numbers have run out. The till tops up its series of receipt numbers as long as there is internet. If they have run out anyway, you see "The receipt numbers of this device have run out. Look for a connection before you continue settling." The receipt then stays on the screen and has not been settled.
- Receipts that remain. If the internet is back but there are still receipts, you see a red bar at the bottom "Receipts are still waiting to be sent." with the number. The till tries again every thirty seconds. If it fails after three attempts, it says "The server is not accepting a receipt. The receipt is not lost: it is on this till and will be retried. If this message stays, call Jimani." Such a receipt only counts towards revenue once it is at the server.
- Logging in and out. Without internet the till does not log anyone out by itself, and the payment terminal cannot check a PIN: you see "No internet. Logging in works again as soon as there is a connection."
- Online once first. The till only stores the products and prices on the device once it has been online. A new till therefore only works without internet after it has had a connection once. If you tap a product group, the till first asks the server and after four seconds without an answer takes the copy on the device.
- A power cut is not covered by this: without power the device itself does not work.
- Example
-
During a wifi outage you settle with a guest in Cash. The receipt comes out of the printer, the drawer opens and the receipt waits on the till. After ten minutes the internet is back: you see "You're back online" and the receipt is then simply included in today's revenue.
- Related
-
What happens if a card payment fails or is cancelled?, How do I settle with my own separate card terminal?, Which receipts and payment methods does the Jimani POS support?
Keywords: till offline, internet down till, till without internet, wifi outage till, card payment without internet, print receipt offline, internet outage
Related questions - What happens if my wifi or internet goes down while settling?
- Can I take card payments offline?
- Can I print receipts and open the cash drawer without internet?
- What happens to receipts I made offline?
- Can I use a gift card offline?
How do I settle with my own separate card terminal?
- Answer
-
Just tap Pin. If no Mollie payment terminal and no Tap to Pay is connected to the till, the Pin button books the receipt as Pin (external): paid with a separate card terminal outside Jimani. You enter the amount yourself on your own card terminal; the receipt is immediately marked as paid and counts as card payment in the reports.
- Explanation
-
- Step 1. Ring up the order and tap Pin (or tap Payment and then Pin in the Select payment method window).
- Step 2. Enter the same amount on your own card terminal and let the customer pay.
- Step 3. The till asks nothing more: there is no waiting window and no payment terminal reporting anything back. The receipt is completed and, if the till does that, printed.
- In the figures. Pin (external) counts as card payment on the Z report, the X report, the cash count and in the cash journal. Previously the Pin button without a payment terminal booked as Pay other; as a result the card revenue was under Other.
- For everyone. There is no setting: every till without a Mollie payment terminal or Tap does this. A till with a Mollie payment terminal or Tap simply sends the amount to that device.
- Without internet. Pin (external) also works if the till has no internet. If a Mollie payment terminal is connected to the till and the internet is down, the Pin button books as Pay other (see the article about the till without internet).
- Paying part by card. If you settle part of the receipt by card on a till without a payment terminal, that part is also booked as Pin (external).
- Turning Pin off. If you don't want the Pin button on a till at all, set Pin to No under Payment methods on this till (Settings > Till and products > Registers and hardware, open the till, page Till settings).
- Pay other continues to exist alongside it: with it you book a receipt that was paid outside Jimani. That revenue does not count as card payment in the reports.
- Example
-
A snack bar has its own card terminal from the bank and no Mollie payment terminal. A customer pays € 12.50: the employee taps Pin, enters € 12.50 on the card terminal, and in the day closing the € 12.50 appears under card payments.
- Related
-
What do card payments cost with Jimani?, Does the till still work if the internet goes down?, Which receipts and payment methods does the Jimani POS support?
Keywords: separate card terminal, own card terminal till, pin external, card payment without mollie, card payment outside jimani, card revenue day closing
Related questions - Can I use the till with my own card terminal from the bank?
- What is Pin (external) on the till?
- How do I book a card payment if I enter the amount myself on a separate card terminal?
- Does a payment on my own card terminal count in the reports?
What happens if a card payment fails or is cancelled?
- Answer
-
Then nothing has been booked and the receipt is open again, with a message. A receipt on a table stays on the table with the same lines; a loose receipt without a table goes back so you can settle it again without double revenue. Then settle again with Pin or with another payment method.
- Explanation
-
- Step 1. The amount goes to the payment terminal. After Pin you see "Payment sent to the payment terminal" and "Waiting for payment on the payment terminal." The till waits until the payment terminal reports back.
- Step 2. Cancelling. You cancel on the payment terminal itself: "Cancel? Press the red stop button on the payment terminal." From the till a card payment on a Mollie payment terminal cannot be cancelled.
- Step 3. Cancelled, failed or expired. If Mollie reports that, you see "The card payment was cancelled. The receipt is still open; settle again." (or failed, or expired). If the Pin button is on the screen, you immediately choose Retry card payment or Close; otherwise you settle again however you like.
- Step 4. No answer after three minutes. Then the till stops waiting: "The payment terminal still gives no answer after three minutes. Check on the payment terminal whether the payment succeeded before you settle again." So first check on the payment terminal whether the amount went through.
- The amount did not arrive on the payment terminal. If Mollie returned no payment number, nothing is on the payment terminal and you see "The payment terminal did not receive the amount: Mollie returned no payment number. Nothing has been charged; try again or choose another payment method." The receipt goes back and the stock is added back.
- No payment terminal connected. Then you see "No payment terminal is connected to this till. Nothing has been charged; choose another payment method." Connect the payment terminal under Connected payment terminal of the till (Settings > Till and products > Registers and hardware).
- Tap to Pay. If a payment with Tap to Pay fails, you see "Tap to Pay did not succeed, choose a payment method again." With Cancel under the customer screen Jimani cancels the payment at Mollie: "Payment cancelled. The receipt is still open." If Mollie does not allow that, you see "Mollie does not allow this payment to be cancelled; it expires by itself. The receipt is still open."
- Done. After the payment the till completes the receipt and prints it (if the till prints a receipt). If a customer receipt does not come out of the printer, the till keeps trying for another half hour by itself. After that it appears under Other at Unprinted receipts, with the number behind it.
- The till froze while ringing up. If the till screen restarted before you had saved or settled, the till restores the order: "There was still an order that had not been saved. It has been restored." Lines that were already in a saved order are not added again. That works for the same employee, up to twelve hours later.
- Example
-
A guest presses stop on the payment terminal. The till reports "The card payment was cancelled. The receipt is still open; settle again." The receipt is still on table 4; the guest then pays in cash.
- Related
-
Does the till still work if the internet goes down?, How does Tap to Pay work on a handheld or tablet?, How does the payment window of the till work?
Keywords: card payment failed, card payment cancelled, payment terminal no amount, payment cancelled till, receipt still open, card receipt not printed
Related questions - What if the card payment doesn't work, is the receipt paid anyway?
- Is the revenue booked twice if I have to pay by card again?
- What happens to the table if the card payment is cancelled?
- The customer cancelled the card payment, what now?
How does Tap to Pay work on a handheld or tablet?
- Answer
-
With Tap to Pay the customer taps a card or phone against your handheld or Android tablet, via the Mollie Tap app. You turn on the Tap to Pay integration (€5 per month, excl. VAT, for an unlimited number of devices), connect the Tap with the Connect Tap to Pay button under Registers and hardware, and turn on Tap to Pay on the device. It does not work on a fixed till screen.
- Explanation
-
- Step 1. Mollie. Your business must be connected to Mollie. Without Mollie you see when connecting "This store is not connected to Mollie yet. Connect Mollie first; then the Tap can be added."
- Step 2. The integration. Turn on Tap to Pay under Settings > Add-ons.
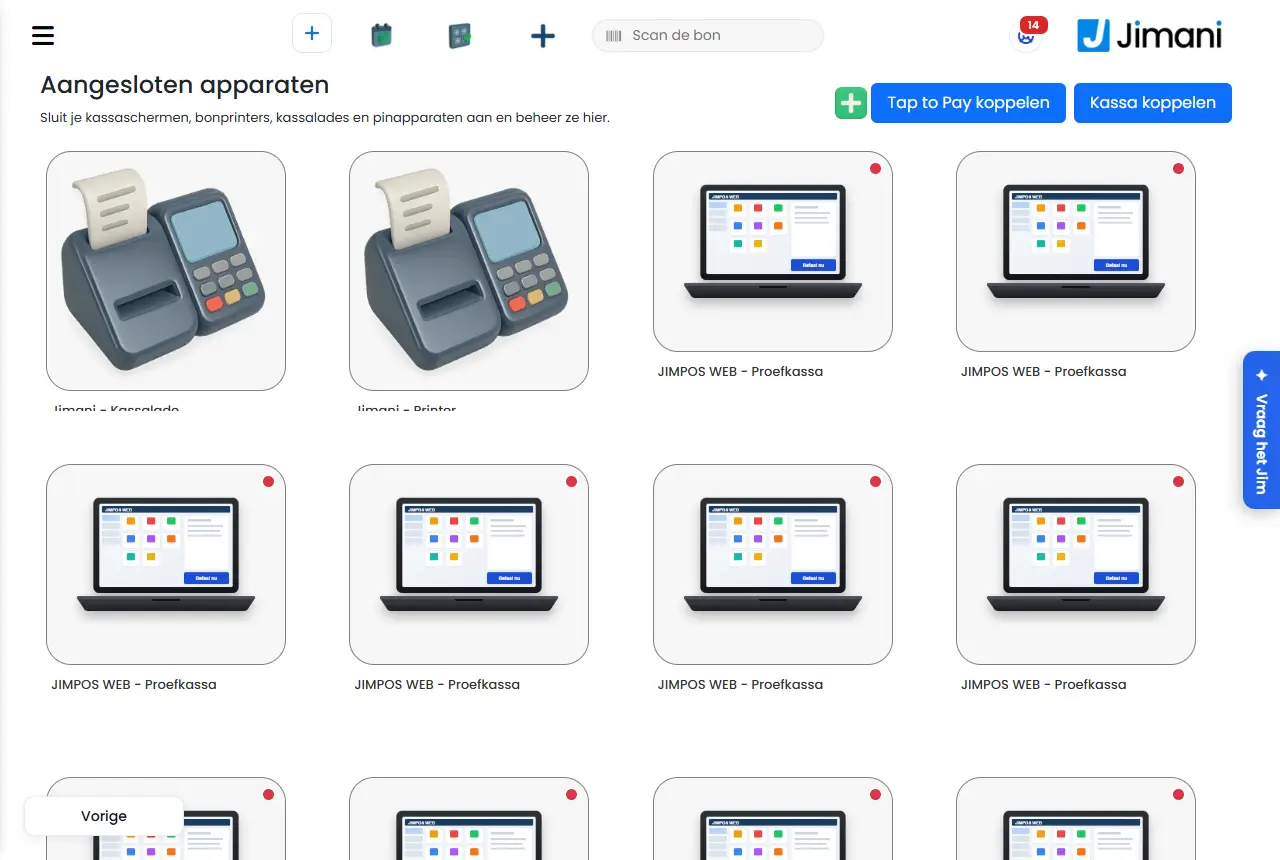
- Step 3. Connecting the Tap. Go to Settings > Till and products > Registers and hardware and tap Connect Tap to Pay. You get a QR code and a code with "Valid until". Scan the QR code with the Mollie Tap app on the device, or type the code in there. The Tap then appears automatically under POS & Hardware.
- Step 4. The device. Open the device under Registers and hardware. For a handheld or phone you set Tap to Pay active to Yes ("If this is set to yes, you settle by tapping a card or phone against this device."). If there are several Taps, you choose the Tap of this device under Tap to Pay terminal. For a tablet as a till you choose the Tap of this tablet under Tap to Pay (or Off).
- Step 5. Settling. If only a Tap is connected to the device, the Pin button is called Tap to Pay. If both a payment terminal and a Tap are connected, the till first asks at Pin "How does the customer want to pay by card?" with Tap to Pay or Payment terminal.
- Step 6. The customer screen. You see the logo of the business, the amount and the Tap to Pay sign. With Rotate you turn the screen upside down, so that the customer can read it when you turn the device around. If the integration Keep track of tips is on, the customer first chooses No tip, 5%, 10% or 15%, Round to a round amount or Other amount. Then the Mollie Tap app opens with the amount; after the payment you automatically return to Jimani.
- Cancel. With Cancel under the customer screen Jimani cancels the payment and the receipt is open again.
- No amount in Mollie Tap? Then the device is connected to a different Tap. The till says so too: choose at the device the Tap that Mollie Tap shows under Settings, cancel the payment and settle again.
- Not possible. Tap to Pay does not work on our own till screen (it has no suitable NFC chip), not without internet, and not for part of the receipt: "Tap to Pay is not possible for part of the receipt. Choose another payment method for this part."
- Turning it off per till. Under Payment methods on this till there is a separate Tap to Pay row as soon as Tap to Pay is on for the device.
- Cost per payment. In addition you pay the Mollie rate per transaction, as with card payments.
- Example
-
A terrace employee settles €23.40 with the handheld. She taps Tap to Pay, turns the device around, the guest chooses a 10% tip and taps their phone against the handheld. Mollie Tap reports paid and the handheld is back on the till.
- Related
-
What do card payments cost with Jimani?, What happens if a card payment fails or is cancelled?, How do I order and settle with a handheld or phone?
Keywords: tap to pay, mollie tap, card payment with phone, contactless handheld, tap and pay, tablet card payment
Related questions - Can I accept card payments with my phone without a card terminal?
- How do I let customers pay contactless on my tablet?
- What does Tap to Pay cost?
- Does Tap to Pay work on a fixed till screen?
How do I take back an item or credit a paid receipt at the till?
- Answer
-
Look up the receipt with Look up a bill (under Other) or scan it in the Scan the receipt box, tap Credit and tap the lines that are coming back. They appear on the receipt with a minus quantity. Then settle: you give the money back with Cash, Pay other, Refund to card or as a Gift voucher. Crediting is only possible with the Refund integration (free).
- Explanation
-
- Step 1. Looking up the receipt. Tap Other > Look up a bill. The last receipt of this till then appears in the receipt box, with receipt number, date, amount and Paid or Outstanding. With the arrows you page further back. If you have the receipt on paper, scan the barcode in the Scan the receipt box at the top.
- Step 2. Crediting. For a paid receipt the buttons under the receipt box are Receipt details (the i sign), Print receipt, Credit and, for an open receipt, Delete and Pay. Tap Credit: the receipt opens and the trash is on.
- Step 3. Choosing the lines. Tap every line that is coming back. If there are more of them, the till asks how many. The line is added with a minus quantity, never more than was on the receipt.
- Step 4. The reason. If the Reason box is under the receipt, choose Ordered incorrectly, Incorrect order, Complaint about the article, Something is missing or Other; for Other you fill in Other reason. Without a reason you see "Select a reason for refund". If there was a discount or tip on the receipt, those amounts are shown too and you can adjust them.
- Taking back miscellaneous items. You don't take back a miscellaneous item with the trash: "You take back a Miscellaneous line with Miscellaneous and a minus amount."
- Step 5. Giving back. Tap Pay (or Cash or Pin). In the window you choose how the money goes back: Cash, Pay other, Refund to card (only for a receipt paid via Mollie) or Gift voucher (only with the Gift voucher integration). On account and the payment terminal cannot be used for money back; if you tap the Pin button, the till books it as Pay other. A return that comes to zero books itself. Reservations: a reservation paid online is refunded under Refunds overview, not at the till.
- Step 6. The credit note. The till prints a credit note, just like with a normal sale.
- Exchanging. If you ring up new products next to the return lines, the till settles the difference.
- An open receipt or a table. On a receipt that has not been paid yet, you remove lines with the trash; that is not a credit. In Look up a bill the button is then called Delete.
- Permissions. If Returns and refunds is set to No under Permissions on this till, the till asks for the PIN of someone who is allowed. Refund to card additionally requires the permission Refund via Mollie.
- Without the integration. Then the trash is grey on a paid receipt and you see "You need the Refunds integration for this option." Turn on Refund under Settings > Your business > Add-ons.
- Without internet return and credit note are not possible; that works again as soon as there is a connection.
- Example
-
A customer brings back a lamp of €39.95 bought by mistake. You look up the receipt with Look up a bill, tap Credit and the lamp, choose the reason Ordered incorrectly and give the money back in cash. The drawer opens and the credit note comes out of the printer.
- Related
-
How do I refund a return to the customer's bank card?, How does the till screen work in Jimani?, What can you set per till under Payment methods, Permissions, Auto-lock and Table name required?
Keywords: return till, credit receipt, money back till, credit note, take back product, refund at the till, exchange
Related questions - How do I take back an item?
- How do I give a customer their money back?
- How do I make a credit note?
- Can I reverse a paid receipt?
How do I refund a return to the customer's bank card?
- Answer
-
Choose Refund to card when giving back. The money then goes back via Mollie to the card or account the customer paid with. That is possible for a receipt paid via Mollie (card payment, Tap to Pay or online), up to 120 days after the payment and up to the amount that can still be refunded. You need the permission Refund via Mollie.
- Explanation
-
- Step 1. Look up the receipt with Other > Look up a bill or scan it at Scan the receipt, tap Credit and tap the lines that are coming back (see the article about returns and crediting).
- Step 2. Tap Pay. In the window, under money back, is the button Refund to card, with below it "Via Mollie back to the customer's card or account" and the maximum.
- Step 3. Tap Refund to card. The till asks "€ ... goes via Mollie back to the customer's card. Continue?" Choose Refund. The server calculates the amount itself, per line with supplements and discount, plus proportionally the tip and the receipt discount.
- Step 4. Only when Mollie says yes does the till book the return and the credit note comes out of the printer. The return is then recorded as card payment in the books, on the till where you do it.
- Can less be refunded than you want? Then it says "Another € ... can be refunded to the card. Pay back the rest in cash." The button is then grey; give the money back with Cash.
- Tapping twice does no harm. Every attempt has its own key. If the till gets no answer, you see "The till got no answer. Tap Refund to card again: it will not be refunded twice."
- Who is allowed. The permission Refund via Mollie is under Settings > Your business > Users and permissions, tab User permissions. By default it is on for Owner and Manager; the owner is always allowed. In addition the Refund integration must be on, and Pin must be on under Payment methods on this till.
- The status on the receipt. On the receipt you see how it stands: Being processed by Mollie, Refunded to the card, Card refund cancelled, or "Card refund failed, pay back in cash". If a refund still fails later at Mollie, Jimani rebooks that part in the journal from card payment to cash; give the money back in cash then.
| Message | What does it mean | What do you do |
|---|
| This receipt was not paid via Mollie, so it cannot be refunded to the card. | The receipt was paid in cash, with Pay other or with Pin (external). | Give the money back with Cash or Pay other. |
| This payment is older than 120 days. Mollie can no longer refund it. | Mollie refunds up to 120 days back. | Pay back in cash. |
| There is too little balance on your Mollie account to refund this now. | Mollie does not have the money for it right now. | Pay back in cash, or first add funds to Mollie. |
| Mollie did not make the refund. Pay back in cash. | Mollie refused. Nothing has been booked. | Pay back in cash. |
| You don't have permission to refund via Mollie. Ask the owner (Settings > Roles). | Your role does not have the permission Refund via Mollie. | Ask the owner to turn on the permission under Users and permissions > User permissions. |
| Refunds are turned off for this store. | The Refund integration is off. | Turn it on under Settings > Add-ons. |
| Your Mollie account is not connected. Pay back in cash. | There is no Mollie connection. | Pay back in cash; connect Mollie under Settings > Money and figures > Payments (Mollie). |
- Example
-
A customer paid €60 by card last week and brings back an item of €25. You credit the item, choose Refund to card and confirm €25. Mollie puts the €25 back on their card and the credit note comes out of the printer.
- Related
-
How do I take back an item or credit a paid receipt at the till?, What do card payments cost with Jimani?
Keywords: refund to card, return card payment, money back on bank card, mollie refund till, refund card, refund
Related questions - How do I put money back on the customer's card?
- How long after the payment can I still refund?
- Which permissions do I need to refund via Mollie?
- Can I refund a cash receipt to the card?
How do I add a tip for cash or card payments?
- Answer
-
Turn on the Keep track of tips integration (free). Then the payment window for Cash, Pay other and Pin shows the Tips block with 5%, 10%, 15% and Manual. With card payments the amount and the tip go in one go to the payment terminal. The tip is booked separately: no revenue and no VAT.
- Explanation
-
- Step 1. Turn on Keep track of tips under Settings > Add-ons.
- Step 2. Settle with Cash or Pay other. In the payment window you choose under Tips 5%, 10% or 15% (the amount is shown under each percentage) or Manual for your own amount. Under the block it says "Tip is added to the total amount" and Total incl. tip.
- Step 3. With Pin you get the same window with Tips on, with only the tip block. Amount plus tip go together to the payment terminal.
- Tip on the payment terminal itself. If the customer gives a tip on the payment terminal, the payment comes in higher than the receipt asked for. Jimani also books that difference as a tip, not as revenue.
- Tap to Pay. There the customer chooses the tip on the customer screen: No tip, 5%, 10%, 15%, Round to a round amount or Other amount.
- A table that has already been booked. If the table is already in the cash journal (after Save or on account), the tip goes on a separate tip receipt: without items, only the tip, paid with the same payment method.
- Not for money back. With a return there is no tip block. If there was a tip on the receipt you credit, you see it at the return and can adjust it.
- Paying out tips to staff. If you take tips from the drawer, book that with Other > Cash > Withdrawal and the reason Tip paid out.
- Not in every free till. In the free till for shops and for treatments the tip block is not there.
- Example
-
A bill of €42 is paid by card with a 10% tip. In the window you choose 10% (€4.20); the payment terminal asks for €46.20. The revenue shows €42, the €4.20 is recorded as a tip.
- Related
-
How do I book money in or out of the cash drawer?, How does the payment window of the till work?, How does Tap to Pay work on a handheld or tablet?
Keywords: tip till, tip card payment, add tip, tip cash, book tip, tip not revenue
Related questions - Can a guest give a tip when paying by card?
- How do I turn on tips on the till?
- Does the tip count as revenue and VAT?
- Can I let people choose fixed tip percentages such as 5 or 10 percent?
Can a guest split the bill?
- Answer
-
Yes, in two ways. If someone wants to pay part, you enter a lower amount at Cash: that becomes a partial payment and you settle the rest afterwards, also with another payment method. If a guest only wants to pay their own lines of a table, you move those with Other > Split the bill to another table and settle that table separately.
- Explanation
-
- Partial payment. Settle with Cash and enter less at Cash (the amount received) than the Outstanding amount. After Pay Now you see "Partial payment registered. Pay the remaining amount to complete this order." The outstanding amount is shown under the receipt at Outstanding amount, next to Total paid. Settle the rest with Cash, Pin or another payment method. Only when everything is paid is the receipt done.
- During a partial payment you can no longer change anything on the receipt: no adding products, no removing anything. If you want to leave the page, the till asks "The payment of the order is still open. Are you sure you want to leave this page?" If you leave anyway, you settle the rest later from the order overview.
- Paying part by card. If part has already been paid, the outstanding part with Pin simply goes to the payment terminal. Tap to Pay is not possible for part of the receipt.
- Split the bill (per guest). Open the table. Choose Other > Split the bill. Next to the saved lines of the table there are then checkmarks and Quantity to transfer. Tick the guest's lines, choose the quantity and tap Transfer the selected items. In Choose Parking Table ("Choose the table the order should be booked to.") choose the table they are going to, for example a new table with the guest's name. You see "Lines moved". Then simply settle that table.
- When is Split the bill possible? Only with an opened table with saved lines: the button is under Other and is grey until the lines of the table have loaded. You need tables (Parking tables integration).
- Equal parts (the bill divided by four) are not calculated by the till; enter the amount per person yourself as a partial payment.
- Example
-
Table 7 has €84 outstanding. Two guests each pay €30 in cash: enter €30 twice as a partial payment. The last guest pays the remaining €24 by card, and then the receipt is completed.
- Related
-
How do I work with tables on the till?, How does the payment window of the till work?
Keywords: split bill, split payment, pay separately, partial payment, half cash half card, guests settle separately
Related questions - How do I split the bill at the table?
- Can guests pay separately?
- How do I let a guest pay only part of the bill?
- How do I move lines to another table to split?
How do I choose supplements or options for a product at the till?
- Answer
-
If a product has supplements, related products or is a set, tapping the tile opens the product window. There you tap the choices per group, set the quantity right and tap Add to cart. Since 15-10-2026 the choices are spread over multiple lines, so you no longer have to scroll sideways.
- Explanation
-
- Step 1. Tap the product. If it has no choices, it goes straight onto the receipt. If it does have choices, the product window opens with the name, the photo with the price and the groups with choices.
- Step 2. In each group tap the choice; a checkmark appears and the price of the supplement is shown below it. In a group where only one choice is allowed, a new tap replaces the previous one. A sold-out choice is grey and cannot be tapped.
- Step 3. For a product set you choose one product per Layer. If the product has sizes or kinds, you choose those under Product variants.
- Step 4. At the bottom set the quantity with minus and plus; next to it is the Total. Tap Add to cart.
- Mandatory choice. If a group is required and you have not chosen anything, you see "Required supplements" with "Type 1 supplement is required" (or 2 or 3). Choose one and tap Add to cart again. If no size has been chosen while that is required, the size boxes light up.
- Related products. Under the choices is Related products. Tap one to order it at the same time; the required groups also apply to that product.
- Allergies. If there are allergens for the product, you see them under Allergies.
- More lines at once. Press the tile for half a second: in the window "Quantity ..." you enter the quantity and choose OK. If the product has choices, the product window then opens with that quantity already filled in.
- On the receipt the supplements are shown under the product, with their price. On the handheld fewer choices fit next to each other than on the till; long names continue on a second line.
- Creating supplements is done at the product itself, not at the till. The Supplements integration is free.
- Example
-
A guest orders a burger. You tap Burger, choose Mayonnaise in the group Sauce and Cheese and Bacon in the group Extra, set the quantity to 2 and tap Add to cart. The receipt shows 2 Burger with the supplements below.
- Related
-
How does the till screen work in Jimani?
Keywords: supplements till, extra options product, choose sauce, product window, mandatory choice, toppings, product set
Related questions - How do I add options to a product at the till?
- Why does a window open when I tap a product?
- How do I set the quantity right in the product window?
- Do I still have to scroll sideways to see all choices?
How do I send dishes to the kitchen per course from the till?
- Answer
-
With the Courses integration (€10 per month, excl. VAT; free until 1 January 2027 if you already use it) every item on the receipt gets its course, such as starter or main course. The receipt is organised per course. With Other > Next course you call the next waiting course of the table to the kitchen. You move an item to another course by tapping it and choosing Change course.
- Explanation
-
- Step 1. Setting up. Turn on Courses under Settings > Add-ons. Create the courses and link them to your products under Settings > Till and products > Courses. The first course of a product is its default course.
- Step 2. Ringing up. Tap the products as usual. Every item gets its default course. On the receipt there is a heading per course in the colour of the course, with the number of items, for example "Starter · 5 items". Whatever has no course is at the top under Direct and goes straight to the kitchen.
- Step 3. Changing the course. Tap an item on the receipt (not in trash mode). In the Change course window you choose under Quantity how many of this item go to the other course (with One less and One more) and under Course the course. Direct means: immediately, without calling. You see "Course changed".
- Step 4. Saving. Save the order on the table. Then the following go to the kitchen: the first course of the table, every course that sends directly (for example drinks) and everything without a course. The following courses wait. An order without a table (at the counter, takeaway) never waits: everything goes straight through there.
- Step 5. Next course. When the table is ready for the next course, choose Other > Next course. Under the button it says which course that is. You see, for example, "Main course goes to the kitchen". If nothing is waiting any more, you see "No course is waiting".
- Saved lines. At the saved lines of the table the status is shown per course: Direct, Waiting, Called with the time, or In the kitchen. A saved item can only be moved to another course as long as it is still waiting; otherwise you see "This item is already in the kitchen." If you put a waiting item in a course that has already been called, it goes straight to the kitchen ("... goes to the kitchen now").
- Where. Next course is only under Other if a table is open. Courses also work on the handheld.
- Without the integration there are no courses on the receipt and the till stays as it was.
- Example
-
Table 3 orders two soups and two steaks. The soups are under Starter, the steaks under Main course. After Save the soups go to the kitchen. When the soup is finished, you choose Other > Next course and see "Main course goes to the kitchen".
- Related
-
Which features cost money?, How do I work with tables on the till?
Keywords: courses till, next course, starter main course, call course, courses kitchen, change course
Related questions - How do I call the main course to the kitchen?
- Can I send starter and main course to the kitchen separately?
- How do I move a dish to another course?
- What does the courses feature cost?
How do I use buzzers at the till?
- Answer
-
Turn on the Buzzers integration and set Buzzer at this till to Yes on the till screen. Then with every order you choose under Other > Add buzzer the number of the buzzer the guest takes along. That number appears at the top of the receipt and is shown with the order. Buzzers cost €10 per month per till screen with the buzzer on (excl. VAT).
- Explanation
-
- Step 1. Turn on Buzzers under Settings > Add-ons.
- Step 2. Go to Settings > Till and products > Registers and hardware, open the till and on the Till settings page set Buzzer at this till to Yes. It says there: "If this is set to yes, you enter a buzzer number for every order on this screen and that number appears at the top of the receipt."
- Step 3. Ring up the order and choose Other > Add buzzer. In the Buzzer number window there is already a suggestion: the previous number on this till plus one. Adjust it with minus and plus or type it in, and choose OK.
- Step 4. Settle. The buzzer number goes along with the order: at the top of the receipt and in the Buzzer column in the order overview.
- Both must be on. If only the integration is on, or only Buzzer at this till, Add buzzer is not under Other. A till that is not connected (for example the till in a normal browser without a connection) never has a buzzer.
- Paying per screen. You pay per till screen on which Buzzer at this till is set to Yes. A counter with buzzers and a terrace till without therefore costs €10 once.
- Not with a return. With a receipt with return lines, Other (and so Add buzzer) is grey.
- The buzzer itself. Jimani does not make the buzzer go off. Jimani only puts the number on the receipt and with the order; you make the buzzer go off with your own buzzer system.
- Example
-
A takeaway business gives a buzzer with every order. The employee chooses Add buzzer, the till suggests 14 (the previous one was 13), and the receipt shows 14 at the top.
- Related
-
What does an extra POS, handheld, kitchen screen or buzzer cost?, How does the till screen work in Jimani?, What can you set on a POS screen, handheld, tablet or phone?, Is the order number on the receipt and can I put it large at the top?
Keywords: buzzer till, restaurant pager, buzzer number, takeaway buzzer, buzzer on the receipt, waiting pager
Related questions - Can I give guests a buzzer for when their order is ready?
- How do I link a buzzer number to an order?
- What does the buzzer feature cost?
- Where do I turn on buzzers on the till?
How do I work with tables on the till?
- Answer
-
Tap Tables next to the payment buttons, choose a table or create one with New table. Save the order with Save; the lines stay on the table until you settle. A table belongs to one device at a time. With Table name required set to Yes every new table must get a real name, and an outstanding credit never expires without the till asking.
- Explanation
-
- Step 1. Choosing a table. Tap Tables. The Tables window ("Park the order by placing it on a table") shows all tables; a table with an open bill stands out. Search with Search table name. With the Restaurant integration you also filter by status (All tables, Free, Reserved, Late, Occupied / open bill) and by location, and there is a Legend with what the colours mean.
- Step 2. New table. Tap New table. At the top choose Main guest Yes or No (default No), type the Table name (letters and numbers, up to 20 characters, for example "Family Jansen" or "12") and with Restaurant choose the Location. Tap the checkmark. If the name already exists, you see "This table already exists."
- Step 3. Ringing up and saving. The name of the table is next to the order number; you can also change it there. Ring up products and tap Save. The lines go to the table (and to the kitchen) and the till is empty again for the next order. If you open the table later, the saved lines are above.
- Step 4. Settling. Open the table and tap Pay (or Cash or Pin). If a guest wants to pay separately, use Split the bill under Other.
- Leave the table. With the cross at the top right of the receipt you leave the table without settling.
- One device at a time. If a colleague has the table open on another device, you see "This table is in use" and "The table is currently opened by" with their name: "Only when the table is no longer open there can you open it." If there is nothing new on your table, the till releases the table after a minute so a colleague can get to it. If someone takes it over while you are typing, you see "The table has been taken over".
- Reminder. If there is something on your table that has not been saved or settled, then after a while of doing nothing "Your table is still open" appears at the top right with "Save the order or settle it." You set that time per till or handheld under Open table reminder after (1, 5, 10, 15 or 60 minutes, or off; default 5).
- Table name required. If Table name required is set to Yes for this till, the till asks for a new table and when opening a free table "Name for this table" ("On this till every new table gets a name, for example the name of the guest."). Choose Open table or Back. The name must have at least 3 characters, not be only digits and not be the default name such as Table 6.
- Credit does not expire silently. If you have put a credit on a table (a minus line) and you leave the table (cross, another table, New table or a customer on account), the till first asks "Credit is still open": "A credit is still open (...). If you leave the table, this credit expires." Choose Back to stay on the table, or Discard credit.
- Main guests. A table with Main guest set to Yes is not among the normal tables but with the main guests. At the bottom of the window you show them with Show main guests.
- Lines to another table. With Other > Split the bill you transfer selected lines to another table, for example when guests move or want to pay separately.
- Without internet you cannot open a table and cannot save anything on a table.
- No Tables button? Then the Parking tables integration is off. If Tables and reservations is set to No under Permissions on this till, the till asks for a PIN.
- Example
-
A group walks in without a reservation. The employee taps Tables > New table, types "Family de Vries", rings up drinks and taps Save. Later a colleague opens the same table on the handheld and adds the food; at the end the till settles the whole table.
- Related
-
Can a guest split the bill?, How does the Tables window on the till work?, What can you set per till under Payment methods, Permissions, Auto-lock and Table name required?
Keywords: tables till, open table, new table, park table, table name, save order on table, table occupied
Related questions - How do I save an order for a table?
- How do I create a new table on the till?
- Can two people order at the same table at the same time?
- How do I enforce that a table gets a name?
How do I order and settle with a handheld or phone?
- Answer
-
A handheld or phone with the Jimani app is a till in your hand: the same products, tables and payment buttons, on a narrow screen. What you ring up on the handheld is immediately on the table and goes to the same kitchen. A handheld costs €5 per month per device (excl. VAT); a phone with the handheld app also counts as a handheld.
- Explanation
-
- Step 1. Connecting. Connect the device under Settings > Till and products > Registers and hardware with Connect a POS: you get a pairing code that you type in the app. The device then appears under POS & Hardware.
- Step 2. Ringing up. Tap the name of the category at the top: the list of categories slides across the screen. Choose a category and tap the products.
- Step 3. The receipt. At the bottom is a bar with the number of items, View order (or Nothing rung up yet) and the total. Tap it: the receipt slides up with the same buttons as on the till. With the cross (Close receipt) it closes again; if you are on a table, you leave that too.
- Step 4. Tables. Tap Tables, choose the table and tap Save. The lines are then on the table, also for the till. A table belongs to one device at a time: if the till has it open, you see who.
- Step 5. Settling. Settle with Cash, Pin or Pay other, just like on the till. With Tap to Pay the customer pays by card on the handheld itself. For cash the device needs a cash drawer or wallet; you choose it under Change cash drawer or wallet.
- The Settings window. Tap the logo at the top left. There you find Logged in as, Change receipt printer, Change cash drawer or wallet, Change user, Sign in or Sign out, Log out, Check for updates and at the bottom the version of the app. What you change here also changes under POS & Hardware.
- Log in for every order. At the device you set whether the employee signs in with their PIN for every order (Yes) or once at the start of the shift (No, then there is a log out button on the screen).
- What is different from the till. Customer details and Repair are not on the handheld, and Look up a bill is under Other.
- Reservations. At the top there is also Book (today's reservations), with Restaurant Floorplan, and Reservation to create one.
- Example
-
A restaurant with one till and two handhelds pays 2 × €5 = €10 per month for the handhelds; the first till is free. The waiter takes the order at the table, taps Save, and the till and the kitchen see it immediately.
- Related
-
How do I sign in or out on the till and the handheld?, How does Tap to Pay work on a handheld or tablet?, What does an extra POS, handheld, kitchen screen or buzzer cost?
Keywords: handheld ordering, order at the table, phone as till, mobile till, handheld hospitality, waiter handheld
Related questions - Can I take orders at the table with my phone?
- What does a handheld cost per month?
- Does an order from the handheld go straight to the kitchen?
- Is a handheld the same as the till?
How do I sign in or out on the till and the handheld?
- Answer
-
With the Log in on the till integration every employee signs in with their own PIN on the PIN pad. On the handheld, Sign in/Sign out and Log out are in the menu at the top and in the Settings window; on the till you switch with Switch staff member. Whoever is signed in is signed out automatically after twelve hours, or fifteen minutes before the day closing time if that comes earlier.
- Explanation
-
- Step 1. Turning it on. Turn on Log in on the till under Settings > Add-ons and give your employees a PIN under Settings > Your business > Users and permissions. The PIN pad only appears when there is at least one employee with a PIN.
- Step 2. Signing in. Enter your PIN on the PIN pad and tap the checkmark. Empty input gives "Enter your PIN first.", a wrong code "Unknown PIN." After too many wrong attempts you have to wait a moment.
- Step 3. Signing out on the handheld. Tap the Sign out icon in the menu at the top (the name of whoever is signed in is next to it) or open the Settings window via the logo. The PIN pad appears over the screen; nothing is lost. As long as nobody is signed in, the button is called Sign in and the PIN pad has a cross to go back.
- Step 4. Switching on the till. Tap the cogwheel (Settings) and choose Switch staff member. The PIN pad appears, with a cross to go back.
- Logging out. Logging out on the handheld first asks "Log out and unlink this handheld? Afterwards you need a pairing code to log in again." On the till the button is called Log out (unlink register). After logging out the device has to be linked again; signing out is therefore usually what you want.
- Automatically signed out. The till and the handheld check every minute, and immediately when you pick the device up again. The moment is the earlier of two: twelve hours after signing in, or fifteen minutes before the day closing time of your business (Settings > Money and figures > Day closing, default 06:00). Whoever signs in just before that moment is not immediately dropped again: then the next moment counts.
- Your order stays. Signing out only puts the PIN pad over the screen. If you sign in again, the till restores the order you had not saved. If a colleague signs in, your order is kept (twelve hours) until you come back.
- Auto-lock. Separately from that, a till can go to the PIN pad after a number of minutes of doing nothing, so the next employee signs in. You set that per till under Auto-lock (1 to 240 minutes). It is only possible with at least two users with a PIN; then it is on by default after 5 minutes.
- Forgot your PIN? On the PIN pad tap "Forgot your PIN? Log in with your password", log in with your email address and password and then change your PIN under Users.
- Without internet the PIN pad cannot check your PIN ("No internet. Logging in works again as soon as there is a connection.") and the till does not sign anyone out automatically.
- Example
-
An employee signs in at 17:00 on the handheld; the day closing is set to 03:00. At 02:45 the PIN pad appears by itself, even if they are still busy. What they had not yet saved is ready again as soon as they enter their PIN.
- Related
-
How do I order and settle with a handheld or phone?, How does the PIN pad and linking a till work?
Keywords: sign in till, sign out handheld, pin code till, switch staff member, signed out automatically, log out handheld, lock till
Related questions - How do I log out on my handheld when my shift is over?
- How do I switch employees on the till?
- Is my staff signed out automatically on the till?
- Where do I enter my PIN to start working?
- What is the difference between signing out and logging out?
Can I use multiple tills, for example one for the bar and one for the terrace?
- Answer
-
Yes. You connect each till, handheld or phone separately under Registers and hardware, and per till you set which products are on it, which printers, drawer and card terminal belong to it and which payment methods are allowed. This way you can make, for example, a bar till and a terrace till. A till beyond the first costs €15 per month (excl. VAT); the till in the dashboard does not count.
- Explanation
-
- Step 1. Connecting. Connect each till under Settings > Till and products > Registers and hardware with Connect a POS. Give it a clear name under Display name, such as Bar till.
- Step 2. Products per till. Open the till. If Always show all products on the POS? is set to Yes, it sells everything, including products you add later. With No you choose per category which products are on this till.
- Step 3. Devices per till. Choose per till the Connected receipt printer, Connected kitchen printer(s), the Connected kitchen screen, the Connected cash drawer and the Connected payment terminal. Without a cash drawer, cash payment is not possible on that till; without a receipt printer no receipt ever comes out.
- Step 4. Payment methods and permissions per till. On the Till settings page you set Payment methods on this till (for example only card on the terrace) and Permissions on this till.
- Tables per area. With the Restaurant integration tables belong to a location (for example Terrace or Hall). In the Tables window you filter per location. There is no separate "zone" setting; you work with the tills, their products and the locations of the tables.
- Together on one table. Tills and handhelds work on the same tables. A table belongs to one device at a time; the other device sees who has it open.
- The till in the dashboard. Every store has one web till in the dashboard; that does not count as a till. If another computer opens it, you see "This till is open on another computer." with the button Continue here. A second till screen on a computer is an extra till.
- A computer that is not attached to a till. If you pay in cash or by card there, Jimani asks In which till? or Which card terminal? ("This PC is not attached to a till. Choose the till this revenue should be included in."). With Remember choice (on by default) it does not ask again until you log in again.
- Costs. The first till is free, every till beyond that €15 per month. A handheld or phone costs €5 per month per device.
- Example
-
A café with a bar till, a terrace till and two handhelds pays €15 for the second till and 2 × €5 for the handhelds: €25 per month excl. VAT. On the terrace till there are only drinks and ice cream, and the payment method Cash is off there.
- Related
-
What does an extra POS, handheld, kitchen screen or buzzer cost?, What can you set per till under Payment methods, Permissions, Auto-lock and Table name required?
Keywords: multiple tills, extra till, bar till terrace, points of sale, till per area, second till cost
Related questions - Can I have a separate till for bar and terrace?
- What does an extra till cost?
- Can I set different products and printers per till?
- How many tills can I connect?
Can I use a self-order kiosk?
- Answer
-
Jimani has the Kiosk device: a stand or tablet on which guests order themselves via your webshop widget. You add it under Registers and hardware and choose at the device which widget is on it. In the settings of the webshop you determine whether food, takeaway and delivery are possible on the kiosk.
- Explanation
-
- Step 1. Add the kiosk under Settings > Till and products > Registers and hardware. You can add more kiosks; each is a separate device.
- Step 2. Open the kiosk and choose under Widgets the widget you show on this stand ("The widget you show on this stand."). For a kiosk you can also add an image for the screen saver and a background.
- Step 3. In the settings of the webshop widget you set what is possible on the kiosk: Show food option on the kiosk, Takeaway active for an order via the kiosk, Deliver actively for an order via the kiosk, and Show items that are out of stock in the Kiosk.
- The orders. An order from the kiosk is in your orders; in the details of the order it says under Ordered via: Kiosk.
- Printing. A kiosk can serve as a printer for receipts; with a test receipt you see "The receipt was sent to the printer."
- Example
-
A lunchroom puts a tablet as a kiosk at the entrance with the webshop widget Lunch. Takeaway is on, delivery off. Guests order themselves and the order is in the list with Ordered via Kiosk.
- Related
-
Can I use multiple tills, for example one for the bar and one for the terrace?
Keywords: kiosk, self-order kiosk, order kiosk, order yourself, kiosk tablet, ordering stand
Related questions - Can guests order themselves at a stand?
- How do I set up a tablet as a self-service kiosk?
- Can I let people order delivery and takeaway via the kiosk?
- Which widget do I run on the stand?
How do I look up an earlier receipt and print it again?
- Answer
-
Choose Other > Look up a bill. The last receipt of this till is then in the receipt box; with the arrows you page further back. Tap Print receipt to print it again. A paper receipt you scan in the Scan the receipt box at the top. A bill for the guest before they pay you print with the little printer icon next to the payment buttons.
- Explanation
-
- Step 1. Tap Other > Look up a bill. If there is nothing else under Other, Look up a bill is a separate button next to Miscellaneous.
- Step 2. Under the receipt you see the order number, the date and time, the amount, Paid or Outstanding, the table and which receipt it is (for example 1 / 25). Page with the arrows to the left (older) and right (newer).
- Step 3. Choose what you want to do. Receipt details (the i sign) shows payment method, order number, date, order method, user and table. Print receipt sends the receipt to the printer again ("The receipt was sent to the printer."). Credit (for a paid receipt) or Delete (for an open receipt) opens the receipt with the trash on. Pay is only shown for a receipt that is still outstanding.
- Step 4. Done? Tap the red cross at the top right (Close the lookup) and you are back on an empty till.
- Scan the receipt. Scan the barcode of a receipt in the Scan the receipt box; the receipt opens immediately. In the Jimani app on a device with a camera you can also do that with the camera.
- Bill for the guest. The little printer icon next to the payment buttons prints the receipt that is currently on the screen, without payment method, order time, order method and user, because nothing has been paid yet. If nothing is open, you see "Nothing is open yet to print."
- Unprinted receipts. If a customer receipt did not come out of the printer, the till tries again by itself for half an hour. After that it is under Other at Unprinted receipts.
- No printer. If no receipt printer is connected to the till, or No printer is set to Yes, there is no printer icon. If printing fails, you see for example "Connect the printer to the system" or "The selected printer was not found."
- Without internet you only search through Order overview (or Search order) the receipts of today of this till and print them again.
- Example
-
A guest asks an hour later for a receipt for their employer. You choose Other > Look up a bill, page back three receipts until you see their amount, and tap Print receipt.
- Related
-
How do I take back an item or credit a paid receipt at the till?, What is on the receipt?
Keywords: reprint receipt, lost receipt, find old receipt, look up a bill, copy of receipt, scan receipt
Related questions - How do I print a receipt again?
- A customer wants a copy of their receipt, how do I look it up?
- How do I find an old receipt?
- How do I print the bill before the guest has paid?
- Can I scan a paper receipt?
Which devices does Jimani work on?
- Answer
-
Jimani works on a Jimani POS screen, on a tablet as a POS, on a phone or handheld for ordering at the table, in the browser of a computer or laptop (the web POS) and as a program on a Windows computer (POS for Windows). An iPad or iPhone is not listed as a device type in Jimani.
- Explanation
-
You pair each device with a pairing code, and it then appears under Settings > Till and products > Tills and equipment, on the Connected devices tab.
| Device | What it is for | How to get it running |
|---|
| Jimani POS screen (for example the X80-EU, or the X80D-EU with a second screen for the customer) | The fixed POS | POS app on the device, pair with a pairing code |
| Tablet | The POS on an ordinary tablet, without a built-in printer | POS app, pair with a pairing code |
| Phone | Ordering at the table on a phone (handheld) | POS app, pair with a pairing code |
| Handheld (for example the Sunmi L3) | Ordering and settling at the table | POS app, pair with a pairing code |
| Computer or laptop (web POS) | The POS in the browser | POS button in the dashboard, or Add External Device > Web POS |
| Windows computer | The POS as a program | Turn on the POS for Windows add-on and download the installation file |
| Kitchen screen | Orders in the kitchen | Pair with a pairing code; the Kitchen screen add-on must be on |
| Self-order kiosk | Guests order themselves | Pair with a pairing code in the app |
You also connect: receipt printers, cash drawers, buzzers and card terminals (PAX A35 or PAX A920-PRO via Mollie, and the Mollie Tap for Tap to Pay).
- Example
-
A café has a Jimani POS screen at the bar, two phones as handhelds on the floor and the web POS on the owner's laptop. The phones cost 2 × €5 = €10 per month. The first POS and the web POS cost nothing extra.
- Related
-
How do I install POS for Windows?, Can I install this myself and pair my devices myself?, How does the Connected devices screen work in Jimani?
Keywords: which devices, POS on tablet, POS on phone, POS on windows, web POS, ipad POS, handheld
Related questions - Does Jimani work on an iPad?
- Can I use the POS on my laptop?
- Which devices can I use as a POS?
- Does it work on an iPhone?
How do I install POS for Windows?
- Answer
-
In the dashboard, under Settings > Add-ons, turn on the POS for Windows add-on and then open the settings of that tile. Then you download the installation file. Install it on your Windows computer and pair the POS with a pairing code.
- Explanation
-
- Step 1. Go to Settings > Add-ons and find the POS for Windows tile. Click Turn on.
- Step 2. Click the Open settings icon on the tile. As long as the add-on is off, this takes you back to Add-ons. Once it is on, the download of the file Jimani-Kassa-installeren.exe starts.
- Step 3. Install the program on the Windows computer or Windows POS.
- Step 4. In the dashboard go to Settings > Till and products > Tills and equipment and click Connect a POS. Type the 6-character code into the program. The code works for a quarter of an hour and only once.
- Printer. The program works with a receipt printer via USB or via the network.
The POS for Windows add-on itself costs nothing per month. If the computer counts as a POS (a POS screen), the usual rule does apply: the first POS is free, an extra POS costs €15 per month excl. VAT.
- Example
-
A shop with a Windows POS at the counter turns on POS for Windows, downloads the file, installs it and pairs it with the code from Connect a POS.
- Related
-
Which devices does Jimani work on?, Can I install this myself and pair my devices myself?
Keywords: pos for windows, install windows pos, download pos program, pc pos, pos installation file
Related questions - Can I install the POS on my Windows PC?
- Where do I download the installation file for the POS on Windows?
- How do I pair my PC with Jimani using a pairing code?
Can I install this myself and pair my devices myself?
- Answer
-
Yes. You pair a POS, handheld, tablet, phone or kitchen screen yourself with a pairing code from the dashboard, and you add a receipt printer, cash drawer or buzzer yourself under Add External Device. You do not need an engineer to pair in Jimani.
- Explanation
-
- Step 1. Go to Settings > Till and products > Tills and equipment and click Connect a POS. You see a 6-character pairing code (without 0, O, 1, I and L, so you do not mistype anything).
- Step 2. Type the code into the POS app on the device. The code is valid for a quarter of an hour and works once. If two people create a code at the same time, they get the same code as long as it is still valid for at least five minutes.
- Step 3. The window waits for the device (Waiting for the point of sale...). Once it is paired, it reports The point of sale is paired and the device appears in the Connected devices list.
- SMS. If SMS is on and your own mobile number is confirmed, you can send the code to your phone with the button Send by text to my phone. If the SMS cannot be sent, the code goes by email.
- Recognition. Jimani recognises a known device by its model name and immediately creates it with the right type. If Jimani is not sure, the app asks what the device is.
- Pairing the same device again returns the same device, with its own settings.
- Computer or laptop. No code is needed: when adding, choose Web POS (This computer as a till), or open the POS in the dashboard. There is one web POS per business.
- Kitchen screen. Pairing a new kitchen screen only works if the Restaurant, Courses and Kitchen screen add-ons are on. Otherwise Jimani refuses it and the code stays unused.
- Card terminals. Once Mollie is connected, Jimani fetches your card terminals and Taps itself when you open Connected devices. You add a Tap with Connect Tap to Pay.
- Printer, cash drawer, buzzer. Click the green plus. Choose the type (Printers, Cash register or Buzzers), then the device. A printer needs an IP address, or a USB cable to the POS.
Physically setting up and connecting cables and network is outside Jimani.
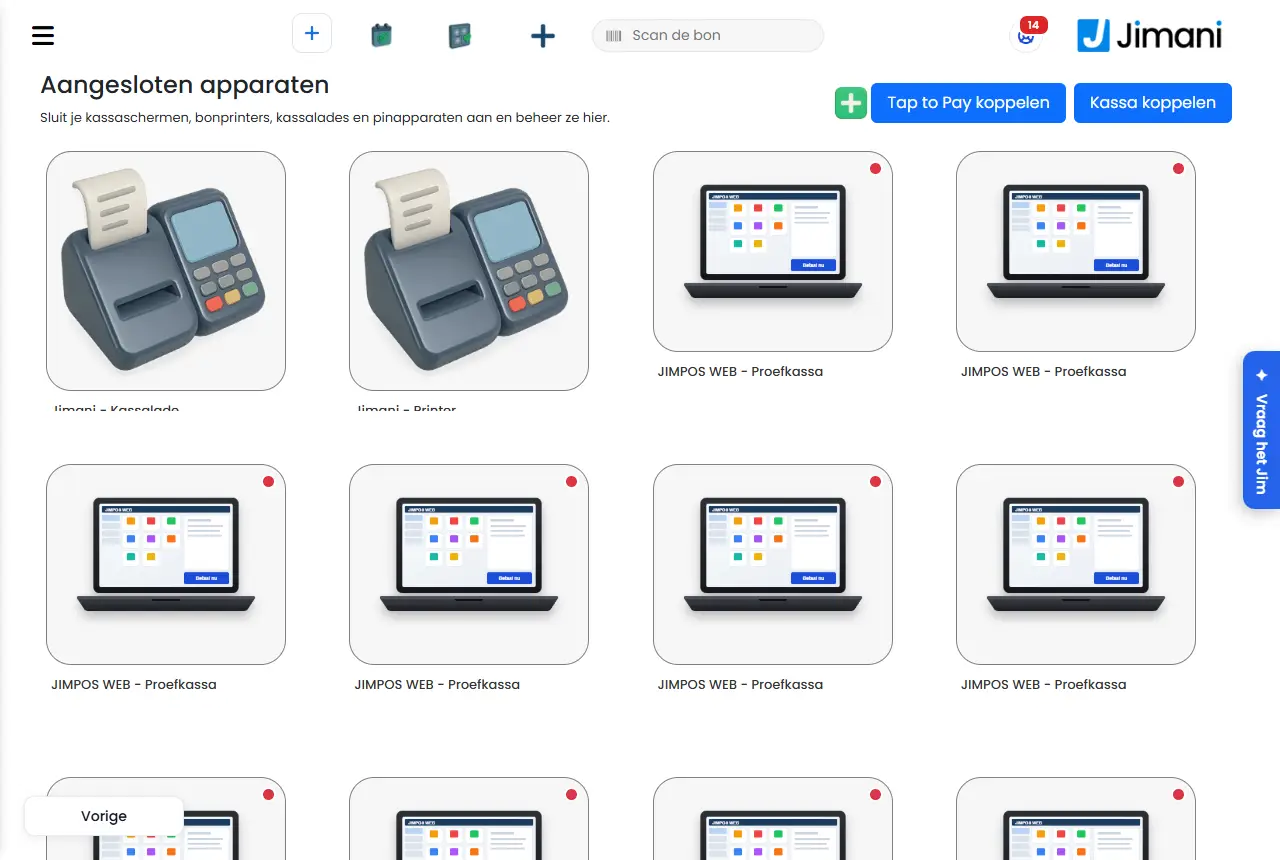
- Example
-
You buy a tablet for the bar. You click Connect a POS, get code K7M2PQ, type it into the app and after a few seconds the tablet is in your list. Then, on the tablet, you choose which receipt printer belongs to it.
- Related
-
Which devices does Jimani work on?, How do I connect a receipt printer and use multiple printers?, How does the Connected devices screen work in Jimani?
Keywords: install yourself, pair POS, pairing code, pair device, without engineer, connect new POS, pair tablet
Related questions - Do I need an engineer to install my POS?
- How do I pair a new POS screen or handheld myself?
- How do I add a printer or cash drawer myself?
- Where do I find the pairing code for my device?
How do I connect a receipt printer and use multiple printers?
- Answer
-
Under Connected devices, click the green plus, choose Printers and under What is this printer for? choose Till receipts or Kitchen tickets. You can connect several printers: one POS printer for the customer receipt and one or more kitchen printers for the kitchen and bar.
- Explanation
-
- Step 1. Go to Settings > Till and products > Tills and equipment and click the green plus (Add External Device). Choose Printers (Receipt and kitchen printers) and then the model.
- Step 2. Choose Till receipts or Kitchen tickets. A printer is one or the other: a till receipt is a different receipt from a kitchen ticket.
- Step 3. Give the printer a Display name.
- Step 4, till receipts. Is this printer connected to the POS with a USB cable? Choose Yes for a cable, No for a network printer and then enter the IP address. If needed, choose the cash drawer (Which cash drawer?).
- Step 4, kitchen tickets. Only the IP address: a kitchen printer with a USB cable to the POS is not possible. Then you choose which products come out (Products for this kitchen).
- Step 5, till receipts. Optionally an image, the Header text on the receipt and the Footer text on the receipt.
- Connecting to the POS. Open the POS screen under Connected devices. Under Connected receipt printer you choose the printer for the customer receipt. Under Connected kitchen printer(s) you choose one or more kitchen printers; with the plus you add one.
- Products per kitchen printer. Which products go to which kitchen printer, you set on the kitchen printer itself. Of an order, only those products appear on that kitchen ticket. This way a drink goes to the bar and a dish to the kitchen.
- More than one POS. Each POS has its own choice of POS printer and kitchen printers.
- Example
-
A restaurant has an Epson receipt printer at the POS (Till receipts) and two kitchen printers: Kitchen (dishes) and Bar (drinks). The POS screen gets both under Connected kitchen printer(s), and an order splits automatically.
- Related
-
How do I set up the kitchen ticket?, Which cash drawer opens and how do I connect it?, How do I print a receipt if my tablet or phone has no printer?, How does the Connected devices screen work in Jimani?
Keywords: connect receipt printer, multiple printers, kitchen printer, bar printer, POS receipt printer, ip address printer, usb printer
Related questions - How do I connect a receipt printer to the POS?
- Can I use multiple printers, for example in the kitchen and at the bar?
- How do I get orders printed in the kitchen?
- How do I choose whether a printer prints till receipts or kitchen tickets?
How do I print a receipt if my tablet or phone has no printer?
- Answer
-
Set No printer to Yes on the device if it never needs to print a receipt. If you do want a receipt, the POS chooses the printer in your network at checkout: you get the question On which printer? and Jimani remembers your choice.
- Explanation
-
- No printer. Open the device under Settings > Till and products > Tills and equipment. Set No printer to Yes: this device then does not try to print a receipt and you get no message that the printer was not found. It is available for POS screens and handhelds and saves immediately.
- A receipt from another printer. If the device has no printer of its own, the POS first looks for the printer you remembered earlier. If there is none, you get On which printer? with the text This device has no printer of its own. Choose the printer for the receipt.
- Remember choice. Below the list is the switch Remember choice, on by default. Then the POS no longer asks. If there is only one printer, the POS chooses it itself.
- What goes on the receipt. It is the same customer receipt; you only choose the printer.
- Always a receipt or choose. With Always print a receipt you decide whether a receipt goes out without asking. If this is set to no, you choose Print receipt or No receipt at checkout.
- Example
-
A tablet sits behind the bar without a printer. The receipt printer is at the main POS. The bartender settles, chooses the receipt printer of the main POS once with Remember choice on, and the next receipts come out there automatically.
- Related
-
How do I connect a receipt printer and use multiple printers?, Is the order number on the receipt and can I put it large at the top?, What is on the receipt?
Keywords: tablet without printer, print receipt tablet, phone receipt, no printer, choose printer, receipt to other printer
Related questions - How do I print a receipt from my tablet without a printer?
- My phone has no printer, can I still print a receipt?
- Why does the POS ask which printer I want to print on?
- How do I stop a device from printing receipts?
Is the order number on the receipt and can I put it large at the top?
- Answer
-
Yes. The receipt number and the date and time are always on the receipt; you cannot turn them off. If you also want the number large at the top right, turn on Receipt number at the top of the receipt on the printer. A buzzer number on the receipt is a separate setting.
- Explanation
-
- Always on the receipt. On the printer there is the line Receipt number and date/time are always on the receipt (cash register law). The order number and the order time are fixed; you cannot turn them off.
- Large at the top right. Open the receipt printer under Settings > Till and products > Tills and equipment. Under What goes on the receipt? you find Receipt number at the top of the receipt (Large, top right). By default this is No.
- What you can turn off. Payment method on the receipt (Cash, card or otherwise), Order method on the receipt (Till, online or handheld) and User on the receipt (Who rang up the order). All three are on by default.
- Also on a receipt from a tablet. If a tablet or phone prints on another printer, the order number appears on the customer receipt that comes out there. See How do I print a receipt if my tablet or phone has no printer?.
- Buzzer number. If you also want the number of a buzzer at the top of the receipt, see How do I use buzzers at the till?.
- Example
-
A takeaway business turns on Receipt number at the top of the receipt. On every receipt the number is now large at the top right, so the guest can read it from a distance when collecting.
- Related
-
What is on the receipt?, How do I use buzzers at the till?, What can you set on a receipt printer or kitchen printer?
Keywords: order number on receipt, receipt number at top, large receipt number, what is on the receipt, pickup number, number on receipt
Related questions - How do I get the receipt number large at the top of the receipt?
- Can I remove the receipt number from the receipt?
- Are the date and time on the till receipt?
- How do I put a buzzer number on the receipt?
Which cash drawer opens and how do I connect it?
- Answer
-
Add the cash drawer via the green plus > Cash register. Then connect it to the receipt printer (Which cash drawer?) or to the POS screen (Connected cash drawer). When a customer pays cash, that drawer opens. A drawer is connected to one device at a time.
- Explanation
-
- Step 1. Go to Settings > Till and products > Tills and equipment, click the green plus and choose Cash register (Cash drawer and wallet). Choose the cash drawer and give it a name.
- Step 2, via the printer. Open the receipt printer. Under Which cash drawer? you choose the cash drawer that is attached to this printer and opens when you pay cash.
- Step 2, via the POS screen. Open the POS screen. Under Connected cash drawer you choose the drawer, or None. If you choose None, you cannot pay cash on this POS, only by card. This choice only appears if a cash drawer has been created.
- One drawer, one device. If you choose a drawer that is already connected to another device, that other device releases it. In the list, the drawer is therefore followed by currently at and the name of the device it is currently connected to.
- Open cash drawer under Other? On Yes, there is an Open till button under Other on the POS. Tapping the logo at the top left twice also opens the drawer, even if this is set to No. By default this is No.
- When booking money. A deposit or withdrawal at Cash also opens the drawer; see How do I book money in or out of the cash drawer?.
- Example
-
You have two POS devices and one cash drawer. You first connect the drawer to POS 1. If you then choose it on POS 2, the list shows currently at POS 1 after the name, and POS 1 then has no drawer anymore.
- Related
-
How do I connect a receipt printer and use multiple printers?, How does the Connected devices screen work in Jimani?
Keywords: connect cash drawer, cash drawer does not open, open cash drawer, pay cash drawer, no cash drawer, drawer on printer
Related questions - My cash drawer does not open, how do I connect it?
- How do I connect a cash drawer?
- Which device is the cash drawer connected to?
- Does the drawer also open for card payments?
How do I set up the kitchen ticket?
- Answer
-
Open the kitchen printer (What is this printer for? is set to Kitchen tickets) under Connected devices. There you choose which products come out, which language the ticket is in, what is on the ticket and in which order the items appear.
- Explanation
-
- Products for this kitchen. Choose which products come out here. Of an order, only those products appear on this kitchen ticket.
- Kitchen ticket language. Default is Language of the business. If you choose another language, product names and options are translated; guest comments never are.
- Content of the kitchen ticket. This choice only appears if the Courses add-on is on. You choose from four forms:
- This course, own: only the course that is going to the kitchen now, with only the items of this printer. This is the default.
- This course, all: only the current course, with all items of that course, including those of other printers.
- Full ticket, own: the whole order with the items of this printer. The current course is at the top, what is still waiting below it, what has already been served at the bottom with a tick.
- Full ticket, all: the whole order with all items, arranged in the same way.
- Order on the kitchen ticket. Entry order (default): the items in the order in which the waiter rang them up. Or Register order: as they appear on the POS, first the order of the categories, within them that of the products.
- Connecting. The printer only works for a POS once you choose it on the POS screen under Connected kitchen printer(s).
- Example
-
The bar prints only drinks and chooses This course, own with Entry order. The kitchen chooses Full ticket, all, so the cook sees which courses are still to come.
- Related
-
How do I connect a receipt printer and use multiple printers?, How does the kitchen screen work?
Keywords: kitchen ticket, set up kitchen printer, kitchen ticket language, kitchen ticket order, courses kitchen ticket, bar printer
Related questions - How do I decide which products appear on the kitchen ticket?
- Can I have the kitchen ticket printed in another language?
- How do I change the order of dishes on the kitchen ticket?
- How do I change what is on the kitchen slip?
How does the kitchen screen work?
- Answer
-
The kitchen screen shows the orders for the kitchen as cards. The cook taps a product to move it from New to In progress and then to Done, and completes the order once everything is done. You pair the screen with a pairing code; a kitchen screen costs €5 per month per screen (excl. VAT).
- Explanation
-
- Pairing. Click Connect a POS and type the code on the screen. If Jimani does not recognise the device, the app asks what it is: choose Kitchen screen. A new kitchen screen only works if the Restaurant, Courses and Kitchen screen add-ons are on. Courses costs €10 per month (free until 1 January 2027 if you already use it).
- Which orders. You connect the kitchen screen to a POS under Connected kitchen screen (The kitchen screen on which the orders of this till appear). On the kitchen screen under Connected devices, you choose under Products for this kitchen which products come out.
- Card. Each order is a card with the items and options, the table or location, the number of guests, the waiter, the time of the order and the type of order (Eat here, Pickup or Delivery). The screen refreshes itself every 10 seconds.
- Tapping products. Tap a line or the tick: New becomes In progress, In progress becomes Done. If you tap Done, it goes back to In progress.
- Everything at once. If a card has more than one item, small buttons above the items let you set all items at once to in progress, done or back.
- Hold. With the Hold button at the top (which then reads Hold: on) you turn on hold mode. Then tap an item to put it on hold; you see the message Item ON HOLD. If you tap it again, the hold disappears (Hold removed). If you tap an item on hold while hold mode is off, you get Turn on Hold mode to change the held items. Below the card are the states New, In progress, Done and Hold; they show which state the order is in.
- Completing. Open the Done tab. If all items of an order are done, the button under the card is green and reads Completed. As long as something is not done yet it says Partially Ready and you cannot complete. A completed order is on the Finished tab.
- Tabs. At the top are All, New, In progress, Done, Hold and Finished, each with a count. An order with items in two states appears in both tabs.
- Courses. With the Courses add-on the whole ticket is on the screen, per course. What has not been called yet is dimmed. As long as a course is waiting to be called, you cannot complete the order.
- Light or dark. With the Light or dark button at the top you switch the colours. The screen remembers your choice on that device; the default is dark.
- Cancelled. A cancelled order disappears from the kitchen screen.
- Example
-
An order for table 4 comes in with two dishes. The cook taps both: In progress. When the first is done he taps it again: Done. When the second is done as well, he opens the Done tab and chooses Completed; the card goes to Finished.
- Related
-
Kitchen screen or kitchen printer: which suits me?, How do I follow the status of an order and how does the kitchen screen work?, How do I set up the kitchen ticket?, What does an extra POS, handheld, kitchen screen or buzzer cost?, How does the kitchen screen's screen work?
Keywords: kitchen screen, kds, kitchen display, orders kitchen screen, kitchen screen in progress done, courses kitchen screen
Related questions - How does the cook use the kitchen screen?
- What do New, In progress and Done mean on the kitchen screen?
- How do I pair a screen in the kitchen?
- What does a kitchen screen cost?
Kitchen screen or kitchen printer: which suits me?
- Answer
-
You can use either, and even side by side. A kitchen printer prints a ticket per order and is available without an extra add-on. A kitchen screen lets the cook keep track of orders on the screen (New, In progress, Done) and requires the Restaurant, Courses and Kitchen screen add-ons, at €5 per screen per month.
- Explanation
-
| Kitchen printer | Kitchen screen |
|---|
| What you see | A ticket with the products for that kitchen | A card per order on a screen |
| Tracking | Not on the ticket itself | The cook taps New, In progress and Done and completes |
| Pairing | Add External Device > Printers > Kitchen tickets | Pairing code, like a POS |
| Where you choose it | On the POS screen under Connected kitchen printer(s) (more than one is allowed) | On the POS screen under Connected kitchen screen (one) |
| Products | Products for this kitchen, per printer | Products for this kitchen, per screen |
| Options | Language, Content (with Courses) and Order of the kitchen ticket | Light or dark, tabs and hold mode on the screen |
| Costs | No add-on needed | €5 per screen per month, plus Courses €10 per month (excl. VAT; free until 1 January 2027 if you already use it) |
- Both at the same time. A POS screen can have one kitchen screen and several kitchen printers. This way a dish goes to the kitchen screen and a drink to the receipt printer at the bar.
- Which products. You choose on each device which products come out. Of an order, only those products appear on that device.
- Courses. If you want starters, mains and desserts called separately, you need Courses. Then the kitchen screen shows the whole ticket per course, and a kitchen ticket can show the current course or the whole ticket.
- Example
-
A restaurant with one kitchen chooses a kitchen screen for the cook and a receipt printer in the bar for the drinks. The cook taps dishes when they are done; the bar simply tears off the ticket.
- Related
-
How does the kitchen screen work?, How do I set up the kitchen ticket?, Which features cost money?
Keywords: kitchen screen or printer, kitchen printer, kds, kitchen ticket or screen, kitchen screen costs, bar printer
Related questions - Should I get a kitchen screen or a kitchen printer?
- Can I use a printer and a screen in the kitchen at the same time?
- Which add-ons do I need for the kitchen screen?
- What is the difference between a kitchen ticket and a kitchen screen?
Can I show different products on each POS?
- Answer
-
Yes. Open the POS screen under Connected devices and set Always show all products on the POS? to No. Then you choose per category which products this screen sells. On Yes the screen automatically sells every product of your business.
- Explanation
-
- Step 1. Go to Settings > Till and products > Tills and equipment and click the POS screen.
- Step 2. Set Always show all products on the POS? to No. If this is on yes, this screen automatically sells every product of the business, including a product you add or remove later. If it is on no, you choose per category which products are sold here.
- Step 3. Click Next. You get a page per category. Choose the products, or use Select all for a whole category or Add all products for everything. Click Save.
- New product. If the choice is on No, a product you create later does not automatically appear on this screen. You add it here.
- Only for a POS screen. The question appears for POS screens whose point of sale has categories.
- Which module. If your business sells more than one kind (for example POS and webshop), you choose under Point of sale which module this screen sells.
- Images. With Images with the items set to No you only see the name and the price. That is calmer and faster.
- Stock. The questions Hide stock on the till and Show items that are out of stock only appear if the stock module is on.
- Example
-
The bar only sells drinks and the kitchen only dishes. On the bar POS you set Always show all products on the POS? to No and choose only the categories Beer, Wine and Soft drinks.
- Related
-
What can you set on a POS screen, handheld, tablet or phone?, How do I connect a receipt printer and use multiple printers?
Keywords: products per POS, different products on POS, assortment per POS, bar and kitchen POS, choose products POS screen
Related questions - How do I show different products on one POS than on another?
- Can I give the bar POS only drinks?
- Where do I choose which products a POS sells?
Why is my device green or red under Connected devices?
- Answer
-
The dot at the top right of the tile of a POS, handheld, phone or kiosk is green if the device has had contact with Jimani in the last three minutes, and red if not. The tile also shows which app version the device is running and when you last saw it.
- Explanation
-
- Green or red. Green if the device has an open connection with Jimani, or reported in during the last three minutes (the app reports in every minute), or if the POS screen was still open in that time. Otherwise red. Printers, cash drawers and kitchen screens do not have this dot.
- App version and last seen. At the bottom left of the tile it says for example 1.0.87 · 4 min ago. If you hover over it, you see App version and the time at which the device last reported in. The text turns orange if the device has not reported in for ten minutes.
- POS app not connected – restart the app. This orange message appears if the POS screen is still open but the POS app has not reported in for two minutes. No receipts will come out then. Restart the app on the device.
- Printer not found — N receipts waiting. This message appears if the POS cannot find its USB receipt printer. The receipts keep waiting and come out automatically as soon as the printer is back. The message stays for a quarter of an hour and does not appear with No printer.
- Belongs to old account. This card terminal belongs to your previous Mollie account.
- Brand and model. Under the name is the brand and model as the device reports it, when pairing and at every start.
- Receipt printing status. Open a POS or printer and expand Receipt printing status at the bottom. You see per receipt when it was Sent, after how long it was Printed, how many Attempts there were and What went wrong. A receipt can be Sent, Printed or Failed.
- Example
-
At the bar a tablet is red with the orange message POS app not connected – restart the app. You close the app, open it again, and after a minute the dot is green.
- Related
-
How does the Connected devices screen work in Jimani?, How do I print a receipt if my tablet or phone has no printer?
Keywords: device offline, POS red dot, POS not connected, app version POS, printer not found, receipts waiting
Related questions - What does the red dot at my POS mean?
- How do I see whether my POS or handheld is online?
- Where do I see which app version my POS is running?
- My device is red, what now?
How do I set up the customer display?
- Answer
-
If your POS has a second screen for the customer (such as the X80D-EU), open the POS screen under Connected devices and go to the Customer display step. There you choose the logo, the line under the logo, the welcome text, the font, the text size and the background. You see a preview right away.
- Explanation
-
- Where. Settings > Till and products > Tills and equipment, click the POS screen. The Customer display preview step only appears for a POS with a second screen.
- Logo. With Show logo you choose Yes or No. Logo size is Small, Medium (default) or Large. Leaving Own logo for this screen empty means: your business's logo.
- Line under the logo. By default your business's email address. Enter something yourself, for example a phone number or website, at most 100 characters. Leaving it empty gives your business's email address.
- Welcome text. Leaving it empty gives the default text in the language of the POS. A text of your own can be at most 60 characters.
- Font. Inter (default), Poppins, Georgia or Arial.
- Text size. Small, Normal (default) or Large.
- Background. The colour when nothing is being ordered: Light (default), Dark or Blue. Blue uses the colour from your house style.
- Save. At the bottom is Save.
- Example
-
A bakery sets Line under the logo to its phone number, leaves the welcome text Welcome to the bakery! as it is and chooses the Blue background.
- Related
-
Which devices does Jimani work on?, What can you set on a POS screen, handheld, tablet or phone?
Keywords: customer display, second screen POS, welcome text customer display, logo customer display, x80d, dual POS screen
Related questions - How do I put my logo on the customer display?
- Can I put a welcome text on the second screen for the customer?
- How do I set up the customer display?
- Can I change the font and background of the customer display?
How do I have the day closing made and emailed automatically?
- Answer
-
Go to Settings > Money and figures > Day closing and click the cog at the top right (End-of-day settings). Set Automatic day closing to Yes and choose the End-of-day closing time. Set Email the end-of-day closing automatically to Yes and enter the email addresses. By default Jimani closes every night at 06:00.
- Explanation
-
- Step 1. Open Day closing and click the cog. The window is called End-of-day settings.
- Step 2. Set Automatic day closing to Yes. Then the night round closes the day every day at the chosen time, on your business's clock. This is on Yes by default.
- Step 3. Under End-of-day closing time enter a time as hh:mm, for example 04:00. Choose a time after closing, so the day is really over. By default that is 06:00.
- Step 4. Set Email the end-of-day closing automatically to Yes. After every day closing the financial overview (pdf, with the Excel attached) goes to your addresses. This applies to the automatic and to a manual day closing.
- Step 5. Under Email addresses enter one or more addresses. Separate multiple addresses with a comma. Click Save.
- Mailing again. If you count the cash after closing (see How does the day closing and counting the cash work?), the email goes out once more as soon as all drawers have been counted, now with the cash difference and the amount skimmed off.
- Fixed change. Under the same settings are Fixed change in the drawer and Change per drawer. These save immediately when you change them.
- Error messages. Enter a time as hh:mm. means the time is not valid. Enter at least one email address. appears if emailing is on without an address. This is not a valid email address: ... names the address that is wrong.
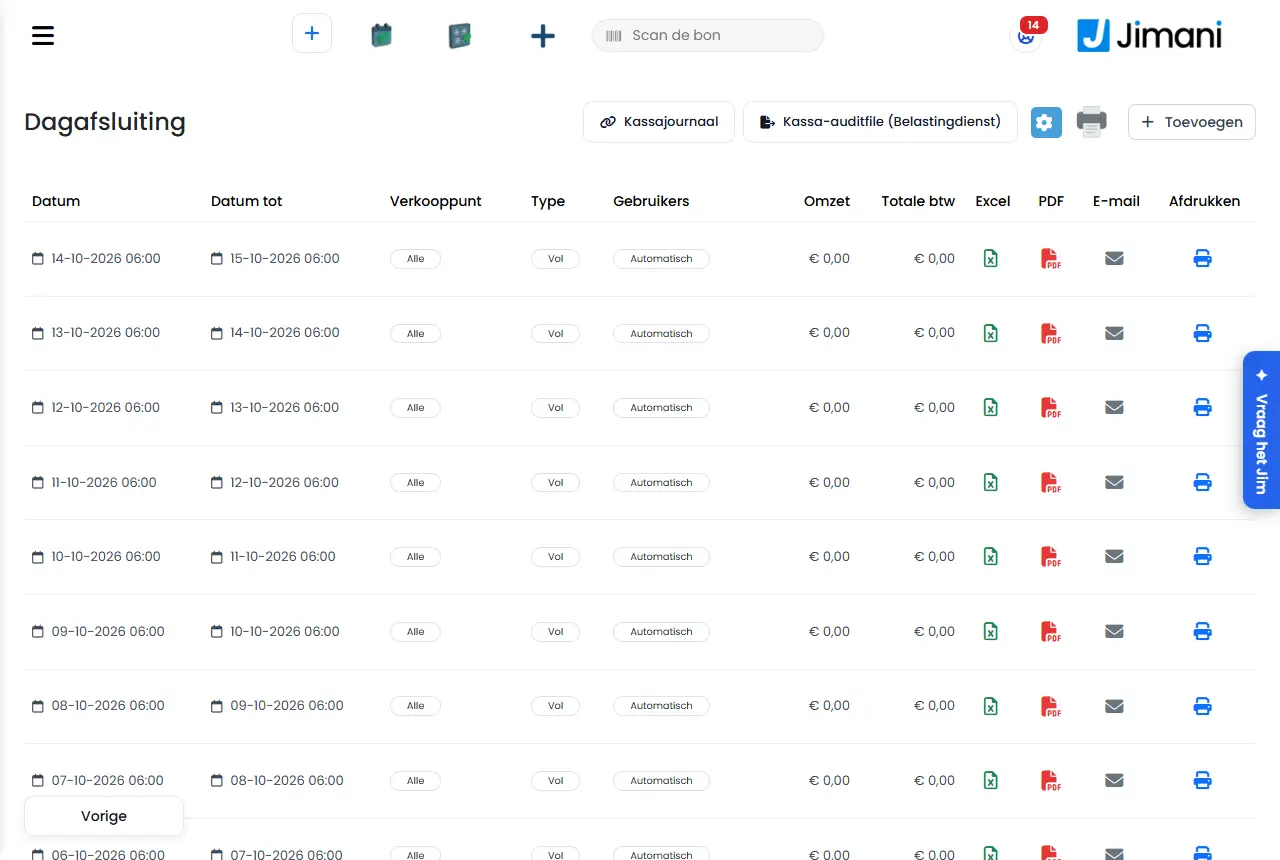
- Example
-
A restaurant closes its doors at 02:00. The owner sets the End-of-day closing time to 04:00 and enters his own address and that of the bookkeeper. Every morning the overview is in both mailboxes.
- Related
-
How does the day closing and counting the cash work?, How do I make a day closing myself and how do I download, email or print it?, How does Day closing work in Jimani?
Keywords: automatic day closing, email day closing, day closing time, z report email, day closing bookkeeper, day closing 06:00
Related questions - Can the day closing be made automatically?
- How do I get the daily report in my mailbox every day?
- How do I change the time of the day closing?
- What time is the default day closing?
- How do I set the cash closing to automatic?
How do I make a day closing myself and how do I download, email or print it?
- Answer
-
Go to Settings > Money and figures > Day closing, click the plus and choose Save. Jimani closes from where the previous closing ended until now. In the list you can then download the Excel or Pdf, email it or print it.
- Explanation
-
- Step 1. Open Day closing and click the plus at the top right. The window is called Day closing.
- Step 2. Leave Day close of the full day on. Then you only see Date from. If you turn it off, Date to, Time from and Time to are added (in steps of 15 minutes).
- Step 3. If needed, choose a Point of sale (Select all), a Type (Full, Financial or Reservation) and a user under Users (All users). Click Save.
- What Jimani determines itself. A closing always starts exactly where the previous one ended, without a gap and without overlap, and ends at the latest now. What you choose for the date can therefore not change that. If there is nothing new to close, nothing happens. Double-clicking does not create a second closing.
- Count the cash. If The cash is counted is on, the Count the cash screen opens right after saving.
- The list. Per closing you see Date, Date to, Point of sale, Type, Users, Revenue and Total VAT, with the Total at the bottom.
- Excel and Pdf. Click the Excel or pdf icon in the line. The pdf is called Download PDF.
- Email. Click the envelope icon. Enter an email address and click the send icon. You get The email has been sent, or The email could not be sent. Under Download there is also Download PDF.
- Print. The printer icon in the line prints the closing on the receipt printer or on the POS where you work. It only appears if there is a receipt printer or a POS that can print it.
- On the POS itself. If you work in the POS view, you only see Print; Excel, Pdf and Email are on the computer.
- Print list. The printer icon above the list prints the list as it appears on the screen as an overview. See How do I print a list or overview?.
- Example
-
At 23:30 you want to close the day. You click the plus, leave Day close of the full day on and choose Save. The closing runs from the previous closing to 23:30. You click the pdf icon and send it to your bookkeeper.
- Related
-
How does the day closing and counting the cash work?, How do I have the day closing made and emailed automatically?, How does Day closing work in Jimani?
Keywords: make day closing, download z report, day closing pdf, day closing excel, email day closing, print day closing
Related questions - How do I close the POS manually at the end of the day?
- How do I download my day closing as Excel or pdf?
- How do I print the day's revenue?
- Can I email a day closing to my bookkeeper?
How do I download the POS audit file and check the cash register journal?
- Answer
-
As the owner, go to Settings > Money and figures > Day closing. With the button POS audit file (Dutch Tax Authority) you choose a period and download the file. With the button Cash register journal you check whether the chain of receipts is still intact.
- Explanation
-
- Who. You only see both buttons as the owner of your business. An employee or manager does not see them.
- POS audit file (Dutch Tax Authority). This is the file you give to the Belastingdienst during an inspection: all receipts, credits, practice receipts and closings of the POS over a period. The button is not in the POS view but on the computer.
- Step 1. Click POS audit file (Dutch Tax Authority). Under From choose the first day and under Up to and including the last day. With the minus and plus sign you can go a day back or forward. By default the previous calendar year is filled in, because that is what the Belastingdienst usually asks for.
- Step 2. Click the download button. The file goes to your downloads.
- Period. Calendar days on your business's clock; the end date is included. At most one year per file.
- VAT number. If your business's VAT number is missing, you see the message The business's VAT number is missing. Enter it in the company details; the Belastingdienst expects it in the audit file.
- Cash register journal. Click Cash register journal. Every closed receipt, settlement and POS event is tied to the previous one with a hash. If something changes afterwards, or a receipt disappears, the chain breaks at that place. You see the Chain status: Chain intact, or Break at receipt or Break at link with the location. Jimani checks the chain every night. With Check now you do it immediately, from the beginning.
- Chain details. You see, among other things, Links in the chain, Last checked, Start hash, Last hash, Not in the chain yet and Modified receipt lines.
- Numbering per register. Each POS numbers its receipts without interruption, next to the receipt number. You see the numbering per POS, and Gaps if numbers are missing. With no problems it says No gaps.
- Not checked yet. This is how the status looks before the first check. If it says The hash chain is not yet turned on for this environment, the chain has not been enabled there yet.
- Example
-
The Belastingdienst asks for the POS data over 2026. In POS audit file (Dutch Tax Authority) you set From 01-01-2026 and Up to and including 31-12-2026 and click download. First you check with Cash register journal whether it says Chain intact.
- Related
-
Does the Jimani POS meet the requirements of the Belastingdienst (Dutch Tax Authority)?, How does the day closing and counting the cash work?, How does Day closing work in Jimani?
Keywords: POS audit file, xaa, cash register journal, hash chain, belastingdienst POS inspection, chain intact, receipt gaps
Related questions - How do I download the audit file for the Belastingdienst?
- How do I check that my POS data is correct and has not been changed?
- What should I do if the Belastingdienst asks for my POS data?
- What is a cash register journal?
Can I let customers buy tokens or drink vouchers?
- Answer
-
Yes, with the Pay with tokens add-on (free). Turn it on under Settings > Add-ons. Then you set up your token under Settings > Money and figures > Pay with tokens: a name, the price per token and how many tokens an item costs. A business has one token.
- Explanation
-
- Step 1. Turn on Pay with tokens under Add-ons. Then Tokens appears under Money and figures.
- Step 2. Open Tokens. As soon as the add-on is on, Jimani creates one token itself with the name Token. Click the tile of your token. The window is called Edit token and has 3 steps, or 4 if not everything costs the same.
- Step 3, What it is. Enter the Name and optionally EAN or SKU.
- Step 4, Questions. Answer three questions with Yes or No: Do you also sell half tokens? (the quantity then goes in steps of a half), Does a customer get a discount when buying more at once? (then you can add a price tier to the price) and Does everything cost the same number of tokens? If Yes, you enter How many tokens does an item cost?; that applies to everything you sell. If No, a step is added for the price per product.
- Step 5, Price. Enter the Price per token and choose a product group under Which VAT rate does a token fall under?. Under Popular quantities you set up to five quantities; they also appear on the POS. Under Price tier you add lines: from a certain number of pieces, a token costs less.
- Step 6, Price per product. Only with No on Does everything cost the same number of tokens?. Enter per product how many tokens it costs. If you leave a product empty, you cannot buy it with tokens. With Fetch list and Import list you work with an Excel file.
- Save. On the last step you choose Save.
- Currency settings. If Import and export is on, above the tile there are Currency settings with Choose a file to import an Excel and a button to export.
- Example
-
A playground sells the token Play token for €1.00, with the popular quantities 5, 10 and 25. Every attraction item costs 2 tokens (Does everything cost the same number of tokens? is set to Yes).
- Related
-
Which features cost money?, How do Tokens work in Jimani?
Keywords: tokens, drink tokens, consumption tokens, drink vouchers, pay with tokens, play tokens, punch card
Related questions - Can I sell drink tokens at an event?
- How do I let customers pay with tokens?
- Can I have more than one kind of token?
- What does paying with tokens cost?
How do I create or change a product?
- Answer
-
Go to Point of sale and products, click the blue plus button and choose Products. On the first page enter the name, the price, the VAT group and optionally the EAN Code and a photo, choose the category and click Save. You change an existing product by clicking it in the Products tab.
- Explanation
-
- Step 1. Open Point of sale and products in the left-hand menu and click the blue plus button (Add) at the top right. In the window What would you like to add, choose Products.
- Step 2. Under Basic details enter the Name (at most 50 characters) and optionally a Description. With multiple languages you do this per language.
- Step 3. Under Price and barcode enter the Price, including VAT, and choose the VAT group. The EAN Code is needed if you work with a scanner.
- Step 4. Optionally add a photo under Image. A product has a photo.
- Step 5. Click Next and choose the Categories the product should be in. There can be more than one.
- Step 6. On the page Parts of this product you use Yes or No to turn on what else you want to fill in: options, extra information, supplements, variants, related products, labels and allergens. What you leave on No is skipped.
- Step 7. Click Next until the last page and choose Save.
- Changing. In the Products tab, click the product. For a quick change of name, VAT group or price, use the pencil (Edit) above the list and change it in the list itself; do not forget the save icon.
- Switching off temporarily. Click the three dots (Actions) behind the product and choose Deactivate. With Activate you put it back. Create a Copy or Send to Trash are in the same menu.
- Stock. You do not manage that in this window, but on the Stocks tab.
- Example
-
You create Cappuccino for €3.20 in the VAT group Low rate and put it in the category Hot drinks. On the page Parts of this product you leave everything on No: the product goes into the shopping cart with one tap.
- Related
-
What can you set for a product?, How does the Point of sale and products screen work?, How do I import or export my products with Excel?
Keywords: add product, create product POS, edit product, change price, switch off product, add item, menu
Related questions - How do I add a new item to the POS?
- How do I change the price of a product?
- Where do I enter the VAT and the barcode of a product?
- How do I add a photo to a product?
How do I create categories and organise my products?
- Answer
-
Go to Point of sale and products > Categories, click the blue plus button and choose Categories. Give the category a name, a description and an image and on the second page choose which products belong to it. A product can be in more than one category.
- Explanation
-
- Step 1. Open the Categories tab in Point of sale and products, or choose the plus button and then Categories.
- Step 2. Enter the Name (at most 50 characters). The name appears at the POS and when reserving.
- Step 3. Add an Image, so you recognise the category at the POS.
- Step 4. Click Next and choose the Products that hang under the category. With the cross you take a product off again.
- Step 5. Click Save.
- Afterwards. For an existing category you can add or remove products on the same page, or on the product itself under Categories.
- Many at once. With Select Excel file and Export categories you read in categories or download them (if Import and export is on).
- Middle layer. If you want another layer below a category, such as Phone › Samsung, see What are subcategories and how do I create them?.
- Example
-
You create the category Drinks with a photo of a glass, hang Cola, Coffee and Tea under it, and also put Coffee in the category Hot drinks.
- Related
-
What can you set for a category?, How do I create or change a product?
Keywords: create category, POS categories, organise products, organise menu, product group, category image
Related questions - How do I divide my products into groups, such as drinks and food?
- Can a product be in two categories?
- How do I create a new section on the POS?
- How do I add a photo to a category?
What are subcategories and how do I create them?
- Answer
-
A subcategory is a middle layer below a category, such as Phone › Samsung and Phone › iPhone. At the POS, after a main category you first see the subcategories as tiles. The Subcategories feature costs €5 per month (excluding VAT).
- Explanation
-
- Step 1. Turn on the Subcategories feature under Settings > Add-ons. The Subcategories tab then appears under Point of sale and products.
- Step 2. First create your main categories. If there is no category yet, the window says: Create a category first.
- Step 3. On the Subcategories tab click Create and give the subcategory a Name. Do not use the characters › and > in the name.
- Step 4. Under Main categories tick where the subcategory belongs. If Samsung has both Phone and Cases as main category, tick both: you create the subcategory once.
- Step 5. For each ticked main category choose the products that fall in the subcategory and click Save.
- Number. Every combination, such as Phone › Samsung, gets its own number. In an import file you can use the combination by name (Main › Sub).
- Deleting. Jimani asks Delete subcategory? and says that the products stay in the main category.
- Example
-
A phone shop has the category Phone with the subcategories Samsung and iPhone. At the POS the employee taps Phone, sees the tiles Samsung and iPhone and then chooses the device.
- Related
-
What can you set for subcategories?, How do I create categories and organise my products?
Keywords: subcategory, subcategories, middle layer category, phone samsung, category under category, main category
Related questions - How do I create a category under a category?
- Can I use main groups and subgroups?
- What do subcategories cost?
How do I import or export my products with Excel?
- Answer
-
First make an export: on the Products tab click Export products. Edit the Excel file, choose it with Choose a file and click the import icon next to it. Jimani recognises existing products by the EAN code, and if that is empty by the name. Import and export is free.
- Explanation
-
- Step 1. Open Point of sale and products > Products. If you do not see the block Select Excel file, turn on the Import and export feature under Settings.
- Step 2. Click Export products. You get an Excel file with all your products.
- Step 3. Edit the file or add lines. At minimum the name, the price and the VAT group (idProductGroup) are needed; the rest may be missing.
- Step 4. Choose the file at Choose a file and click the import icon. Afterwards Jimani says how many lines succeeded and which did not.
- Recognition. If the EAN code of a line already belongs to a product, that product is updated. If the EAN code is empty, Jimani searches on the name. Otherwise a new product is created.
- Empty cells. An empty cell changes nothing: what was there stays. You clear things on the screen.
- Photo. A product has a photo. If the file contains a link to an image, it becomes the photo if the product does not have one yet; if fetching fails, the old photo stays.
- Categories. A line can name categories; an empty cell does not remove the product from its categories.
- Unit. With Price per unit, "piece" sets the product back to per piece. An unknown unit is refused.
- Supplements and related products. These are not in the product file but in a file of their own, under Links per product on the Supplements tab.
- System products. Products that Jimani manages itself (such as Transaction costs) are not updated by the import.
- Other lists too. Categories, supplements, product variants, labels and tags, tables, discounts and stock have the same buttons on their own tab.
- Example
-
You export 120 products, raise all prices by 5% in Excel and import the file again. The products are recognised by their EAN code and get the new price; the rest stays as it was.
- Related
-
How do I create or change a product?, How does the Point of sale and products screen work?
Keywords: import products, export products, excel products, change prices excel, bulk products, import POS
Related questions - How do I put my range into Jimani in one go with an Excel file?
- Can I export all my products to Excel?
- How do I change many prices at once?
- How does Jimani recognise existing products when importing?
How do I create product variants, such as sizes or colours?
- Answer
-
On the Product variants tab, create a variant group with the options, for example Size with S, M and L. Then choose that group on the product, on the page Show product variants?, and enter the EAN Code and the Price per option. Product variants are free.
- Explanation
-
- Step 1. Make sure the Product variants feature is on. The Product variants tab then appears under Point of sale and products.
- Step 2. Click the blue plus button and choose Product variants (or use the tab itself). Give the group a Name of at most 15 characters, for example Size.
- Step 3. Under Number of options choose how many options the group has (up to 50) and give each option a name.
- Step 4. Under All options have same price? choose Yes if everything costs the same. Choose No if, for example, a large size is more expensive; you then enter a price per option.
- Step 5. Under All products have an Ean code? choose Yes if every option has its own barcode.
- Step 6. Open the product, set Show product variants? to Yes and under Select product variant? choose your group. You get a table with Size/name, EAN Code, Price and Active. Switch an option off under Active to take it away temporarily.
- At the POS and in the online store. The guest or employee chooses the variant. The base price and the EAN code are managed per variant option.
- Many at once. With Select Excel file and Export on the Product variants tab you read in groups or download them.
- Example
-
A T-shirt gets the group Size with S, M, L and XL, with its own EAN code per size. When printing labels, each size gets its own line with its own code and price.
- Related
-
What can you set for product variants?, How do I print labels with a price and barcode?
Keywords: product variants, sizes, colours, create variants, variant price, variant ean, choose size
Related questions - How do I sell the same product in different sizes?
- How do I add colours or sizes to an item?
- Can I set a separate price and barcode per size?
- What do product variants cost?
How do I add options or supplements to a product?
- Answer
-
First create the supplements on the Supplements tab and then in the product window set Add product supplements to Yes. You can attach up to three rows of supplements to a product, each with its own title and with the choices Mandatory choice and Multiple choices possible. Supplements are free.
- Explanation
-
- Step 1. Make sure the Supplements feature is on. The Supplements tab then appears under Point of sale and products.
- Step 2. Click the blue plus button and choose Supplements. Give the supplement a Name, a Price (it may also be free) and a VAT group, and click Save.
- Step 3. Open the product and go to the page Parts of this product. Set Do you want to add options to this product? to Yes and Add product supplements to Yes.
- Step 4. On the Supplements page choose the supplements for row 1. If you want a second or third row of choices, for example sauce and topping separately, choose those on the following pages. When creating a product they appear as Option 1, Option 2 and Option 3.
- Step 5. Optionally give each row its own title, for example Choose your sauce.
- Step 6. Under Choice rules set whether the guest has to choose from the row (Mandatory choice) and whether they may tick more than one (Multiple choices possible). That only applies to that row.
- Step 7. Click Save.
- Sold out. If you set a supplement to Sold out, it is no longer shown to the customer.
- Many at once. Under Links per product on the Supplements tab you import and export which supplement belongs to which product.
- At the POS. How the employee chooses the supplements is described in How do I choose supplements or options for a product at the till?.
- Example
-
For a portion of fries you attach the sauce in row 1 (Mayonnaise, Ketchup, Satay sauce; Multiple choices possible on No) and the toppings in row 2 (Onions, Cheese; Multiple choices possible on Yes). The guest sees two choices.
- Related
-
What can you set for supplements?, How do I sell a menu or package for a fixed price (product set)?
Keywords: supplements, extra topping, extras with product, choose sauce, options for product, mandatory choice
Related questions - How do I let the customer choose extra options for a product, such as sauce or topping?
- How do I make a mandatory choice for a dish?
- How many supplements can I attach to a product?
- What do supplements cost?
How do I suggest other products with a product (related products)?
- Answer
-
Open the product you want to suggest something with, set View related products to Yes and on the next page choose the products you offer with it. For those suggested products you can set a lower price of their own in the field Related product price. The Related products feature is free.
- Explanation
-
- Step 1. Make sure the Related products feature is on.
- Step 2. Open the product you want to suggest something with, for example the hamburger. On the page Parts of this product set Do you want to add options to this product? and View related products to Yes.
- Step 3. On the next page choose the products you suggest with it, for example soft drink. You see chosen products in the block Selected products; with the cross you remove one.
- Step 4. Under How the guest chooses, choose: Related products selection and Multiple choices possible. This is how you decide whether the guest may choose one or more.
- Step 5. If you want to offer the suggested product cheaper, open that product and fill in Related product price. That price applies when the product is chosen as a suggestion. The screen says: When you add this product as a related product to another product, you can optionally offer a discount.
- Step 6. Click Save.
- Many at once. Under Links per product on the Supplements tab you import and export which related products belong to which product.
- Example
-
With the hamburger (€9.50) you suggest a soft drink. The soft drink normally costs €2.50, but as a suggestion with the hamburger the Related product price is €1.50.
- Related
-
How do I add options or supplements to a product?, What can you set for a product?
Keywords: related products, suggest product, upsell POS, soft drink with hamburger, put together menu, matching product
Related questions - How do I have a drink suggested with a main course?
- Can I give a cheap price to an extra product that I offer?
- How do I set up upsell or suggestions on a product?
- What does the related products feature cost?
How do I sell by the metre, kilo or litre?
- Answer
-
Turn on the Price per unit feature and under Settings > Point of sale and products > Price per unit choose the unit per product: piece, metre, centimetre, gram, ounce, kilo or litre. The price of the product is then the price per unit, and the POS asks for a quantity. Price per unit is free.
- Explanation
-
- Step 1. Turn on Price per unit under Settings. The line Price per unit then appears under Point of sale and products.
- Step 2. Open Price per unit. You see all your products with Category, Unit and Price per unit. Search or filter on category or unit.
- Step 3. On the product choose the Unit, for example metre. "/ m" appears behind the price.
- Step 4. Type the price per unit, for example €12.00 for a metre of fabric. Every change is saved immediately. The price is between 0 and 99,999.99.
- At the POS. The product asks for a quantity, for example How many metres? You may tap in 2.5 (up to three decimals). The receipt shows 2.5 m × €12.00 and the amount of the line.
- Stock. The stock goes down by the actual quantity.
- In the online store. The guest orders a quantity with decimals.
- Back to per piece. On the product choose piece again.
- Turning off. If you turn the feature off, products with a unit behave as piece; the chosen unit is kept.
- Importing. In an import file, "piece" sets the product back to per piece; an unknown unit is refused.
- Example
-
A fabric shop sells fabric for €12.00 per metre. A customer buys 2.5 metres: the amount is €30.00 and the stock goes down by 2.5 metres.
- Related
-
What can you set for price per unit?, How do I track the stock of my products?
Keywords: price per unit, sell by the metre, price per kilo, per litre, quantity decimals, fabric by the metre, scale
Related questions - How do I sell fabrics by the metre?
- Can I charge products by the kilo or by the gram?
- How do I make the POS ask for a quantity?
- Which units can I choose, such as litre or ounce?
How do I make the POS ask fixed questions with fixed answers (product notes)?
- Answer
-
On the Notes tab, create a question with answers and choose the products the question belongs to. At the POS those products show the button Notes instead of Comments: the employee taps the answer instead of typing. The Product notes feature is free.
- Explanation
-
- Step 1. Turn on the Product notes feature. The Notes tab then appears under Point of sale and products.
- Step 2. Click Create. Under Question type the question, for example Condition of the device (at most 100 characters).
- Step 3. Under Answers type one answer per line, for example New, Used and Faulty. Each answer becomes a button at the POS. You need at least two answers.
- Step 4. Under Products choose the products the question is ready on, or add a whole category with Add all products of a category.
- Step 5. Click Save.
- At the POS. The employee taps the answer and optionally types a comment. It appears on the receipt and the kitchen ticket like a comment.
- Deleting. Jimani asks Delete question? and shows the question.
- Many at once. You can also import notes.
- Example
-
A phone shop creates the question Condition of the device with the answers New, Used and Faulty and attaches it to all products in the category Phone. When ringing up, the employee taps Used, and that appears on the receipt.
- Related
-
What can you set for notes?, What are subcategories and how do I create them?
Keywords: product notes, POS notes, fixed question, condition of the device, replace comment, answer button
Related questions - How do I let employees choose from fixed answers, such as how well done a steak is?
- What is the difference between Notes and Comments at the POS?
- How do I set a fixed question on a product?
- What does the Product notes feature cost?
How do I give a product a label or tag?
- Answer
-
First create the label or tag on the Labels and tags tab and then choose it in the product window. A product can have one label (top left of the photo) and three tags (bottom left). Labels and tags only appear if the Online webshop feature is on.
- Explanation
-
- Step 1. Open Point of sale and products > Labels and tags, click the blue plus button and choose Labels and tags.
- Step 2. Under Type choose whether it is a Label or a Tag and fill in the Explanation, for example New or Vegetarian. That is the text the guest sees.
- Step 3. Choose the Background color and the Text color.
- Step 4. Under Visible in Kiosk? and Show in widget say Yes or No where the badge can be seen, and set Active to Yes. Click Save.
- Step 5. Open the product, on the page Parts of this product set Show labels and tags to Yes and choose the Label and Tag 1, Tag 2 and Tag 3.
- Creating directly. If the label or tag does not exist yet, you create it on that page with Create a new label or Creating Tags.
- Many at once. With Export Labels and Tags and Per product you read them in or download them.
- Adjusting visibility. In the overview you see per badge Visible in webshop and Visible in Kiosk.
- Example
-
You create the label New (green with white text, visible in the widget) and give three products that label. On the tile of those products, New appears at the top left.
- Related
-
What can you set for labels and tags?, What can you set for a product?
Keywords: product label, product tag, new label, vegetarian label, badge on photo, label colour
Related questions - How do I put a label such as New or Promotion on a product?
- How many tags can I attach to a product?
- Why do I not see labels on my products?
- Where do I create labels and tags?
How do I track the stock of my products?
- Answer
-
Turn on the Stock feature and open Point of sale and products > Stocks. There, turn on the Stocks switch for the products you want to track and enter the Available stock. With every sale the quantity goes down, and when it runs out the product is automatically set to sold out. Stock and Suppliers are free.
- Explanation
-
- Step 1. Turn on Stock under Settings > Add-ons. The Stocks tab then appears under Point of sale and products.
- Step 2. Open Stocks. Above the list are the totals: Total stock value (units x purchase price excl. VAT), Average margin, Total sales value and Units in stock.
- Step 3. In the Stocks column turn the switch on for every product you track. With the switch at the top of the column you do it for all products in the list; Jimani first asks whether you want to turn on Track stock for the number of products in the list. It saves immediately.
- Step 4. Click the pencil (Edit), type the quantity under Available stock, optionally adjust the Purchase price, the Price and, with Purchasing, the Minimum stock, and click Save. Jimani books the difference.
- Automatically sold out. With Active stock the product is automatically set to sold out when the stock runs out. It can then no longer be ordered and is no longer shown to the customer.
- Switching off temporarily. Turn on the Sold out switch to block a product directly, or on the product choose Deactivate in the Actions menu.
- Below the minimum. Under Filter choose Below minimum stock to see what you need to reorder. The minimum stock appears in the Minimum stock column as soon as you have Purchasing.
- Products without stock. Tick Show "Inventory Inactive" to see products whose stock you are not tracking yet.
- Many at once. In the Products list, the gear sets Active stock and Minimum stock for several products at once. With Export stock you download the stock (quantities and purchase price) or the Stock settings (minimum and supplier); an import does the reverse.
- Weight and length. With Price per unit the stock goes down by the actual quantity, also with decimals.
- Example
-
You track 24 bottles of wine with a minimum of 6. After every sale the quantity goes down. At 6 the bottle appears in the filter Below minimum stock; at 0 it is set to sold out.
- Related
-
What can you set for stocks?, How do I order from my supplier and book the delivery in?, How do I change multiple products at once?
Keywords: track stock, POS stock, minimum stock, set sold out, stock value, switch off product temporarily, automatic stock
Related questions - How do I keep track of how much I still have in stock?
- Does a product automatically go to sold out when it runs out?
- How do I enter the opening stock?
- What does stock management cost?
How do I record my suppliers and link products to a supplier?
- Answer
-
Turn on the Suppliers feature, open Point of sale and products > Suppliers and click the blue plus button. Enter the supplier's details and then link the Supplier per product, in the product window or for many products at once. Suppliers is free and only works together with Stock.
- Explanation
-
- Step 1. Make sure Stock and Suppliers are on. If you turn on Purchasing, Suppliers is turned on with it.
- Step 2. Open the Suppliers tab and click the plus button. The window Add Supplier has three pages.
- Step 3. On the first page enter the company name, the VAT number and the Chamber of Commerce number, the First name and Last name of your contact, Phone, Email and Invoicing e-mail.
- Step 4. On the second page enter the Website and the address: Address, Addition, Postal code, City, Province, Country and Language.
- Step 5. On the third page optionally add a photo and click Save.
- Linking. Open a product and under Supplier choose the supplier. For many products at once: tick them in the Products list, click the gear and choose Supplier. Or choose the supplier in the Supplier column on the Stocks tab.
- With Purchasing. A supplier then also has Prices on the purchase order (Yes or No), and the Email address is used to send the order.
- Deleting. Click the supplier and choose Delete.
- Example
-
You record Jansen Wholesale with its email address and link the 40 products you buy there. In Purchasing, Jimani creates an order per supplier.
- Related
-
What can you set for suppliers?, How do I order from my supplier and book the delivery in?
Keywords: add supplier, manage suppliers, wholesaler, product supplier, purchasing address, link supplier
Related questions - How do I add a supplier?
- How do I link many products to one supplier at once?
- What does the suppliers feature cost?
- Where do I record the details of my wholesaler?
How do I order from my supplier and book the delivery in?
- Answer
-
Open Settings > Point of sale and products > Stock and purchasing. The Order suggestion tab shows what you need to order; with Create orders you get a draft per supplier that you send. When the delivery arrives, you choose Book receipt and the quantity goes into stock. Purchasing costs €10 per month (excluding VAT), including Warehouse locations, and only works together with Stock.
- Explanation
-
- Step 1. Turn on Purchasing under Add-ons. Stock must be on, and Suppliers is turned on with it.
- Step 2. On each product you order, link a Supplier, an Order quantity (for example a box of 12) and a Minimum stock, and turn on the product's stock.
- Step 3. Open Purchasing. The Order suggestion tops up to above the minimum, in whole order quantities, and takes into account what you have already ordered. A line without a supplier or without an order quantity cannot be ordered and gets an orange message.
- Step 4. Under Order adjust the quantities. Filter on Supplier, Categories or Only below minimum, and click Create orders.
- Step 5. A draft appears per supplier. Click Send to email the supplier. If you cannot email, choose Download PDF, send the PDF yourself and click Set to ordered. Emailing from your own address requires the Own sender feature.
- Step 6. Under Send you can fill in a CC, a Requested delivery date and an Explanation, and choose whether the Prices on the purchase order are shown.
- Step 7. When the delivery arrives, open the order under Purchase orders and click Book receipt. Under Received now enter what has arrived. It goes into stock at the purchase price. If only part has arrived, the status is Partly delivered; if everything has arrived, Delivered.
- Who may book. Booking a receipt requires the right Purchasing book receipt.
- Example
-
Of Cola, 4 bottles are in stock with a minimum of 6 and an order quantity of 24. The suggestion is 24. You create the order, email it to the wholesaler and later book in the delivery of 24.
- Related
-
What can you set for purchasing?, How do I record my suppliers and link products to a supplier?, How do I track stock per place or shelf (warehouse locations)?
Keywords: purchasing, order suggestion, order from supplier, book receipt, purchase order, order quantity, order minimum stock
Related questions - How do I know what I need to reorder from my supplier?
- How do I book a delivery that has arrived into my stock?
- Can I send purchase orders from Jimani?
- What does the purchasing module cost?
How do I track stock per place or shelf (warehouse locations)?
- Answer
-
Turn on Warehouse locations, create your locations on the Warehouse locations tab (for example Shop and Shelf 1A) and set the quantity per location for each product. The stock of a product is the sum of all locations. Warehouse locations costs nothing itself but only works together with Purchasing, which costs €10 per month: €10 in total.
- Explanation
-
- Step 1. Turn on Purchasing and Warehouse locations under Add-ons. Purchasing in turn requires Stock.
- Step 2. Open Point of sale and products > Warehouse locations and click Add location. Give the location a Name (at most 100 characters) and optionally a Barcode that hangs on the shelf.
- Step 3. Click a location to see what is stored there. Under Add product... choose a product, type the Quantity and click Add. You can adjust the Quantity here later.
- Step 4. One of the locations is the default location (with the label default). It applies to the online store and to sales without a fixed location. With Make default you choose another.
- Step 5. Under Which location does the till sell from? choose a location per POS. A sale is deducted from that location. If it runs out, the sale simply goes ahead and the location goes below zero.
- On the Stocks tab. You see the column Stock location and a filter Location. Click in the column to set quantities per location (Quantities per location).
- Changing and deleting. With Change you adjust name or barcode. You cannot delete a location that has stock: first set the quantities to 0 or move them.
- Example
-
You have Shop (2 items) and Shelf 1A (38 items) of a product: the stock is 40. The POS in the shop sells from the location Shop.
- Related
-
What can you set for warehouse locations?, How do I order from my supplier and book the delivery in?
Keywords: warehouse locations, stock per location, shelf, stock location, default location, divide stock
Related questions - How do I track stock per shelf or per shop?
- Can I have a product in stock at several locations?
- What do warehouse locations cost?
- How do I add up the stock of several locations?
How do I print labels with a price and barcode?
- Answer
-
Open Settings > Point of sale and products > Label printing, tick the items, enter how many labels you want under Number of labels and click Print labels. Each label shows the product name, the variant, the price and the barcode. You print on a Brother QL-800 or a Dymo LabelWriter. Label printing is free.
- Explanation
-
- Step 1. Make sure the Label printing feature is on. Under Printer, choose the Brother QL-800 or the Dymo LabelWriter.
- Step 2. Brother: connect the printer to a POS with a USB cable and click Connect printer. Switch off the Editor Lite mode on the printer (hold the button until the light goes out), otherwise it shows up as a USB stick. It works with continuous DK rolls of 12, 29, 38, 50 or 62 mm.
- Step 3. Dymo: under Size, choose the label, or Custom size with a length of 15 to 150 and a width of 10 to 62 mm. The Dymo is attached to the computer you use to open the screen.
- Step 4. Set the layout: Name and price (Stacked or On the same line), Price format, Always the same height, where the name and the price go (Left, Centre or Right), Print barcode too, Digits underneath, and the height of the name, price and barcode and the white margin. The Example label shows the result. Click Save settings.
- Step 5. Search for items by name or barcode and filter by Category, Barcode status or Stock. An item without a barcode gets one with Create barcode; with Create all barcodes you do them all at once.
- Step 6. Enter the quantities under Number of labels, or click Quantities = stock to set the number for each item equal to its stock. Clear selection removes the ticks.
- Step 7. Click Print labels. With a Brother, it prints from the POS it is connected to. With a Dymo, a preview opens with the Print button; when printing, set the margins to zero and the scaling to one hundred percent, otherwise the scanner cannot read the code.
- Many at once. On a computer you can export the list (Export) and import the quantities from a spreadsheet (Import).
- Sizes. An item with sizes produces one line per size, each with its own code and price.
- Example
-
After a delivery of 30 pairs of trousers, you click Quantities = stock for the new items, check the Example label and print 30 labels on the Brother with roll DK-22225 (38 mm).
- Related
-
What can you set for label printing?, How do I create product variants, such as sizes or colours?
Keywords: print labels, price label, print barcode, Brother QL-800, Dymo, label printer, create barcode
Related questions - How do I print price stickers with a barcode?
- Which label printer can I use, Brother or Dymo?
- What does label printing cost?
- How do I create barcodes for my items?
How do I set up a discount on products?
- Answer
-
Go to Point of sale and products > Discounts, click the blue plus button and enter a name, a discount percentage and optionally a period. On the second page, choose the products. Under Apply discount on the till straight away you choose whether the discount comes off immediately (Yes) or stays a button on the bill (No). Discounts are free.
- Explanation
-
- Step 1. Make sure the Discounts feature is on. The Discounts tab then appears under Point of sale and products.
- Step 2. Click the blue plus button. Enter the Name (at most 15 characters) and the Discount percentage (between 0.01 and 100).
- Step 3. Optionally enter Valid from and Valid until (inclusive). If you leave them empty, the discount always applies. The end date counts for the whole day.
- Step 4. Under Apply discount on the till straight away, choose Yes if the discount should come off as soon as you ring up the product, for example for a promotion. Choose No if the employee has to tap the discount themselves.
- Step 5. Click Next and choose the products, per category. With Select all you turn on all products.
- Step 6. Click Save.
- On the POS. Only the discounts that apply today appear on the POS. With No, the discount is a button on the bill. Who may tap it is decided by the POS permission Give discounts; if that is set to No, the POS asks for a PIN code.
- Typing a price yourself. A price you enter by hand takes precedence over a discount.
- Temporary promotions with their own amount or a discount voucher. See How do I create a sale or temporary promotion?.
- Checking. You can see what has been given away in the discount overview, see How do I see how much discount I have given?.
- Example
-
You create the discount Summer with 20% from 1 July until 31 August for all ice creams, with Apply discount on the till straight away set to Yes. In that period every ice cream appears on the POS with 20% off.
- Related
-
What can you set for discounts?, How do I see how much discount I have given?
Keywords: set up discount, discount percentage, discount on products, POS promotion, discount period, activate discount immediately
Related questions - How do I give 10 percent discount on products?
- Can I set up a temporary promotion or happy hour?
- Should the discount come straight off the price on the POS or as a button?
- What do discounts cost?
How do I create a sale or temporary promotion?
- Answer
-
Turn on the Gift voucher feature (€10 per month, excluding VAT) and, on the Gift voucher card under Settings > Add-ons, click the Settings button. Sales and discounts then opens: create a promotion with an amount or percentage, a start and end moment and the products it applies to. A promotion that does not function as a discount voucher is applied automatically on the POS.
- Explanation
-
- Step 1. Click the plus button (Add). In the Sale & discounts window you enter a Name; it is only visible internally.
- Step 2. Leave Functions as a coupon? on No for a normal promotion. On Yes it is a discount voucher with a Coupon code, and then the discount is not applied automatically on the POS.
- Step 3. Choose Start date and Start time, and End date and End time.
- Step 4. Under Discount, choose an amount or a percentage. A percentage is between 1 and 100.
- Step 5. Under Can the discount be combined with other discounts? say Yes or No and optionally give a Discount priority from 1 to 100.
- Step 6. Click Next and tick the products on the pages per category. With Add all products you do everything at once. Click Save.
- On the POS. If a product has more than one promotion, the promotion that gives the highest amount wins; if that is equal, the lowest priority number. A price you type yourself takes precedence over any discount. No promotion is ever applied to a return line.
- A discount the employee gives themselves. Use Discounts for that, see How do I set up a discount on products?.
- Omnibus. Jimani does not show the lowest price of the past 30 days for a promotion, see Does Jimani show the lowest price of the last 30 days for a promotion (Omnibus)?.
- Example
-
You create the promotion Winter sale: 30% off all jackets from Friday 08:00 to Sunday 18:00. In that period the jackets appear on the POS with 30% off, without the employee tapping anything.
- Related
-
What can you set for sales and discounts?, How do I set up a discount on products?
Keywords: sale, temporary promotion, promotional price, coupon code, discount voucher, discount period
Related questions - How do I set up a sale with temporary prices?
- Can I set up a promotion with a start and end date?
- Is a promotional price applied automatically on the POS?
- Where do I find Sales and discounts?
How do I see how much discount I have given?
- Answer
-
Open Settings > Money and figures > Reports and choose the Discount overview tab. Choose a period with From and Until and click Search: you see per discount the date, the receipt number, the item, the amount and who gave the discount, with the total at the bottom.
- Explanation
-
- Step 1. Open the Discount overview tab (the screen is also called Discount overview). The old address still works too.
- Step 2. Choose From and Until, with the calendar or with the minus and the plus, and click Search.
- Step 3. Under Discounts given, look at the columns Date, Order number, Item, Quantity, Discount and By whom. A discount on the whole bill shows the text Whole receipt under Item.
- Step 4. Click the info button behind a line to open the bill (Open order) and see what the discount was on.
- Total. At the bottom is the sum of the discounts in the list.
- Who may see this. The Discount overview permission determines who may open the screen.
- Empty. If nothing has been given, it says: No discount was given in this period.
- Example
-
In July you gave €140 in discounts. In the list you see that €100 of that was on the promotion Summer and €40 was given manually by an employee.
- Related
-
What is on the discount overview?, How do I set up a discount on products?
Keywords: discount overview, discount given, check discounts, who gave discount, discount report, POS discount report
Related questions - How do I see how much discount my staff have given?
- Where do I find an overview of all discounts in a period?
- How do I check who gave a discount on a bill?
Does Jimani show the lowest price of the last 30 days for a promotion (Omnibus)?
- Answer
-
No. Jimani does not automatically store or show the lowest price of the past 30 days next to a promotional price. A discount or promotion you set up subtracts the amount or percentage, but does not add a 30-day reference price.
- Explanation
-
- What Jimani does. Under Discounts and under Sales and discounts you set a percentage or amount, with a period. On the POS that is subtracted from the price. See How do I set up a discount on products? and How do I create a sale or temporary promotion?.
- What Jimani does not do. There is no field or report for the lowest price of the last 30 days, and a promotion does not check whether it complies with the Omnibus rule.
- What you can do yourself. Keep track yourself of the lowest price in the 30 days before the promotion, for example with the export of your products (Export products) that you save before you change a price, and put that price in the text or on the shelf yourself.
- Example
-
You give 20% off a jacket of €100. Jimani shows the jacket on the POS for €80. Whether a price from the last 30 days must also be shown, you keep track of yourself.
- Related
-
How do I set up a discount on products?, How do I create a sale or temporary promotion?
Keywords: omnibus, lowest price 30 days, promotional price, reference price, discount legal, price reduction
Related questions - Do I have to show the lowest price of 30 days with a promotional price?
- Does Jimani comply with the Omnibus directive?
- Does the POS automatically add a reference price to a discount?
How do gift cards work in Jimani?
- Answer
-
With the Gift cards feature (€10 per month, excluding VAT) you create cards with their own card number and balance, choose how long they are valid and always see what is still outstanding. A sold card does not count as revenue but as a liability, until the card is redeemed. That is different from the Gift voucher feature, which also costs €10 per month.
- Explanation
-
- Step 1. Turn on Gift cards under Settings > Add-ons. Then open the screen under Settings > Money and figures > Gift cards and gift vouchers, or with the Settings button on the Gift cards card.
- Step 2. On the Validity tab, choose under Valid for, in months how long a new card is valid (from 1 to 120; twenty-four months is common practice in the Netherlands) and click Save. This applies to cards created after this.
- Step 3. On the Create tab, create a series of cards: enter How many cards (at most five hundred at a time) and the Amount per card. Zero means: the amount is entered at the sale. If you leave Valid until empty, the shop's term applies. Give the series a Description, for example Christmas 2026, and click Create cards.
- Step 4. Before selling, create a product and set Is this a gift card? to Yes on that product. There is then no VAT on it and the amount only counts when the card is redeemed. That question only appears on the product if Gift cards is on.
- Overview. On the Overview tab you see Outstanding balance (which should equal the liability account in your bookkeeping), Cards outstanding and Expired this year. Per card you see the Card number, the Starting balance, the Balance, Valid until, the Status and the Description, with the transactions below.
- Expired. Expired cards are processed automatically every morning. With Process expired cards now you do it immediately. An expired card is released as revenue.
- Card number. A card number has thirteen digits with a check digit, so that a wrongly typed digit is rejected.
- Example
-
For the holidays you create 100 cards of €25 with the description Christmas 2026, valid 24 months. Every card you sell is a liability in your bookkeeping until the customer uses it.
- Related
-
What can you set for gift cards?, How do I create a sale or temporary promotion?
Keywords: gift card, gift cards, gift voucher, gift card balance, store credit, giftcard, sell gift card
Related questions - Can I sell gift cards with a balance?
- What is the difference between a gift card and a gift voucher?
- How do I see how much credit is still on issued gift cards?
- Does a sold gift card count as revenue?
- How long is a gift card valid?
How do I record allergens and cross-contamination for a product?
- Answer
-
Turn on the Allergens (NVWA) feature (€5 per month, excluding VAT; free until 1 January 2027 if you already use it). Then, in the product window, set Show allergies options to Yes and tick on the following pages what is in the product, what it may come into contact with and which dietary characteristics it has. The guest sees this when ordering.
- Explanation
-
- Step 1. Turn on Allergens (NVWA) under Settings > Add-ons. Without this feature the question does not appear on the product and the allergy pages are skipped. The question also does not appear on a free POS for retail or treatments.
- Step 2. Open the product and go to the page Parts of this product. Set Show allergies options to Yes. The screen says: Here you can indicate per product whether the product, for example, may contain traces of nuts, or whether a product is "vegan" or "Halal".
- Step 3. On the Allergens page, tick under Allergies what is in the product. You choose from 44 options, such as Gluten (wheat, rye, barley, oats, spelt), Crustaceans, Eggs, Fish, Peanuts, Soy, Milk, Nuts (almonds, hazelnuts, walnuts and more), Celery, Mustard, Sesame seeds, Sulphites, Lupin and Molluscs.
- Step 4. On the Cross-contamination page, tick under Possible cross-contamination what the product may come into contact with in the kitchen. You choose from 14 lines, such as May contain traces of gluten, May contain traces of nuts and May contain traces of peanuts.
- Step 5. On the Dietary characteristics page, tick what applies, for example Vegetarian, Vegan, Gluten-free, Lactose-free, Halal, Kosher or Organic. There are 27 characteristics.
- Step 6. Click Save.
- What the guest sees. Under Allergens it says: What is in this product. The guest sees this when ordering.
- Turning off. If you set Show allergies options back to No, nothing about allergies appears for that product.
- Example
-
For a nut cake you tick Nuts (almonds), Gluten (wheat), Eggs (hen's egg) and Milk under Allergies, May contain traces of peanuts under Cross-contamination and Vegetarian under Dietary characteristics.
- Related
-
What can you set for a product?, How do I create or change a product?
Keywords: allergens, product allergies, NVWA, cross-contamination, vegan halal, dietary characteristics, allergen menu
Related questions - How do I add allergens to my dishes so guests can see them?
- Can I show cross-contamination and allergies on the menu?
- What does the allergens feature (NVWA) cost?
- Where do I tick that there is gluten or nuts in a product?
How do I take in a repair on the POS?
- Answer
-
On the POS, choose the Repair category in the menu on the left and then Take in repair. Enter the description of the defect, the price, optionally a deposit and the customer's details; the deposit goes on the bill. When the item is collected, you choose Repair pickup and settle the rest. The Repairs feature costs €150 one-off and has no monthly fee.
- Explanation
-
- Step 1. Turn on the Repair feature under Settings > Add-ons. The Repair category then appears on the POS, not on the handheld.
- Step 2. In the menu on the left, choose Repair and tap Take in repair (Defect, price, deposit and customer).
- Step 3. Under Defect and price, enter the Description of the defect (required, at most 1000 characters) and the Price (required). Under Deposit, enter an amount or a percentage of the price, or leave it empty for no deposit. Under Expected ready on, choose a date of today or later; if that is today, also choose Ready at.
- Step 4. Under Customer, enter the Name and the Phone (required: choose the country code and type the number without the 0) and optionally the E-mail. With Find a customer you pick an existing customer. With an email address, the customer receives an email at every step of the repair.
- Step 5. Tap On the receipt. The deposit now goes on the bill; you settle the rest at pickup. The repair gets a number such as R-12.
- Step 6. Under Settings > Till and products > Repairs, set the repair to In repair and later to Ready for pickup. The customer receives an email for each status if there is an email address and the status is set to Send email.
- Step 7. When the customer comes, choose Repair pickup on the POS and search by number, name or phone (R-12, name or phone). Tap the repair: the rest goes on the bill. After payment the repair is set to Picked up.
- Own email text. Under Emails to the customer you set the subject and the text per status, with placeholders such as Customer name and Still to pay. Without your own text, the default text is sent.
- Errors. If something is missing, you get for example Enter the description of the defect or The deposit is not correct: at most the price, or 0 to 100%.
- Example
-
A customer brings in a phone with a broken screen. You take it in for €120 with a €40 deposit. The deposit is on the bill. The customer gets an email when the phone is Ready for pickup and pays the remaining €80 at pickup.
- Related
-
What can you set for repairs?
Keywords: take in repair, POS repair, repair deposit, repair pickup, phone repair, repair status
Related questions - Can I register repairs in the POS?
- How do I ask for a deposit for a repair?
- How do I hand over a repaired product and settle the bill?
- What does the repair feature cost?
How do I assign products to courses?
- Answer
-
First create your courses under Settings > Point of sale and products > Courses and then, in the product window under Courses, choose which course a product is in. The first course of a product is the default course, which the item gets when it is rung up on the POS. The Courses feature costs €10 per month (excluding VAT) and only works together with Restaurant. If you already use Courses, it is free until 1 January 2027.
- Explanation
-
- Step 1. Turn on Courses under Add-ons. Restaurant must be on.
- Step 2. Open Settings > Point of sale and products > Courses. If your shop does not have any courses yet, there are Drinks (send immediately), Starter, Main course and Dessert.
- Step 3. Click Add course for a new course: give a Name, choose a Colour and say Yes under Send immediately for what must go to the kitchen right away, such as drinks. Set Active to Yes.
- Step 4. Drag the lines into the order in which the kitchen makes them. Tap a name to change it.
- Step 5. Open a product. On the first page, under Courses, choose the courses the product is in. A product can be in more than one course. The first one, with the star, is the default course. With Make this the default course you put another one first.
- Turning off. A course that is off can no longer be chosen; products that already have it keep it.
- On the POS and in the kitchen. How the POS shows the bill per course and sends it on is described in How do I send dishes to the kitchen per course from the till?.
- Many at once. In a product file you can set the courses of a product with the Courses column: the names with a | between them, such as Starter|Main course.
- Example
-
The tomato soup is in the Starter course, the steak in Main course. The bar gets Drinks with Send immediately set to Yes, so that order goes out right away.
- Related
-
What can you set for courses?, How do I send dishes to the kitchen per course from the till?
Keywords: courses, starter main course dessert, default course, send immediately, kitchen courses, organise menu
Related questions - How do I set a dish to be a starter?
- Where do I create courses?
- What is the default course of a product?
- Can I use courses without Restaurant?
Can I temporarily turn off a product or mark it as sold out?
- Answer
-
Yes. On the Products tab, click the three dots (Actions) behind the product and choose Deactivate; with Activate you put it back. If you only want to say that it has run out, turn on the Sold out switch on the Stocks tab: the product is then no longer shown to the customer.
- Explanation
-
- Deactivate. Choose Deactivate in the Actions menu of the product. The product is then no longer active. Activate puts it back.
- Sold out. On the Stocks tab, turn on the Sold out switch, or for several products at once: tick them in Products, click the cog and choose Sold out.
- Automatic. If a product has active stock, it is set to sold out automatically when the stock runs out, see How do I track the stock of my products?.
- A size or variant. In the table of variants on the product, turn off the Active column of that variant.
- A supplement. On the supplement, set Sold out to Yes.
- Deleting. If you want to get rid of a product entirely, choose Send to Trash in the same menu.
- Example
-
The fresh cake has run out. You turn on the Sold out switch under Stocks. Tomorrow you turn it off again and the cake is back on the POS and in the webshop.
- Related
-
How do I track the stock of my products?, How do I create or change a product?
Keywords: temporarily turn off product, deactivate product, set sold out, hide product, stop selling
Related questions - How do I temporarily remove a product from the POS?
- How do I set a product to sold out?
- How do I put a deactivated product back?
- Does a sold-out product disappear from the webshop?
How do I find a product with an EAN code or barcode, and can I use the camera?
- Answer
-
Give the product its barcode under EAN Code. On the POS you type a code or part of the name in the search field, or you scan it with a scanner. In the Jimani app on a phone, Sunmi or Mollie Tap handheld, you can use the device's camera under Scan with the camera.
- Explanation
-
- Code on the product. Open the product and enter the EAN Code under Price and barcode (at most 20 characters). With product variants, each option can get its own EAN Code. If an item has no code yet, you create one with Create barcode under Label printing.
- Searching on the POS. The search field on the order screen shows "Search products or EAN code". You search by the name or by the EAN code of a product.
- A scanner. A scanner that types like a keyboard works in the search field: the code appears there. If the cursor is not in a field, fast characters ending with Enter also count as a scan. If the cursor is in a field, the scanner simply types there.
- Camera in the app. In the Jimani app, the search field has the barcode button with the text "Scan an EAN or item number". If the app has a camera, that button opens the app's scanner (EAN-13, EAN-8, UPC, Code128, Code39, QR and more) and the code ends up in the search field. In an ordinary browser nothing changes, and an older app stays as it was.
- Scanning a bill or ticket. In the header there is a camera button for scanning a bill, and the Scan screen registers tickets.
- Importing. In a product file, an existing product is recognised by its EAN code.
- Example
-
Your phone is the POS. You tap the barcode button, point the camera at the bottle and the bottle appears in the search field.
- Related
-
How do I print labels with a price and barcode?, What can you set for a product?
Keywords: search ean code, scan barcode, barcode scanner POS, scan with camera, find product by ean, scan with phone
Related questions - How do I scan a barcode with my phone?
- Can I connect a scanner to the POS?
- How do I quickly find an item by name or code?
How do I sell products with a reservation?
- Answer
-
Put the products you want to sell with a reservation in the POS category Reservation. In the reservation panel you then choose them at the Products step with the minus and the plus. They go on the reservation as a POS bill. A product in the POS category Hospitality can also be made selectable online when booking.
- Explanation
-
- Step 1. Put the products in the POS category Reservation. If there is nothing in it yet, the Products step says: Put products in the POS category Reservation to choose them here.
- Step 2. Open the reservation panel (new reservation or an existing one) and go to the Products step. The products appear as tiles with an image, name, price and a minus and a plus.
- Step 3. Tap the plus for the quantity you want. What is already on the bill you see under Already on the bill.
- Step 4. Save the reservation. What you chose goes on the reservation as a POS bill, with the price, VAT and table from the POS. With products only, there is a Pay button with the total.
- Later more. Choosing more later is a new round. What is already on the bill is never changed; you do that in the POS.
- If it fails. If the reservation exists but the products could not go on the POS bill, you get: The reservation exists, but the products could not be put on the POS bill.
- Products guests choose online. For a product in the POS category Hospitality, the product window has the Reservation page: choose Available online and the reservation types for which guests choose the product. See What can you set for a product?.
- Example
-
For a birthday reservation you choose 2 times Drinks platter. The platter is on the reservation as a POS bill; later the guest pays it.
- Related
-
What can you set for a product?, How do I track the stock of my products?
Keywords: products with reservation, drinks platter reservation, POS bill reservation, reservation category, extra order reservation
Related questions - Can I sell products with a reservation?
- How do I let guests choose food or drinks when booking?
- Where do I put products that belong to a booking?
What do the features for products, stock and discounts cost?
- Answer
-
Most product features are free: product variants, product sets, supplements, discounts, label printing, stock, suppliers, price per unit, product notes and import and export. Paid are Subcategories (€5 per month), Allergens (NVWA) (€5), Purchasing with Warehouse locations (€10), Gift cards (€10), Gift voucher (€10) and Courses (€10), plus Repairs at €150 one-off. All amounts are excluding VAT. Allergens (NVWA) and Courses are free until 1 January 2027 for businesses that already use them; after that they cost the amount given.
- Explanation
-
| Feature | Price |
|---|
| Product variants | free |
| Product set | free |
| Supplements | free |
| Related products | free |
| Discounts (with the discount overview) | free |
| Label printing | free |
| Stock | free |
| Suppliers | free, only works with Stock |
| Price per unit | free |
| Product notes | free |
| Import and export | free |
| Subcategories | €5 per month |
| Allergens (NVWA) | €5 per month, free until 1 January 2027 if you already use it |
| Purchasing (with Warehouse locations) | €10 per month, only works with Stock |
| Gift cards | €10 per month |
| Gift voucher (with Sales and discounts) | €10 per month |
| Courses | €10 per month, only works with Restaurant; free until 1 January 2027 if you already use it |
| Repairs | €150 one-off |
- Turning on. You turn on a feature yourself under Settings > Add-ons. A free feature that has no screen of its own can also be turned on in the Settings list with Yes or No.
- Same price. The price is the same with the free POS and with a subscription.
- More prices. All prices in a row are in the article Which features cost money.
- Example
-
A clothing shop uses product variants, stock, labels and discounts (free) and Purchasing (€10). That is €10 per month, excluding VAT.
- Related
-
How do I track the stock of my products?, How do I order from my supplier and book the delivery in?
Keywords: what does stock cost, subcategories price, purchasing price, gift cards cost, free product features, allergens price
Related questions - Which add-ons for products are free?
- What does an extra feature such as courses or gift cards cost?
- What is the monthly price for subcategories and allergens?
- Which amounts are excluding VAT?
Can a guest order and pay at the table with a QR code?
- Answer
-
Not yet. With the QR codes add-on (€10 per month, only together with the online webshop), every table gets its own QR code that the guest uses to call the waiter. Ordering and paying through that same QR code is not finished yet: the Ordering and payment tab under QR codes has no settings yet. If you want guests to order at the table, turn on Eat here in the webshop widget.
- Explanation
-
- Price and conditions. QR codes cost €10 per month, excluding VAT, and only work together with the online webshop (which is free). Without the online webshop you cannot turn on QR codes. See Which features cost money?.
- Step 1. Go to Settings > Till and products > QR codes. There is also the Buy table QR codes button ("Order QR codes for your tables in our webshop. You can link each QR code to a table later."), but it does not work yet: print the cards yourself (step 4). To set them up, choose Set up next to Set up QR codes. The QR codes page also has the tabs QR codes, Call waiter to table, Show menu and Ordering and payment.
- Step 2. You see all your active hospitality tables. If there are none, it says "There are no active hospitality tables. Create tables first in the hospitality settings."
- Step 3. For each table, turn on Call the waiter, create a Connection key (with the "Create connection keys for all tables" button you do all tables at once) and choose the Point of sale (the receipt printer) where the request is printed. Click Save.
- Step 4. Click Create QR code next to a table. You see a card "Scan to call the waiter" with the QR code and the table. Use the download button to save the card so you can print it.
- What the guest sees. The guest scans the code with their phone and sees "Sending your request", then "Someone is on the way" with their table. If they scan again while the request is still open, it says "We already have your request."
- What you see. On the dashboard you get the notification "Service requested" and on the floor plan the table shows "Waiting for service". If a printer is linked to the table, a receipt "Call waiter to table" is printed. A request is completed when you mark it as handled, or as soon as an order comes in for that table after the request.
- Against misuse. A table can only call again 60 seconds after the previous request. Per device there are at most 6 scans per table and 60 scans in total per 10 minutes.
- If the add-on is turned off. Then the codes that are still on the tables stop working too.
- Ordering yourself at the table. Turn on Eat here in the webshop widget; see How do the delivery and pickup options of the webshop widget work?. A QR code from Widgets (the Link) does not know a table. For the Ordering and payment tab, see What does the Ordering and payment tab do for the QR codes?.
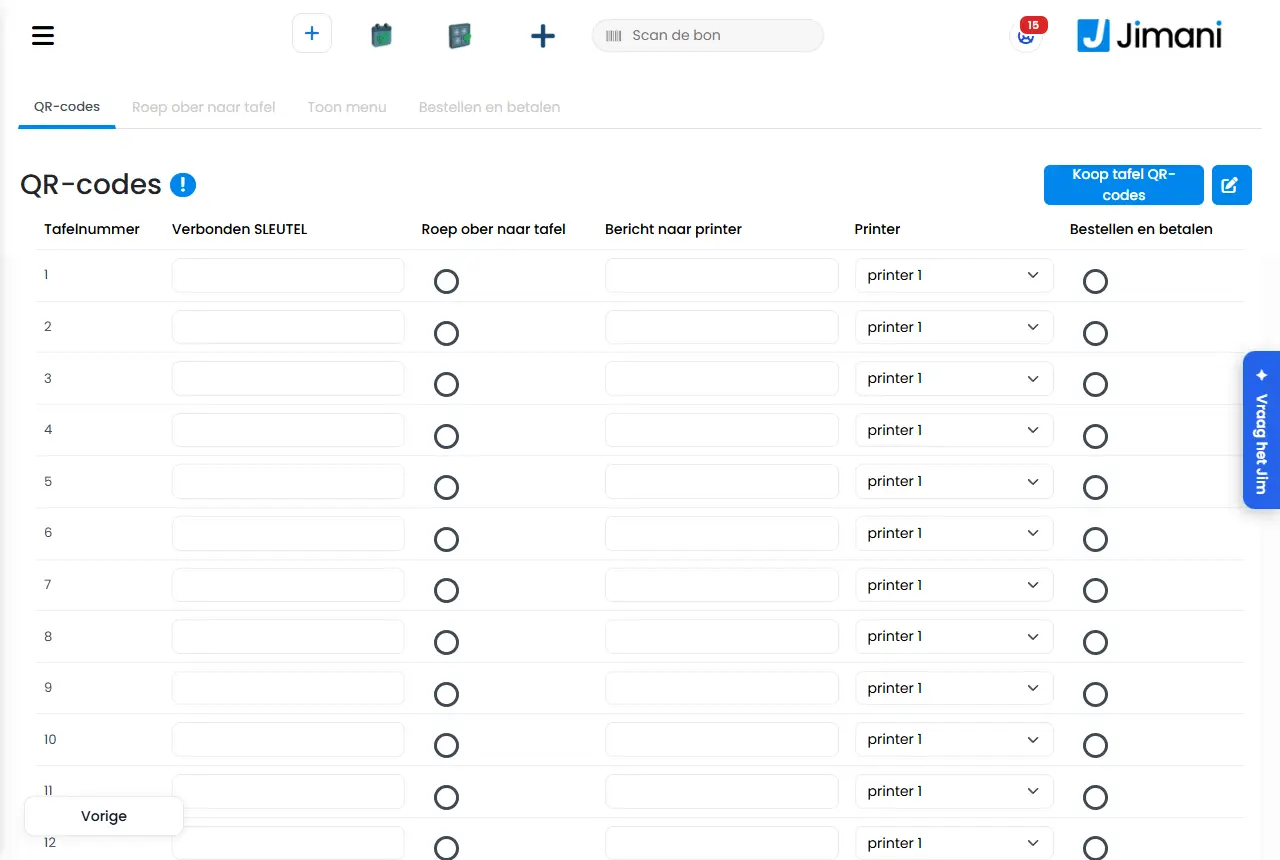
- Example
-
A café turns on QR codes, leaves Call the waiter on for every table and chooses the bar printer. A guest scans the code on table 7; a receipt "Call waiter to table" is printed at the bar and the dashboard shows the notification Service requested for Table 7.
- Related
-
Which features cost money?, How does Set up QR codes work in Jimani?, What does the Ordering and payment tab do for the QR codes?
Keywords: qr code table, call waiter, call server, qr ordering, table qr, qr codes price
Related questions - Can guests order by themselves at the table via a QR code?
- How does a guest call the waiter with a QR code?
- How much does the QR codes add-on cost?
- Can a guest pay via the QR code on the table?
At checkout, under On account, there is the button Own consumption. You choose the Type of consumption (Own use, Staff, On the house or Shrinkage), optionally enter a reason or name and click Book. The receipt closes at zero and does not count as revenue; the stock does go down.
Where to find it: POS > checkout > Own consumption (under On account); also on the handheld
All buttons, settings and messages of this screen
At the top of the POS there is a bar with the buttons that belong to your business. With reservations (Restaurant, Activities, Salon, Ticket sales or Hotel in the POS) these are Create reservation, Reservations, Floorplan, Order and POS. Without reservations they are Order, Order overview or Search order, and POS.
Where to find it: At the top of the POS screen (/WebshopOrder/NewOrder?layout=pos) and on the handheld
All buttons, settings and messages of this screen
In Accounting you set up the link with your accounting package (Exact Online, Twinfield, SnelStart or Odoo), choose which general ledger account belongs to which amount, and see for each day close whether it has arrived in the package. There are three tabs: Sent, Administration and Cash differences.
Where to find it: Settings > Money and figures > Accounting link (the Accounting screen), under Administration and costs. Only with the add-on Accounting link (/Settings/Boekhouding). If it is off, the screen says that Count the cash is not available without the Accounting link and points to Settings > Add-ons
All buttons, settings and messages of this screen
The Own consumption overview shows per year everything you have booked as own consumption: per type, per month and per receipt, with the cost price, the VAT on the cost price and the sales value for info. You can export it to Excel or print it as a pdf.
Where to find it: Settings > Money and figures > Reports, in the POS Financial overview the button Own consumption (/Settings/EigenverbruikFinancialReport)
All buttons, settings and messages of this screen
After Checkout in the cart of the Jimani webshop (Tills and equipment) you fill in your details and the delivery address and choose Place order. You pay via Mollie and then see "Thank you for your order" with your order number. You do not need to log in.
Where to find it: In the Jimani webshop (/Winkel): Cart > Checkout (/Afrekenen)
All buttons, settings and messages of this screen
The Till settings page of a till or handheld has four blocks that apply per device and save immediately: Payment methods on this till, Permissions on this till, Auto-lock and Table name required. This way you can make, for example, a terrace till with only card payments, or a till where giving discounts asks for a PIN.
Where to find it: Settings > Till and products > Registers and hardware, open the till or handheld, Till settings page (/settings/externaldevices)
All buttons, settings and messages of this screen
A till is a connected device: the Jimani app with a pairing code, or a computer that you attach to your business with Link this computer or via /Pos/Koppelen. Employees sign in on it with their PIN on the PIN pad. The cogwheel at the top right opens Settings of this till: language, USB devices, switching employees, logging out, the tiles with settings, Day closing and Product order.
Where to find it: Till > cogwheel at the top right (/Pos/PosSettings); connecting with a code at /Pos/Koppelen; you create pairing codes under Settings > Till and products > Registers and hardware (/settings/externaldevices)
All buttons, settings and messages of this screen
The payment buttons are under the receipt. Depending on the till that is a single Pay Now button with a choice window, or Cash and Pin straight away (or only the payment methods that are on). With Cash the Cash payment window opens with quick amounts, the amount received, what you have to give back and possibly the tip. Pin, Pin (external) and Pay other have no window and book the outstanding amount immediately.
Where to find it: Till > under the receipt (/WebshopOrder/NewOrder?layout=pos); you set how the buttons are arranged under Settings > Till and products > Registers and hardware, open the till, Till settings page
All buttons, settings and messages of this screen
The till screen has the categories and the search box on the left, the product tiles in the middle and on the right the receipt with the buttons below it: Comments (or Notes), Miscellaneous, Other and the trash, and below that the payment buttons. At the top are the logo (double tap opens the drawer), the menu, Scan the receipt and the cogwheel for the settings of this till.
Where to find it: Menu Till (/WebshopOrder/NewOrder); on a connected till in the till layout (/WebshopOrder/NewOrder?layout=pos)
All buttons, settings and messages of this screen
The Tables window opens with the Tables button next to the payment buttons. In it you choose a table, create a New table, search and filter tables, and with the Restaurant integration you check in guests there (Reservations) or make a reservation (Book). Only one device at a time is on a table; the till reports who has it open.
Where to find it: Till > Tables (/WebshopOrder/NewOrder)
All buttons, settings and messages of this screen
The POS settles with Cash, Card, Card payment (external), Tap to Pay, Pay other, On account and (for refunds) Gift voucher. After payment a till receipt (customer receipt) can be printed and the kitchen ticket goes to the kitchen; there are also the card receipt, the credit receipt, ticket receipts, the slip for Cash and the X and Z reports of the day closing.
Where to find it: POS > the payment buttons (/WebshopOrder/NewOrder); which payment methods are on a POS: Settings > Till and products > Tills and equipment, open the POS, Payment methods on this till
All buttons, settings and messages of this screen
At the top of the handheld is a menu with Book, Floorplan (with Restaurant), POS, Reservation, Check in/Check out and Log out. The logo opens the Settings window. From Book you see today's reservations and create or change one; POS opens the POS screen. For a reservation from a module that still uses the old screen, you settle on the handheld in the old order screen.
Where to find it: On the handheld: the menu at the top (/Handheld/ReservationsList, /Handheld/Floorplan, /WebshopOrder/NewOrder); in a salon, Today's appointments (/KassaAfspraken/Handheld)
All buttons, settings and messages of this screen
On Orders you see what was ordered on a given day. With the Restaurant integration, the rounds of the tables and the separate POS sales are under Tables & POS, with filters for date, table, status and employee; with the online webshop, the webshop orders are under Pickup/delivery. Tapping a line shows the order.
Where to find it: Menu Order (/webshoporder); in the POS, Order in the bar at the top (/webshoporder?layout=pos)
All buttons, settings and messages of this screen
With the free Waste and Waste overview integrations you book products that have to go (expired, damaged, spoiled or a preparation error) on the Book as waste screen, with a reason. They are deducted from stock without revenue. In the Waste overview you see per period what was thrown away, with the value at selling price and at cost price. Own consumption (staff, private, free) you book at the POS.
Where to find it: Settings > Till and products, under Own use and waste (/WebshopOrder/WasteOrder); the overview under Settings > Money and figures > Reports, tab Waste overview (/WebshopOrder/WasteOverview)
All buttons, settings and messages of this screen
Under Connected devices are all your POS screens, handhelds, tablets, phones, kitchen screens, kiosks, receipt printers, cash drawers, buzzers and card terminals, as tiles. Here you pair new devices and open a device to set it up.
Where to find it: Settings > Till and products > Tills and equipment (/Settings/externaldevices).
All buttons, settings and messages of this screen
Open the device under Connected devices. You set the name, which printer, drawer, kitchen screen and card terminal belong to it, how settling works and what the POS shows and plays. For a POS screen the window has two pages: the first for the devices connected to it, the second for the Till settings.
Where to find it: Settings > Till and products > Tills and equipment, click the device (/Settings/externaldevices).
All buttons, settings and messages of this screen
Open the printer under Connected devices. You choose whether it is for Till receipts or Kitchen tickets, how it is connected (USB or IP address), which cash drawer belongs to it and what is on the receipt. A kitchen printer additionally has products, a language, a content and an order. You also adjust the text of the receipt in the Receipt Settings window.
Where to find it: Settings > Till and products > Tills and equipment, click the printer (/Settings/externaldevices). Receipt Settings also opens from the orange warning on the dashboard if there is no logo, header or footer.
All buttons, settings and messages of this screen
Open the kitchen screen under Connected devices. You give it a name, choose which products appear on it and save display preferences: dark or light, what appears on the cards, the colour of a supplement and after how long you show the preparation time.
Where to find it: Settings > Till and products > Tills and equipment, click the kitchen screen (/Settings/externaldevices).
All buttons, settings and messages of this screen
You set up a self-order kiosk with a name, the widget it shows, a screen saver, a background and the text on its receipt. A Mollie card terminal and a Tap have no IP address: they appear in the list by themselves as soon as Mollie is connected, and you only open them to change the name or view the card payment plan.
Where to find it: Settings > Till and products > Tills and equipment, click the device (/Settings/externaldevices).
All buttons, settings and messages of this screen
Under Day closing you see all closings of your POS, make a closing yourself, set up the automatic closing and the email, and as the owner fetch the POS audit file and the cash register journal. A closing always starts where the previous one ended.
Where to find it: Settings > Money and figures > Day closing (/Settings/DayClose).
All buttons, settings and messages of this screen
Under Count the cash, after the day closing you enter how many notes and coins are in each cash drawer. Jimani shows next to it what the POS expects and books the difference as a cash difference. A difference always requires an explanation.
Where to find it: The screen opens automatically after a manual day closing if the cash is counted (/Settings/Kastelling). Later you find it via Settings > Money and figures > Accounting link > Cash differences (only with the Accounting link add-on). If it is off, a screen opens instead that says Count the cash is not available without the Accounting link, with a button Go to Add-ons (Settings > Add-ons).
All buttons, settings and messages of this screen
Under Tokens you set up your business's one token: what it is called, what it costs, how many tokens an item costs and which quantities and discounts customers can choose. The screen only appears if the Pay with tokens add-on is on.
Where to find it: Settings > Money and figures > Pay with tokens (/Settings/Munten).
All buttons, settings and messages of this screen
The kitchen screen is a screen of its own on a paired device. At the top are the tabs and the buttons Hold and Light or dark, below that is a card per order. If the device is not paired, you see This screen isn't linked yet.
Where to find it: On the kitchen screen itself (/Kitchen/Kitchen). You pair it under Settings > Till and products > Tills and equipment.
All buttons, settings and messages of this screen
The Jimani webshop is the shop in your dashboard where you order POS screens, printers, cash drawers, kitchen screens, card terminals and other equipment. You choose items, put them in the cart and check out. Prices are excluding VAT.
Where to find it: Settings > Add-ons, under the category Devices and POS the link Buy equipment in the Jimani webshop (/Winkel). You also get there via the tile View our hardware under Connected devices, or with "Jimani webshop" under Search for a setting….
All buttons, settings and messages of this screen
Under QR codes you set up, per table, a QR code with which a guest can call the waiter. You choose the tables, create the address of the QR code, choose a point of sale (printer) and save. The guest then sees a simple Service page.
Where to find it: Settings > Till and products > QR codes, click Set up (/QRCode/QRCodeSetup). The QR codes add-on must be on (€10 per month, only with the online webshop).
All buttons, settings and messages of this screen
Use the scan screen to check a ticket or reservation at the door. You scan the code with a handheld scanner or the camera, or type it in, and you immediately see green (Valid) or red (Refused) with the reason. The screen fills the whole device, without a menu.
Where to find it: Menu > Scan (/Scan). The button only appears if the Scanner add-on is on and your module allows scanning.
All buttons, settings and messages of this screen
Point of sale and products is the screen where you manage your products, categories and everything around them. You open it via Point of sale and products in the left-hand menu. Which tabs appear at the top depends on the features you have turned on.
Where to find it: Point of sale and products in the left-hand menu (/Webshop)
All buttons, settings and messages of this screen
The Product window is a step-by-step window with Previous, Next and Save. The first page holds the basics: name, description, EAN Code, price, VAT group and photo. The later pages (options, extra information, labels, variants, supplements, allergens) only appear if you turn them on on the page Parts of this product.
Where to find it: Point of sale and products > blue plus button > Products (new), or click a product in the Products tab (edit)
All buttons, settings and messages of this screen
On the Products tab you use the pencil (Edit) to switch the list to edit mode, tick the products, and use the gear to choose which property you want to change for all of them. You can change five things at once: Active stock and Minimum stock, Sold out, Supplier, VAT group and the question whether you want to add options.
Where to find it: Point of sale and products > Products > pencil > tick products > gear (Mass product change)
All buttons, settings and messages of this screen
A category is a group of products on your menu, such as Drinks or Main courses. You manage them on the Categories tab of Point of sale and products. A category has a name, a description, an image and the products that belong to it.
Where to find it: Point of sale and products > Categories (/Webshop), new via the blue plus button > Categories
All buttons, settings and messages of this screen
A subcategory is a middle layer below your categories, such as Phone › Samsung. You create it once and tick the main categories it belongs under. The Subcategories feature costs €5 per month (excluding VAT).
Where to find it: Point of sale and products > Subcategories (/Subcategorieen), new with the Create button
All buttons, settings and messages of this screen
A supplement is an extra choice the guest gets with a product, such as a size or an extra topping, with its own price or free. You manage them on the Supplements tab of Point of sale and products and then attach them to a product. The Supplements feature is free.
Where to find it: Point of sale and products > Supplements (/Webshop), new via the blue plus button > Supplements
All buttons, settings and messages of this screen
A product variant group is a short list of options of the same product, such as the sizes S, M and L. You create the group once on the Product variants tab and then choose it on a product. The Product variants feature is free.
Where to find it: Point of sale and products > Product variants (/Webshop), new via the blue plus button > Product variants
All buttons, settings and messages of this screen
A product set is a fixed menu for a fixed price, for example a Kids' menu. The guest chooses one product per layer and always pays the set price. The Product set feature is free. You create a set via the blue plus button > Product set.
Where to find it: Point of sale and products > blue plus button > Product set (/Webshop); you open an existing set in the Products tab, where it has a blue label Product set
All buttons, settings and messages of this screen
A label or tag is a small badge next to a product's photo, such as New or Vegetarian. A label sits at the top left of the photo, a tag at the bottom left. You can choose one label and three tags per product. You manage them on the Labels and tags tab.
Where to find it: Point of sale and products > Labels and tags (/Webshop), new via the blue plus button > Labels and tags
All buttons, settings and messages of this screen
A note is a fixed question with fixed answers that you attach to products, such as Condition of the device with the answers New, Used and Faulty. At the POS you tap the answer instead of typing. The Product notes feature is free.
Where to find it: Point of sale and products > Notes (/Productnotities), new with the Create button
All buttons, settings and messages of this screen
With Price per unit you choose the unit per product, such as metre, kilo or litre. The price of the product is then the price per unit and the customer orders a quantity with decimals. Every change is saved immediately. The feature is free.
Where to find it: Settings > Point of sale and products > Price per unit (/PrijsPerEenheid)
All buttons, settings and messages of this screen
On the Stocks tab you see per product how much is in stock and what it is worth. You turn stock on or off per product, adjust quantities and prices and import or export the stock. The Stock feature is free.
Where to find it: Point of sale and products > Stocks (/Settings/Stocks)
All buttons, settings and messages of this screen
Under Suppliers you record who you buy from, with the details that end up on a purchase order. You then link products to a supplier for a clear purchasing overview per supplier. The Suppliers feature is free and only works together with Stock.
Where to find it: Point of sale and products > Suppliers (/Supplier)
All buttons, settings and messages of this screen
Under Purchasing you order from your suppliers via Jimani and book the delivery into stock. The screen has two tabs: Order suggestion and Purchase orders. The Purchasing feature costs €10 per month (excluding VAT), including Warehouse locations, and only works together with Stock.
Where to find it: Settings > Point of sale and products > Stock and purchasing (/Inkoop)
All buttons, settings and messages of this screen
With warehouse locations you track stock per place, for example Shop and Shelf 1A, with its own quantity per location for each product. The stock of a product is the sum of all locations. Warehouse locations costs nothing itself, but only works together with Purchasing (€10 per month, €10 in total).
Where to find it: Point of sale and products > Warehouse locations (/Magazijnlocaties)
All buttons, settings and messages of this screen
On the Label printing screen you choose items, say how many labels you want of each and print them. Each label shows the product name, the variant, the price and the barcode. You print on a Brother QL-800 or on a Dymo LabelWriter. Label printing is free.
Where to find it: Settings > Point of sale and products > Label printing (/Etiketten/Index)
All buttons, settings and messages of this screen
On the Discounts tab you create a discount with a name, a discount percentage, a duration and the products it applies to. You choose whether the discount is deducted at the POS straight away or stays as a button on the receipt. The Discounts feature is free.
Where to find it: Point of sale and products > Discounts (/Webshop), new via the blue plus button
All buttons, settings and messages of this screen
On the Sales and discounts screen you create a temporary promotion: a discount in euros or percent on chosen products, between a start moment and an end moment. A promotion that does not serve as a coupon is applied automatically at the POS. The screen belongs to the Gift voucher feature (€10 per month, excluding VAT).
Where to find it: Settings > Add-ons, button Settings on the Gift voucher card (/Settings/SalesAndDiscounts); if Gift cards is off, also via Settings > Money and figures > Gift cards and gift vouchers. New with the plus button (Add)
All buttons, settings and messages of this screen
The Discount overview shows all discounts you have given in a period you choose yourself: on which receipt, on which item, how much and by whom. That way you can always check where the money went. It is free with the Discounts feature.
Where to find it: Settings > Money and figures > Reports > tab Discount overview (/Kortingsoverzicht/Index)
All buttons, settings and messages of this screen
On the Gift cards screen you create gift cards with their own card number and balance, see what is outstanding and set how long a card is valid. The screen has three tabs: Overview, Create and Validity. The Gift cards feature costs €10 per month (excluding VAT).
Where to find it: Settings > Money and figures > Gift cards and gift vouchers (/Settings/Cadeaukaarten), or the button Settings on the Gift cards card under Settings > Add-ons
All buttons, settings and messages of this screen
On the Repairs screen you see all repairs of your business with their status, change that status and set up the emails to the customer. You accept and hand back repairs at the POS. The Repair feature costs €150 one-off and no monthly fee.
Where to find it: Settings > Point of sale and products > Repairs (/Reparaties)
All buttons, settings and messages of this screen
Under Courses you create the courses of your menu, such as Starter and Main course, in the order in which the kitchen makes them. Then on each product you set which course it belongs to. The Courses feature costs €10 per month (excluding VAT) and only works together with Restaurant. If you already use Courses, it is free until 1 January 2027.
Where to find it: Settings > Point of sale and products > Courses (/Settings/WebshopCourses)
All buttons, settings and messages of this screen
On the Tables tab you create parking tables: tables on which you park an order until it is paid. On the Opening hours tab you enter, per day, the opening hours for your online orders. Both are under Point of sale and products and only appear if the related feature is on.
Where to find it: Point of sale and products > Tables and Point of sale and products > Opening hours (/Webshop)
All buttons, settings and messages of this screen
A VAT group is a group that products fall under. The group determines which VAT rate applies. You create groups in Settings > Point of sale and products > VAT group, on the VAT group tab, and choose one for each product. VAT groups are free.
Where to find it: Settings > Point of sale and products > VAT group > tab VAT group (/settings/vatsetup)
All buttons, settings and messages of this screen
Hospitality / Reservations
Hospitality / Reservations
- What
- Jimani's reservation system lets guests book a table online at a restaurant, with online deposits, an automatic confirmation email and the option to combine a table, activity and ticket in one booking. Reservations share the same database as the POS, webshop and ticketing.
- Who it is for
- Hospitality businesses and their guests.
- Core features
-
- Online table reservation via a booking widget on your own website
- Combination reservation: table, activity and ticket in one booking
- Online deposit or prepayment when booking
- Guests can change or cancel their own reservation
- Automatic confirmation email with PDF and calendar file (iCal)
- Warning when booking an already occupied table, with the deliberate choice recorded
- Price
- No monthly fee (pricing decision 14-10-2026). See "What does Jimani cost?".
- Difference from competitors
- Lightspeed offers reservations only through a separately purchased add-on or an integration with a third party. unTill has no built-in reservation module in its core price and integrates with external systems such as Formitable or Guestplan. Jimani has reservations natively in the same system, without a separate licence or integration.
Keywords: hospitality reservation system, online table reservation, restaurant booking software, restaurant booking widget
Related questions - Does Jimani have a built-in reservation system, or do I have to connect one separately?
- Can I arrange a table, activity and ticket in one booking with Jimani?
- What does the reservation system cost per month?
Online table reservation
- What
- Guests book a table themselves online via the hospitality business's website, with a time and table size of their choice.
- Who it is for
- Hospitality businesses and their guests.
- How it works
- A booking widget shows available times and table sizes; the reservation is recorded immediately through a command in the reservation system. If a guest (or staff member) books a time at which a table is already occupied, since 14-09-2026 the system responds with a warning instead of a silent overwrite: the guest widget refuses the booking, while a staff member at the POS or dashboard gets a warning and can deliberately continue.
- Difference from competitors
- No public comparison material found that was checked here. Jimani has reservations natively in the same system, without a separate integration.
Keywords: online restaurant reservation, table reservation website, hospitality reservation system
Related questions - How does online booking at a restaurant work with Jimani?
- Can I, as a guest, choose my own time and table size?
- What happens if a guest tries to book a table that is already occupied?
Combination reservation (table, activity and ticket in one booking)
- What
- A guest can combine a table, an activity and a ticket in one booking, for example dinner plus bowling or dinner plus a show.
- Who it is for
- Hospitality businesses that also offer activities or events.
- How it works
- Three separate commands (for hospitality, activity and ticketing) are linked through one shared combination identifier, so that after booking one part the guest is automatically passed on to the next. The booking remains one coherent process for the guest, even though it touches three separate modules in the underlying data.
- Difference from competitors
- None of the three competitors examined combines reservations, table, activity and ticketing in one system with a shared booking — at Lightspeed, unTill and SumUp this requires separate products or integrations between separate systems.
Keywords: combination reservation, book table and activity, combine dinner and ticket
Related questions - Can I arrange a table, activity and ticket in one booking with Jimani?
- How is this different from booking separately in separate systems?
Changing or cancelling a reservation yourself
- What
- Guests can change or cancel their own reservation online, without calling the business owner.
- Who it is for
- Guests of hospitality businesses.
- How it works
- A change or cancel command in the reservation system is linked to a screen in the guest widget. The guest does not need an account for this: the cancel screen identifies the reservation through a `key` and a secret `secretkey` that are parameters in the link — the same link the guest receives in their confirmation email. In the template of that email you place those links with the tags {ChangeWidget} (change) and {CancelWidget} (cancel).
- Difference from competitors
- No public comparison material found on guests changing reservations themselves at Lightspeed, unTill or SumUp specifically.
Keywords: change reservation, cancel reservation, edit reservation yourself
Related questions - Can a guest change or cancel their own reservation?
- Does a guest need an account to change their reservation?
Booking via AI (do not use for marketing claims until public availability is confirmed.)
- What
- A separate command structure exists for creating reservations from an AI channel, but no public access to this feature was found.
- Who it is for
- Cannot be determined yet.
- How it works
- A separate command marks a reservation as created by AI, with no further public integration in the code examined. This means the feature currently cannot be presented as something a guest can use today.
- Difference from competitors
- Cannot be assessed as long as the feature is not publicly confirmed.
- Note
- do not use for marketing claims until public availability is confirmed.
Keywords: AI booking, ChatGPT reservation, book via chatbot
Related questions - Can I book a table at a Jimani restaurant via ChatGPT or an AI assistant? *(feature exists in the code, public availability not confirmed)*
Upsell products for a reservation or booking
- What
- A business owner can set up separate upsell products (name, price, VAT, product group) that are offered to guests while booking a reservation or activity.
- Who it is for
- Hospitality, activity and salon businesses.
- How it works
- Each upsell product is separate from the regular POS products, with its own price and VAT rate, and can be switched on or off per module (hospitality, activities, salon). For activity reservations, the chosen upsell products are linked to the reservation.
- Difference from competitors
- No public comparison material found on built-in upsell products when booking at Lightspeed, unTill or SumUp specifically.
Keywords: upsell reservation, booking add-on sales, extra products with appointment
Related questions - Can I offer guests extra products while they book a reservation?
- Does upsell work the same for hospitality, activities and salon?
Integration with unTill
- What
- Jimani has its own integration with unTill: tables and sales areas from unTill are synchronised, and Jimani reservations are linked to unTill table numbers and transactions.
- Who it is for
- Hospitality businesses that already use unTill as their POS system and want to use Jimani for reservations.
- How it works
- Through a separately configurable integration (`CompanyPlugin`), Jimani retrieves the sales areas and tables from unTill and keeps them synchronised with its own table and room layout. A reservation made in Jimani stores the unTill table number and the associated transaction, so both systems refer to the same table.
- Difference from competitors
- This qualifies the earlier picture in the Jimani vs unTill comparison articles that unTill is purely a competitor: for the POS side, a business owner can keep using unTill and use Jimani alongside it for reservations, thanks to this integration.
Keywords: unTill integration, unTill link, Jimani alongside unTill, synchronise unTill tables
Related questions - Can I use Jimani for reservations if I already have unTill as my POS system?
- Are tables synchronised automatically between Jimani and unTill?
Switching between modules on the same POS
- What
- One POS device remembers which module is active (hospitality, webshop, salon, activities, ticketing) and adapts the menu accordingly; a user can switch this themselves via a dropdown.
- Who it is for
- Business owners who combine multiple modules on the same POS device.
- How it works
- The active module is remembered for thirty days per device/user. If the POS is on the hospitality module, the shared POS screen shows the reservation menu and the table floor plan; with another module the corresponding menu appears. Without a valid, known module the system falls back to the company's own main module, so the POS never gets stuck in the wrong menu.
- Difference from competitors
- No public comparison material found on a comparable shared POS interface that can be switched per module at Lightspeed, unTill or SumUp specifically.
Keywords: switch module POS, POS to reservation screen, switch hospitality webshop salon
Related questions - Can I switch on the same POS between, for example, booking and just taking payment?
- Does the POS remember which module I used last?
Attachments and change history for a reservation
- What
- Files can be linked to a reservation, and every change to the reservation is recorded with who made the change and when.
- Who it is for
- Hospitality businesses and their staff.
- How it works
- An attachment has a name, the file itself and a creation date, linked to one specific reservation — for example for a signed contract with a group booking or a special request by email. Separately, for every change to a reservation the system records a line with what changed, by whom and when, so that a staff member can see afterwards what happened to a reservation.
- Difference from competitors
- No public comparison material found on attachments and a change history per reservation at Lightspeed, unTill or SumUp specifically.
Keywords: reservation attachment, link file to booking, reservation change history, reservation audit trail
Related questions - Can I link a file (for example a contract) to a specific reservation?
- Can I see who changed a reservation and when?
Setting up your own booking fields, including dynamic fields
- What
- A business owner puts together extra fields for the booking form (for example a dietary requirement, a question about children, or a comments field), with its own type, required/optional, and visibility.
- Who it is for
- Hospitality, hotel and activity businesses.
- How it works
- Each field has a name, a type, choice options (for a choice field), a help text, and settings for whether the field is required, publicly visible, and whether it is shown in list overviews. A field can also be made **dynamic**: it then only appears when another field (the "main field") has a specific answer — for example a field "Number of children" that only appears when "Are children coming along?" is answered yes. A field can also be set to appear only when drawing up a quotation, not for a regular booking.
- Difference from competitors
- No public comparison material found on a comparable dynamic, conditional form mechanism at Lightspeed, unTill or SumUp specifically.
Keywords: own booking fields, dynamic field reservation, conditional form field, customise booking form
Related questions - Can I add extra fields to the booking form myself?
- Can a field appear only depending on the answer to another field?
- Can a field appear only for a quotation, not for a regular booking?
In what order does a guest go through a combination reservation?
- How it works exactly
- The order of steps in a combination booking (for example first table, then activity, then ticket) is set separately per combination by the business owner, not hardcoded in one fixed order for all businesses.
- Rules
- - Each combination has its own navigation list that determines which step comes after which. - The navigation is retrieved per language, so that step names are shown in the guest's own language. - A guest goes through the steps in the order set by the business owner, not in an order fixed by Jimani.
- Edge cases
- No rollback or compensation logic was found for a combination booking abandoned halfway, or for a part that turns out to be no longer available during booking — input from Martijn is needed to confirm how this is handled in practice.
Keywords: combination booking order, steps combination reservation, navigation table activity ticket
Related questions - Do I decide myself in what order table, activity and ticket are booked in a combination?
Can I book combinations with different times and my own order? (how the times of the individual parts relate to each other within that order has not been investigated beyond the navigation itself — input from Martijn is needed for more detail.)
- Answer
- Yes, the order of steps in a combination booking (for example first table, then activity, then ticket) is set separately per combination by the business owner.
- Explanation
- Each combination has its own navigation list that determines which step comes after which, and retrieves the matching step names in the guest's language. So there is no fixed order imposed by Jimani: the business owner decides how the combination of table, activity and ticket is run through.
- Example
- A restaurant with an adjacent bowling alley sets it up so that guests first book a table and then a time slot for bowling, in that order.
- Note
- how the times of the individual parts relate to each other within that order has not been investigated beyond the navigation itself — input from Martijn is needed for more detail.
Keywords: combination booking own order, table activity ticket order, combination times
What is on a guest's customer card?
- Answer
-
The customer card shows everything a guest did with you, across all your modules: their contact details, the number of visits, reservations and orders, the revenue, the number of no-shows, the most purchased items and a timeline of every visit. You open it under Search with the button with the people icon next to the guest.
- Explanation
-
- Step 1. Go to Search (or Settings > Guests and bookings > Search guests and reservations) and choose the tab Guests.
- Step 2. Search by name, address, email or phone and choose a period. The quick choices are Today, Yesterday, Last 7 days, Last 30 days, This month and Last month.
- Step 3. Click the button with the people icon next to the guest. The customer card opens.
- Block Customer. The email address, the phone and the address, and six tiles: Visits, Reservations, Orders, Revenue, No-shows and Last visit. If the guest is a walk-in, it says Walk-in: doesn't count as a regular customer.
- Block Items. The items the guest bought most, with the quantity and the amount.
- Block Timeline. Every visit and every order, newest first, with the date, the time, the module, the amount, what was booked, the number of people, the payment method and the status. Cancelled reservations and no-shows are shown in red. If there is nothing yet, you see Nothing yet.
- Over all time. The customer card looks at all visits ever, not only at the period you chose in the list.
- One customer is one email address. If a guest has booked several times under the same email address, everything is on one customer card. Walk-ins (and guests with the business's own email address) are kept separate and get one card per guest.
- In a reservation. If you open a reservation, in Reservation information you also see the number of visits, the previous time with the table and the other information about the guest.
- Hiding. Do you not see all the details? An owner can hide guest fields per role; see How do I hide guest details from employees?.
- Costs. The customer card is part of Search and costs nothing extra. Customer CRM, which turns on customers on account, is a separate add-on of €20 per month (excl. VAT).
- Example
-
A guest calls to book. You search for their name, open the customer card and see that they have been five times, did not show up once and usually come with six people. You note that in the internal memo of the new reservation.
- Related
-
How does the Guests and reservations screen work?, How do I export a guest's data?
Keywords: customer card, customer history, guest history, guest visits, guest no-shows, view customer details, customer crm
Related questions - How do I see how often a guest has been to my business?
- Where do I see how much a customer has spent?
- Can I see how often a guest was a no-show?
- What do I see on a customer's card?
How do I search for a guest or a reservation?
- Answer
-
Go to Search. Type a name, address, email or phone number, choose a period and a module, and choose the tab Guests or Reservations. With the button with the people icon you open a guest's customer card.
- Explanation
-
- Step 1. Open Search in the menu, or Settings > Guests and bookings > Search guests and reservations.
- Step 2. For the module choose All modules, one of your modules or Tills and webshop. This way you search across reservations, appointments, tickets and orders at the same time.
- Step 3. Choose the period with From and Up to and including, or with a quick choice (Today, Yesterday, Last 7 days, Last 30 days, This month, Last month). Without dates you see the last 30 days.
- Step 4. Under By name, address, email or phone type what you know and choose Search. Turn on Exclude walk-ins to leave out guests without details.
- Tab Guests. One line per customer, with Total visits, First arrival, Last visit, Avg. group size, Revenue and No-shows. One email address is one customer.
- Tab Reservations. One line per reservation or order, with among other things Arrival date, Time, Module, Reservation type, Status, Quantity, Name, Amount and Payment method.
- Sorting, paging and columns. Click a column heading to sort. With Previous page and Next page you page through the 25 lines per page. With Columns you choose which columns you see; your browser remembers that choice.
- To Excel. With Export you put all rows of the list in an Excel file, not only what is on the screen. For that you need the Export permission.
- Hidden fields. If your role does not have the permission to see everything, you only search in what you see: a hidden phone number cannot be found by searching.
- Example
-
A guest calls to say they were here last month with six people and want to come again. You search for their last name, choose Last 30 days or a longer period, and open their customer card.
- Related
-
What is on a guest's customer card?, How does the Guests and reservations screen work?
Keywords: search guest, search reservation, search customer, search by phone number, export customer list, search guests and reservations
Related questions - How do I find a guest by phone number?
- Where do I look up an old reservation?
- How do I open a guest's customer card?
- Can I search by email address or name in all reservations?
How do I export a guest's data (access request)?
- Answer
-
Open the guest's customer card under Search and choose Export data. You get a file with everything you keep on this guest, which you can give to the guest. This is only allowed if you see all guest details and have the Export permission.
- Explanation
-
- Step 1. Go to Search, find the guest and open their customer card.
- Step 2. Choose Export data. The button is only there if you have the Export permission.
- Step 3. Jimani downloads a file
gastgegevens-<datum>.json. It contains the profile (salutation, name, email, phone, address, postal code, city, country, extra fields, additional information, company name, VAT number and KvK number), the notes, all visits with date, time, module, amount and payment method, the purchased items and the filled-in fields of webshop orders. - Who may do it. Only someone who sees all guest fields. If your role has fields hidden, you get the message Only someone who sees all guest details can export them. A masked export would be incomplete.
- Recorded. Jimani records that an export was made, by whom and for which guest, without the data itself.
- Default guest of the POS. The general guest of the POS (POS orders without a customer) is not a person; there is nothing to export for it.
- A guest at two businesses. You only get the data that belongs to your business.
- No permission. If you may not see all guest details, it says Only someone who sees all guest details can export them. If the address does not belong to a guest of your business, you see This address does not belong to a guest of this business.
- Example
-
A guest emails that they want to know what you keep on them. You find them, open the customer card, choose Export data and send the file back.
- Related
-
How do I delete a guest's data?, How long does Jimani keep guest data?
Keywords: gdpr access request, export a guest's data, right of access, privacy guest data, guest wants to see their data
Related questions - A guest asks which data I have on them, how do I handle that?
- How do I download all data of one customer?
- Who may export guest data?
- How do I handle a GDPR access request?
How do I delete a guest's data (right to be forgotten)?
- Answer
-
Open the guest's customer card under Search and choose Delete data. Jimani then anonymises the personal details: name, email, phone, address and remarks. Amounts, receipts and invoices remain, because you are legally required to keep them. Only the owner may do this.
- Explanation
-
- Step 1. Go to Search, find the guest and open their customer card.
- Step 2. Choose Delete data. The button is only there if you are the owner.
- Step 3. Jimani asks Delete this guest's data? and says: Name, email, phone, address and remarks will be irrevocably deleted. Amounts, receipts and invoices remain (statutory tax retention obligation). Choose Yes, delete.
- Afterwards. You see This guest's data has been deleted. If it fails, it says Couldn't delete. Try again. From then on the guest is called Deleted guest. The guest can then no longer be restored.
- What disappears. Name, email, phone, address, postal code, city, salutation, extra fields, the note on the guest, and the name and remark on their reservations, orders and repairs, and the filled-in fields of webshop orders.
- What remains. All amounts, lines, payments, receipts, invoices and the journal (7 years), the country and the language, and the company details of a business customer (those are on the invoice).
- Several customers with the same email address. All guests with that email address at your business are deleted together.
- Guest at two businesses. If the guest also booked at another business, your business gets an empty guest ("Deleted guest") on their reservations and the data at the other business remains.
- Default guest of the POS. That is not a person and cannot be deleted; you get the message This guest was not found, or it is the default guest of the POS.
- Not the owner. Then you see the message Only the owner can delete guest data.
- Recorded. Every deletion goes into a log, without the data itself.
- Example
-
A guest emails asking you to delete their data. As the owner you open their customer card, choose Delete data and confirm. Their revenue remains in your figures, but no longer under their name.
- Related
-
How do I export a guest's data (access request)?, How long does Jimani keep guest data?
Keywords: gdpr delete guest, right to be forgotten, delete customer data, anonymise guest, privacy deletion request
Related questions - A guest wants me to erase their data, how do I do that?
- Do receipts and invoices remain if I delete a guest?
- Who may delete guest data?
- How does the right to be forgotten work in Jimani?
How long does Jimani keep guest data, and can I change that?
- Answer
-
By default 24 months after the last visit. After that Jimani automatically anonymises the guest's personal details. As the owner you choose a different period between 6 and 120 months under Guest data retention period in Search.
- Explanation
-
- Step 1. Go to Search. At the bottom is Guest data retention period, with the explanation: after this period without a visit, a guest's name, email, phone and address are deleted automatically, and amounts, receipts and invoices are kept for 7 years.
- Step 2. Choose a period: 6, 12, 18, 24 (default), 36, 48, 60, 84 or 120 months. Your choice is saved immediately.
- Who. Only the owner can change the period. Anyone else sees the choice greyed out and, when trying, the message Only the owner can change the retention period. A period outside 6 up to and including 120 months is refused with Choose a period of 6 up to and including 120 months.
- When. Every night at 04:15 Jimani anonymises the guests who have had no reservation, order, repair or invoice with you for longer than the period. Per night this covers at most 50 groups of 200 guests; a large backlog therefore clears in a few nights.
- What happens. The same as with Delete data: the name becomes Deleted guest, contact details and remarks are removed, amounts and invoices remain.
- Guest at several businesses. The guest is only anonymised when they no longer fall within the period at any business, using the longest period of their businesses.
- What counts as a visit. The arrival of a reservation, an appointment, a ticket or a hotel stay, an order, a repair or an invoice.
- Error messages. If you choose a period outside the list, it says Choose a period of 6 up to and including 120 months. If you are not the owner, it says Only the owner can change the retention period.
- Example
-
You leave the period at 24 months. A guest who last came in October 2024 is anonymised after October 2026 in the next nightly run. Their revenue remains in your reports.
- Related
-
How do I delete a guest's data?, How do I export a guest's data?
Keywords: guest data retention period, gdpr retention, data 24 months, automatically delete guests, how long does jimani keep customer data
Related questions - How long does Jimani store my guests' data?
- Can I set guest data to be erased sooner?
- When is guests' personal data anonymised automatically?
- What is the retention period for customer data under the GDPR?
How do I hide guest details from employees?
- Answer
-
Under Settings > Guests and bookings turn Guest details: who sees what to Yes. Then under User permissions you choose per role which guest fields that role may see, such as email or phone. What a role may not see is shown as hidden in lists, the customer card, details, search and exports. It is free.
- Explanation
-
- Step 1. Go to Settings > Guests and bookings. Under Guests turn the choice Guest details: who sees what to Yes. By default nothing changes: everyone sees everything.
- Step 2. Go to Settings > Your business > Users and permissions > User permissions (
/settings/roles). Under Role choose the role, for example Manager or User. - Step 3. At the top of the list there is now the block Guest details. Each guest field has a choice Yes or No: First name, Last name, Email, Phone, Address, Postal code, City, Country, Salutation and the extra fields of your business. No means: this role sees this hidden.
- Valid immediately. A change is saved immediately, and the role sees it on the next page.
- Search and exports. The server masks the data before anything is searched, shown or exported. Searching for a hidden phone number therefore finds nothing and it is not in an export either. Anyone who does not see fields cannot export data either: the message is Only someone who sees all guest details can export them.
- Who always sees everything. The owner, Jimani administration, a dealer and anyone looking along always see everything. Only the owner can change permissions.
- The guest themselves. Emails and receipts to the guest themselves remain complete.
- No cost. Anonymising guest details is free; it is a privacy setting and not an extra feature.
- Example
-
You want your service staff to see the guest's name but not their phone number. For the role User, set the field Phone to No.
- Related
-
How do I export a guest's data?, What can you set under Guest information?
Keywords: hide guest details, employee may not see phone number, employee privacy, permissions guest details, anonymise per role, gdpr employees
Related questions - How do I make sure my staff cannot see guests' phone numbers?
- Can I decide per employee which guest details are visible?
- How do I hide guests' email addresses in lists and exports?
- Does it cost extra to shield guest details?
How do I ask for a deposit with a reservation?
- Answer
-
Create a product with the price of the deposit and link it to the reservation type under Restaurant > Reservation types. There set Add products and deposits to Yes, Do you want to receive a payment for this reservation? to Yes and Is this a deposit? to Yes. The guest then pays online via Mollie when reserving.
- Explanation
-
- Step 1. Turn on the add-ons: Settings > Add-ons > Reservations: Products and deposits (and Online reservations, if guests book via the widget). Products and deposits only works with a Mollie connection. These add-ons cost nothing extra.
- Step 2. Create the product: Restaurant > Products > Add > Products. Give it the name and the price of the deposit, for example €10 per reservation. You can also create it with the plus button in the reservation type window.
- Step 3. Go to Restaurant > Reservation types and open the type. Set Add products and deposits to Yes.
- Step 4. Set Do you want to receive a payment for this reservation? to Yes and under Choose the product for this reservation choose the product. If it is not listed, create it first under Products.
- Step 5. Set Is this a deposit? to Yes. According to the explanation on the screen, the product is then fully credited when the guest arrives. On No it remains a fixed amount.
- Step 6. Do you want to pass on the payment costs? Set Do you want to charge transaction costs? to Yes and under Transaction costs choose the product with the costs. The costs go on the guest's bill.
- Step 7. Choose Save.
- For the guest. In the widget the guest sees the payment when reserving. If someone has not paid, you can (with the SMS add-on) send a reminder via the moment Deposit open; see the article about automatic text messages in Communication.
- Guest does not come? Then the amount is under Outstanding prepayments. There you refund it or keep it; see What do I do with the deposit of a guest who does not come?.
- A quote. For large groups you can also make a quote: see How do I make a quote for a group?.
- Example
-
For your high tea you ask €10 per reservation. You create the product High tea deposit of €10, link it to the reservation type High tea and set Is this a deposit? to Yes. Whoever books pays €10 online first.
- Related
-
What can you set under Reservation types?, What happens when a guest does not show up (no-show)?
Keywords: reservation deposit, reservation deposit fee, prepay restaurant, prevent no-show, ask for deposit, pay online when reserving
Related questions - How do I make guests pay in advance when they reserve a table?
- How do I ask for a deposit on a reservation so that people do not stay away?
- Can the guest pay a deposit online when reserving?
- Where do I set that a reservation costs a deposit?
What happens when a guest does not show up (no-show)?
- Answer
-
If a reservation is still Open after the arrival time, you see the button Set to No-show in Reservation information. You can also let Jimani do this automatically with Automatically set to No-show under Reservation settings. A no-show frees up the table and appears in the overview Unpaid and no-show.
- Explanation
-
- Manually. Open the reservation via Reservations. If the arrival time has passed and the reservation is still Open, Set to No-show and Set to No-show in 30 minutes appear at the top. The second one sets the reservation to No-show by itself 30 minutes after the arrival time.
- Automatically. Go to Reservations, choose the cogwheel Reservation settings, under Reservations set Automatically set to No-show to Yes and under Waiting time until No-show choose 15 minutes, 30 minutes, 45 minutes or 1 hour. If a reservation is still Open after the arrival time plus this time, Jimani sets it to No-show itself. Jimani checks every minute.
- At the end of the day. Around 23:59 Jimani sets reservations that end today and are still Open to No-show, even if you have not set anything.
- What happens with a no-show. The reservation gets the status No-show. Open POS receipts of the reservation lapse, a paid receipt remains. If you have created a template for the moment No-show under SMS, the guest gets a text message; also with the automatic no-show.
- Overview. Under Settings > Guests and bookings > Guest payments, tab Unpaid and no-show, you see all no-shows in a period (Filter: No-show only) with the total number of no-shows, the number of guests and the total loss.
- On the guest. The customer card shows the number of No-shows; in the list Guests the column is called No-shows.
- Deposit. If the guest paid in advance, under Outstanding prepayments you choose whether to refund or keep the amount; see What do I do with the deposit of a guest who does not come?.
- Preventing. Ask for a deposit; see How do I ask for a deposit with a reservation?.
- Example
-
You set Automatically set to No-show to Yes and Waiting time until No-show to 30 minutes. A 19:00 reservation is still Open at 19:30 and then goes to No-show by itself; the table is free again.
- Related
-
What can you set under Reservation settings?, What can you see and set under Guest payments?
Keywords: no-show, not showing up, automatic no-show, guest did not come, set no-show, prevent no-show
Related questions - How do I set a reservation to no-show if the guest does not come?
- Can Jimani set no-show automatically?
- Does the table become free again if a guest does not come?
- Where do I see which guests did not come or did not pay?
What do I do with the deposit of a guest who does not come?
- Answer
-
Go to Outstanding prepayments. That is where money paid online is listed whose visit date has passed and which has not yet been settled. For each line choose Refund (the money goes back to the guest) or Keep (it goes, without VAT, to the account Prepayments (lapsed)).
- Explanation
-
- Step 1. Open Settings > Guests and bookings > Guest payments > Outstanding prepayments. The dashboard shows how many prepayments are waiting to be handled.
- Step 2. Under Visit date in the last choose 30 days, 90 days or 365 days. By default you look back 90 days.
- Step 3. On a line choose Refund. Jimani asks Refund to the guest via the online payment? The whole open amount goes back to the guest via Mollie.
- Or step 3. Choose Keep. Jimani asks Keep? The amount goes, without VAT, to Prepayments (lapsed). That is the choice if your terms allow you to keep the deposit.
- Refunding part. That is not possible here. Refund the desired part via Everything about payments and then keep the remainder or leave it.
- On handling. Afterwards you see Handled. If there is no online payment to refund, Jimani says There is no online payment to refund. If nothing is outstanding anymore, Nothing is outstanding anymore.
- Permission. You need the permission Outstanding prepayments; the owner always has it.
- At the POS. If a guest paid more in advance than the receipt, the block Reservations at the till determines what the POS does with the rest of the deposit: Give back or Do not give back.
- Example
-
A guest paid a €10 deposit and did not come. Two days later the reservation is under Outstanding prepayments. According to your terms you may keep it: choose Keep.
- Related
-
What happens when a guest does not show up (no-show)?, How do I ask for a deposit with a reservation?
Keywords: no-show deposit, refund deposit, keep deposit, outstanding prepayments, lapsed deposit, guest did not come deposit
Related questions - A guest did not show up and has paid a deposit, may I keep that money?
- How do I return the deposit to a guest who did not come?
- Where do I see which deposits are still outstanding?
- Can I refund only part of the deposit?
How do I refund a cancelled reservation, or reject the refund?
- Answer
-
Go to Refunds overview. It lists the cancelled reservations that were paid online. Choose Refund to return the amount, or part of it, via Mollie, or Reject with a reason. In both cases the guest gets an email.
- Explanation
-
- Step 1. Open Refunds overview in the menu. It is only there if the add-on Products and deposits is on. Without a linked Mollie account, the top says that refunding is not possible yet and the buttons are greyed out; connect Mollie under Settings > Money and figures > Payments (Mollie).
- Step 2. Under Status choose which lines you see: All, the open refunds, Partially refunded, Refunded or Rejected. By default you see the open lines. Refine with Search (name, email or reservation number), Module, Reservation type, Cancelled from, Cancelled up to and including, Reservation date from, Reservation date up to and including and Amount min - max.
- Step 3. Read the line: the guest, when they cancelled, how much time before the reservation (Time before cancellation), how much they Paid online, the reason for the cancellation and the status. With Details you also see the email address and the payments.
- Step 4a: Refund. The window shows how much is open and fills in that amount. Enter a lower amount for a partial refund. The money goes back via Mollie to the original online payment(s) and is in the guest's account within a few days. The guest gets an email that they will get the amount, or part of it, back. After a partial refund the line is set to Partially refunded and you can refund the rest later.
- Step 4b: Reject. Under Reason (the guest will see this) enter a reason. It does not work without a reason. The guest gets an email with the reason and the line is set to Rejected. A rejected line can no longer be refunded afterwards.
- Which payments. Only payments that were really made online (via the widget or a payment link, including a deposit or a part) appear in the list. Card payments at the terminal, pay later or a payment that was not completed never appear in it.
- How long. Mollie refunds up to 120 days after the payment. The list looks back half a year.
- If Mollie refuses. For example with too little balance. You get a clear message and nothing is recorded. You can top up at Mollie; then try again.
- The emails. For a reservation from Restaurant you can adjust the texts of the emails about an approved, partially approved or rejected refund under Customer contact. Other modules send a short fixed email from your business, in the guest's language.
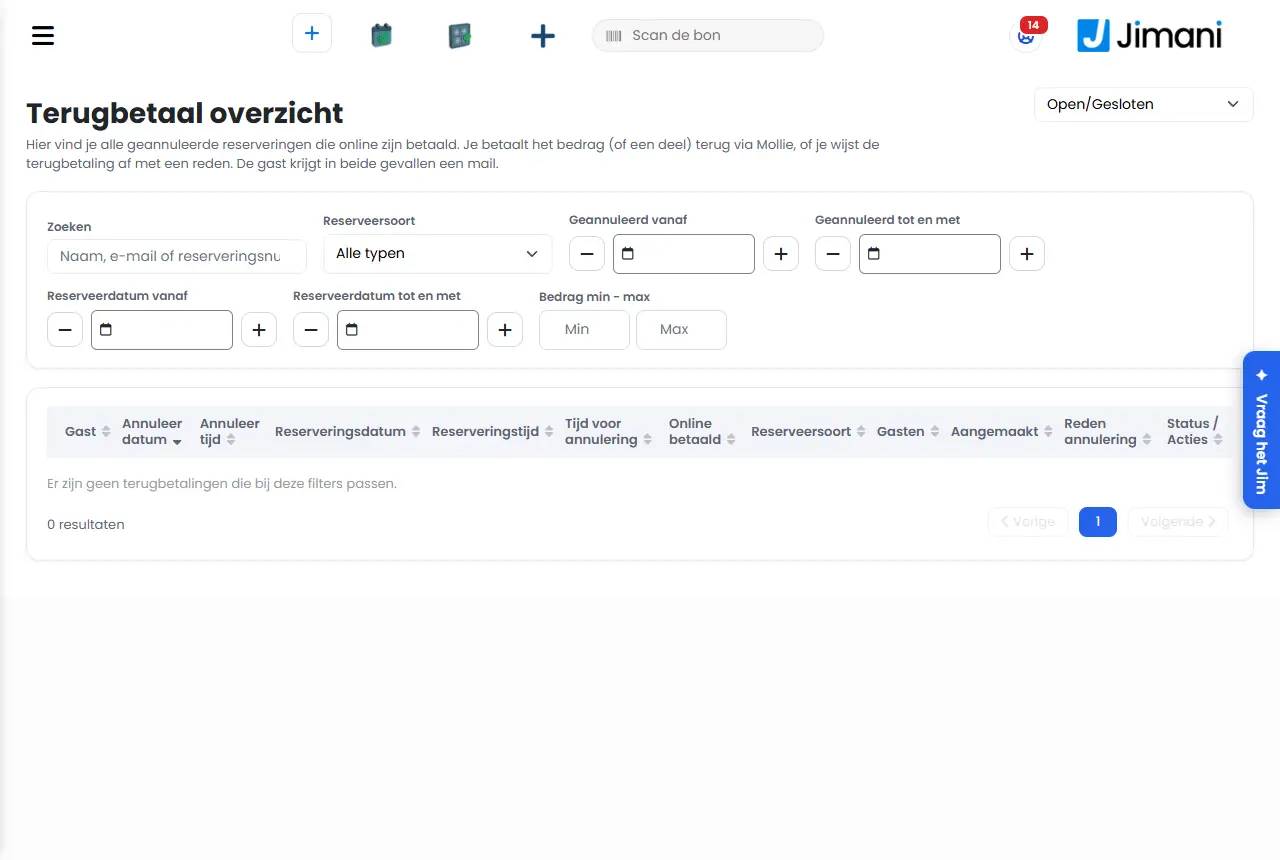
- Example
-
A guest cancelled two days ahead and had paid a €40 deposit. According to your terms they get €20 back. Choose Refund, change the amount to €20 and confirm.
- Related
-
How do Cancellations and the Refunds overview work?, What do I do with the deposit of a guest who does not come?
Keywords: reservation refund, refund cancellation, partial refund, reject refund, mollie refund reservation, guest money back
Related questions - How do I give a guest their money back after a cancellation?
- Can I refund part of the amount?
- How do I reject a refund request?
- Where are cancelled reservations that were paid online?
How do requests work, reservations that I have to confirm myself first?
- Answer
-
For a reservation type set Request to Yes. Bookings of that type are then not final yet: they appear in the menu Requests and the guest gets an email Receive request. You confirm them yourself in Reservation information by setting the status to Confirmed; only then does the guest get the confirmation email.
- Explanation
-
- Turning on. Turn on the add-on Requests: Settings > Add-ons > Reservations. Then under Restaurant > Reservation types, in the type's window, set Request to Yes. If Requests is set to No in the menu settings, the choice stays greyed out.
- Groups automatically. In your widget settings there is Automatic request from how many guests (the question: From how many guests should the reservation be converted to a request?). A group from that number can then choose a time for which no table is free yet; you assess it yourself as a request.
- The overview. Open Requests in the menu. You see all reservations that were submitted as a request, with among other things the arrival date, the reservation name, the reservation type, the Availability, the tables, the number of people, the payment, the extra fields and the memo. The menu shows a counter with the number of outstanding requests. With the Excel icon you export the list.
- Confirming. Click the request for Reservation information. Under status choose Confirmed. A request can also become a Quotation (only with the add-on Quotations). Going back to Request is no longer possible after Confirmed.
- What the guest gets. With the request the email Receive request. If you set the status to Confirmed, they get the confirmation emails. You adjust those emails under Customer contact.
- In the timeline. Requests appear in the timeline with the status colour Request.
- Adjusting before you confirm. You can still change the table, time or number of people, or call the guest for more information, and then confirm the request.
- Example
-
A party of twenty people books a high tea. The type High tea has Request set to Yes. In Requests you see the booking, you call the guest, adjust the time and set the status to Confirmed.
- Related
-
How do I handle a large group reservation?, How do I make a quote for a group?
Keywords: reservation request, requests overview, option reservation, confirm group reservation, confirm request, approve reservation
Related questions - How do I make sure I can approve reservations myself first?
- Where do I find reservations that are still waiting for confirmation?
- When does the guest get the confirmation email for a request?
- Can I put an option on a reservation instead of confirming right away?
How do I handle a large group reservation?
- Answer
-
Create a separate reservation type for groups with its own minimum and maximum number of guests, set Request to Yes and a Minimum time until the reservation on it, and link combination tables. Large groups then come in as a request and you assess them before the guest gets their confirmation. If you want a price agreement, make a quote.
- Explanation
-
- Step 1: a type of its own. Go to Restaurant > Reservation types and create for example Group dinner with Minimum number of guests 10 and Maximum number of guests 40. Under Reservation duration choose a longer duration.
- Step 2: assess first. Set Request to Yes. The booking then goes to Requests; see How do requests work?. Under Minimum time until the reservation set for example 3 days, so that your kitchen and purchasing have time.
- Step 3: tables. Under Restaurant > Combination tables create a combination of single tables, for example Table 5 and 6. In the widget Jimani only offers a combination when no single table is free anymore. For a large party you can also keep a Location of its own free.
- Step 4: questions for the group. Under Restaurant > Fields create the questions you need, for example for dietary wishes or a menu choice. Set Show when booking manually to Yes if you fill them in together with the guest. Under Guest information you turn on Visible in group for the details you want to know about every group member.
- Step 5: deposit. Ask for a deposit to limit no-shows; see How do I ask for a deposit with a reservation?.
- Via the widget. In the widget settings you can choose from how many guests a reservation automatically becomes a request. Above that number times remain selectable, even if there is no free table yet.
- Manually. If you take the group over the phone, you add it with Create reservation. Above the maximum of the type the window gives a warning, except for a quotation.
- Example
-
You create the type Group dinner for 10 to 40 people with Request on Yes and 3 days minimum time. A company books for 24 people. The booking is in Requests, you call about the menu choice and set the status to Confirmed.
- Related
-
How do requests work?, How do I make a quote for a group?
Keywords: group reservation, large group, option reservation, book group restaurant, group booking, group dinner
Related questions - How do I handle reservations from large groups?
- Can I prevent groups from simply booking a table online?
- How do I make sure large groups get a separate rule with a minimum number of guests?
- How do I have groups combine tables?
How do I make a quote for a group?
- Answer
-
With Create reservation, create a reservation with the status Quotation. Add products and custom lines, under Pay later choose Send email with Invoice and edit the email if needed. The guest gets the quote by email with a pdf. In the menu Quotation you then see all your open quotes.
- Explanation
-
- Turning on. Turn on the add-on Quotations (Settings > Add-ons > Reservations). The choice Quotation and the menu Quotation then appear. This costs nothing extra.
- Step 1. In the menu choose Reservations > Create reservation. Choose the type, the date, the time, the number of guests, the tables and fill in the guest details.
- Step 2. Set the status to Quotation. The block Extra information is now called Quotation questionnaire; questions set to Show only in quotation mode on a field now appear. Turn on Add to quote for the memos the guest must read.
- Step 3. Under Products choose the quantities. With Extra Product you add a line of your own with a name (at most 24 characters), the VAT rate, the price including VAT and the quantity, for example a room hire or a fixed price for a package.
- Step 4. Choose Pay. In the choice window the choice Pay later is now called Quotation; choose that and then Send email with Invoice. You see the window Email template: under Email subject, Email text, bcc and Attachment adjust what you want and choose Save.
- What the guest gets. The email Quotation from Customer contact, with a pdf of the reservation as an attachment. You adjust the text of that email under Settings > Communication > Email (Customer contact).
- The overview. The menu Quotation lists the quotes that were sent and have not had a deposit paid yet, or have not been confirmed manually yet. You can edit, confirm, cancel and send a quote. The menu has a counter and an Excel export.
- Confirming. Open the quote and set the status to Confirmed. After that the status can no longer go back to Quotation.
- Editing. As long as no deposit has been received on the quote, you can still change the date, time and number of guests.
- Example
-
A company wants a dinner for 30 people with a fixed menu. You create a reservation with status Quotation, put the package in and add the room hire as an Extra product. The guest gets the quote by email and confirms by phone; you set the status to Confirmed.
- Related
-
How do I handle a large group reservation?, How do requests work?
Keywords: group quote, restaurant quote, send quote, quote for a company dinner, price quote
Related questions - How do I send a price quote to a company coming to eat with a group?
- Can I send a quote by email with a pdf?
- Where do I see my outstanding quotes?
- How do I make a quote for a company dinner?
How do guests get a confirmation and a reminder of their reservation?
- Answer
-
After reserving, the guest automatically gets the email Reservation confirmation, with a pdf of the reservation. After that Jimani can send up to four reminder emails (Pre-arrival notice 1 up to and including 4) and, with the SMS add-on, text messages too. You set the texts and the times under Customer contact.
- Explanation
-
- Where. Settings > Communication > Email, tab Customer contact: here you create and manage the email templates and indicate when the emails are sent.
- Confirmation. Sent as soon as a guest reserves online. If you create a reservation yourself, Jimani asks What action should be taken? after Save and you choose Send email or Don't send email. The email goes to the guest's email address, in their language, for their reservation type.
- No template? If there is no email template for the reservation type and language, Jimani says No email template: the reservation is saved, but the guest gets no email. Then first create a template under Customer contact.
- Attachment. The pdf of the reservation is included by default. Per email you can also add a pdf of your own (Attachment), or turn off the pdf in the document settings.
- Reminders. Pre-arrival notice 1 you choose in hours before arrival (Hours before arrival). Pre-arrival notice 2, 3 and 4 you choose in days (Days before arrival) and at what time they go out (default 12:00). A reminder for a moment that has already passed is no longer scheduled.
- Tags. In a template you put tags such as {ChangeWidget} (the guest can change the reservation), {CancelWidget} (cancel), {ical} (a link to add the appointment to their calendar), {QR_code}, {Products_Table} and {Survey}. The tag of a field of your own (see Fields) also works.
- Request and quotation. A request gets the email Receive request, a quotation the email Quotation; the confirmation only follows after Confirmed.
- SMS. You create SMS messages under Settings > Communication > SMS, per moment: confirmation, change, cancellation, days or hours before arrival, after the visit, survey, deposit open and no-show. No text messages are on by default. See the article about automatic text messages in Communication.
- From your own address. With the add-on Own sender (€10 per month, excl. VAT) you email from your own email address. Without it, your address is the reply address in the email.
- Seeing whether the email arrived. Open the reservation and choose Email History: you see per email the status (for example delivered), how often it was opened and clicked, and the subject. The tab is only there if emails have been sent.
- Sending again. Has the guest lost the email? Open the reservation and at the bottom choose More > Send email: you choose the template and send it again, see How do I edit the email before it goes to the guest?. If the guest has no email address, Jimani says This guest has no email address.
- Example
-
You set Pre-arrival notice 1 to 3 hours and Pre-arrival notice 2 to 1 day at 12:00. A guest who books for Saturday 19:00 gets a reminder on Friday at 12:00 and on Saturday at 16:00, and the confirmation right away.
- Related
-
How do I edit the email before it goes to the guest?, How do I send a message to a guest about their reservation?
Keywords: reservation confirmation email, reservation reminder, reminder email guest, sms reminder, email own address, email template reservation
Related questions - Does the guest automatically get a confirmation by email after reserving?
- Can I send guests a reminder of their reservation?
- How do I send a text message as a reminder to a guest?
- Where do I edit the text of the confirmation email?
How do I edit the email before it goes to the guest, or send it again?
- Answer
-
Open the reservation and at the bottom choose More > Send email. You choose the template, set Edit email text to Yes if you want to change the text and choose Send. The change only applies to this email to this guest; the template itself does not change.
- Explanation
-
- Step 1. Go to Reservations and click the reservation for Reservation information.
- Step 2. At the bottom choose More and then Send email. The window Send email says which address the email goes to (To: the guest's address).
- Step 3. Under Email choose the template, for example Reservation confirmation. You only see templates that exist for this reservation; if they are missing, it says No email templates for this booking.
- Step 4. Do you want to change the text? Set Edit email text to Yes. You see the Email subject and the Email text, filled in with the details of the reservation. Edit them. Below it says: Only for this email to this guest; the template itself stays unchanged.
- Step 5. Choose Send. The confirmation goes out with the pdf of the reservation. The email is then in Email History, with the status and the number of times opened.
- Without an email address. If the guest has no email address, you get This guest has no email address.
- With a new request or quotation. With Create reservation with the status Request or Quotation, under Pay later you choose Send email with Invoice. You then see the window Email template with Edit: edit Email subject and Email text, optionally fill in bcc and add an Attachment (pdf), and choose Save.
- Always edit. Do you want to change the text for all guests? Do that under Settings > Communication > Email, tab Customer contact.
- A message instead of an email. If you only want to ask or tell something, use the messages in the reservation; see How do I send a message to a guest about their reservation?.
- Example
-
A guest emails that they have not received the confirmation. You open their reservation, choose More > Send email, Reservation confirmation and Send. For a group you add a personal sentence at the top of the text via Edit email text.
- Related
-
How do guests get a confirmation and a reminder of their reservation?, What can you set under Add reservation and Update reservation?
Keywords: resend email, resend confirmation, edit email text, email template reservation, edit guest email, confirmation not received
Related questions - How do I send a confirmation to a guest again?
- Can I edit the text of an email for one guest?
- The guest has not received the confirmation email, what now?
- Does the email template change if I edit the text for one email?
How do I send a message to a guest about their reservation, and where do I see their questions?
- Answer
-
Open the reservation and choose the tab Guest messages. Type your message under Enter your message and choose Submit. The guest reads it in their own reservation environment and can reply. New questions from guests are in the overview Questions from the guests.
- Explanation
-
- Step 1. Go to Reservations and click the reservation for Reservation information.
- Step 2. Choose the tab Guest messages. It is only there if there are already messages. Each message shows Message from, the name of the sender, the date and the time.
- Step 3. Choose the icon to send a message, type your text under Enter your message and choose Submit. An empty message is not possible: then you see Message is required. After sending, Message has been sent follows.
- Questions from the guests. If a guest asks a question, the choice Questions from the guests in the help menu turns orange. The overview (
/guestmessage) shows per message the date, the name, the time before arrival, the message and whether it has been Answered (Yes or No). With Open and answer you go to the tab Guest messages of that reservation. - Not the same as an email. A message is a short question-and-answer in the reservation. If you want to email the guest a confirmation or quote, use More > Send email; see How do I edit the email before it goes to the guest?.
- Example
-
A guest asks whether there is a high chair. You open Questions from the guests, click Open and answer and send: Yes, we will set one up.
- Related
-
How do guests get a confirmation and a reminder of their reservation?
Keywords: message guest, answer guest question, guest messages, chat with guest, questions from the guests
Related questions - How do I send a short message to a guest about their reservation?
- Where do I see the questions guests ask about their reservation?
- Can a guest reply to my message?
- Where do I find the chat section of a reservation?
How do I add a reservation myself, for example when a guest calls?
- Answer
-
Go to Reservations and choose Create reservation. Choose the reservation type, the date, the number of guests, the time and the table, fill in the guest details and choose Save. Jimani then asks whether the guest gets a confirmation by email. Booking manually is also possible outside the online times.
- Explanation
-
- Step 1. In the menu choose Reservations and then Create reservation. If the timeline (Overview) is open, a panel opens next to the timeline; in the list views the window Add reservation opens. In the timeline you can also click an empty box at a table: the green box with a plus is as long as the reservation type lasts, and the table, date, time and number of people are then already filled in.
- Step 2. Choose the Reservation types. If you only have one type, Jimani chooses it itself. Then choose the Availability, if there is one.
- Step 3. Choose the Date (above the field are the opening times) and fill in the number of guests per guest group, for example adults and children.
- Step 4. Under From choose the time. For Until Jimani calculates the end time from the reservation duration of the type; adjust it if the guest stays shorter or longer.
- Step 5. Under Table choose with the pencil the table, a combination table or a location. Jimani shows the free tables; Show all tables also shows the occupied ones.
- Step 6. Find the guest with Search, or fill in their details. Choose the Guest's language and check the Reservation name. If you do not want to record any details, set Passer-by (no guest details) to Yes; see Reservation settings to turn this choice on or off.
- Step 7. If needed set Check in now to Yes if the guest is already there, or Locking table change if they must stay at their table. Note agreements in the Internal memo.
- Step 8. Choose Save. Jimani asks What action should be taken? Choose Send email for a confirmation, or Don't send email. An email template must exist for the type and the language.
- Paying. If you want to collect a deposit or the whole amount, choose Pay: Cash, Card, Tap to Pay, Pay later, Pay other, Coupon or Pay on account.
- A request or quotation. Choose Request or Quotation as the status if the reservation still has to be confirmed; see How do requests work? and How do I make a quote for a group?.
- Checks. A table that is already occupied is not among the free tables. Jimani takes the maximum number of guests of the type into account and warns if you go above it (except for a quotation).
- Existing email address. If the email address belongs to an existing guest, Jimani warns with This email address belongs to and the guest's name (or an existing guest if the name is missing). If you save with this name or this phone number, you change that for that guest and their earlier reservations. Choose Yes, update the same customer or No, save other guest as walk-in.
- Example
-
A guest calls for Friday 19:00 with four people. You choose Dinner, Friday, 4 guests, 19:00, a table for four, search their name, choose Save and Send email.
- Related
-
What can you set under Add reservation and Update reservation?, How do I move or swap reservations in the timeline?
Keywords: create reservation, phone reservation, book manually, add reservation, walk-in, check in now, guest calls
Related questions - How do I note a reservation when a guest calls?
- Can I enter a reservation myself outside the online times?
- Does the guest get a confirmation if I enter the reservation myself?
- How do I book a walk-in who comes in now?
How do I move, extend or swap reservations in the timeline?
- Answer
-
Drag a block in the timeline to another table or time. Drag the left edge or right edge to adjust the start time or end time. If you want two reservations to swap tables, drop one block on the other, or choose Swap with… on the reservation. Jimani always shows first what changes.
- Explanation
-
- Changing the start time or end time. Grab the edge of a block (on a touch screen the handles are wider). The tooltip says Drag to change the start time or Drag to change the end time. The left edge changes the start time and leaves the end time; the right edge the other way round. The edge snaps to the grid of the Time interval between reservations. Green means: this is possible. Red: this is not possible.
- When is it not possible? Across another reservation (There is already another reservation at that time.), outside opening hours (Outside opening hours is not possible.) or in the past (A time in the past is not possible.). The block then jumps back with a short message. The server decides. If changing fails for another reason, it says Unable to update the reservation. For Activities Jimani first asks Yes, change? if the price changes or someone is cancelled.
- Shorter than the reservation duration. Only if the reservation type has Manual times may differ, and never shorter than the Minimum booking time. Guests in the widget always book the full duration.
- To another table or time. Drag the middle of the block to the new box. The middle of the block remains the normal moving; the edges are for the time. A reservation that has left, is a no-show or is cancelled can no longer be dragged.
- Swapping with another reservation. Drop reservation A on reservation B in another row, in the middle of the block. Or in the info window, or with a right click or long press on the block, choose Swap with… and then tap B (Choose the reservation to swap with). If you choose a reservation on the same lane or table, Jimani says Choose a reservation on another lane or table.
- Preview first. The window Swap reservations shows who goes where and who moves along ((moves along)). Choose Swap or Cancel. If it is not possible, it says Cannot swap with the reason, for example that swapping is only possible with the same number of tables. If it fails, Jimani says The swap did not succeed. The timeline then reloads.
- New reservation in the timeline. Move the mouse to an empty box: a green box with a plus appears. Click it for the panel in which table, date, time and number of people are already filled in; see How do I add a reservation myself?. The box does not appear on a block, at a time that has already passed or is closed, or where the type does not fit in its entirety.
- Appearance. How the timeline looks (View, text size, grid lines, filters on location and reservation type, order of the tables) you set with the cogwheel Reservation settings.
- Example
-
A guest calls to say they are staying longer. You grab the right edge of their block and drag the end time half an hour to the right. If the table is free, it stays green and the new end time is in; if there is a reservation, it turns red and the block jumps back.
- Related
-
How does the reservation overview work in Jimani?, What can you set under Reservation types?
Keywords: drag reservation, adjust timeline, extend reservation, swap table, swap reservations, change start time, move reservation
Related questions - How do I move a reservation to another table?
- How do I make a reservation longer or shorter?
- How do I swap two reservations between tables?
- Can I drag reservations in the timeline?
How do I block a day, a time or a location for reservations?
- Answer
-
Under Restaurant create a Time limitation for a day or time and a Location restriction for a space. A Time limitation with Day restriction on Yes closes the whole day for the chosen reservation types; a Location restriction removes the tables of a location from the offer on those days. Setting a day to Closed under Opening times is not enough for this.
- Explanation
-
- Turning on. These restrictions belong to the add-on Reservation blocks (Settings > Add-ons > Reservations). That costs nothing extra. If it is on, you see under Restaurant the tabs Location restriction, Crowd reduction and Time limitation.
- A whole day closed. Go to Restaurant > Time limitation and choose the plus button. Give the restriction a name (only for you), set Day restriction to Yes, choose the reservation types and tick the days in the calendar. Choose Save.
- Part of the day. Set Day restriction to No and fill in Time from and Time to, for example 12:00 to 14:00 for a staff lunch. If the period runs past midnight, for example 20:31 to 01:30, it also applies to the part after midnight on the next day.
- A location closed. Go to Restaurant > Location restriction and choose the plus button. Give a name, choose the location(s), and tick the days. On those days the tables of those locations are no longer offered. If the closure is permanent, rather adjust the Opening times.
- On and off. In the list you turn a restriction on or off with the switch in the column Active. A restriction that is not active does nothing and is kept.
- What the guest sees. Blocked times no longer appear in the reservation widget. Staff can keep reserving in the dashboard, except what you mean with the block.
- Closed is not enough. If you set a day to Closed under Opening times, Jimani sets no limit on the times a guest can choose for that day. For a real closing day, create a Time limitation with Day restriction on Yes.
- Limiting crowds. If you do not want to close but limit the number of guests per time, use the Crowd reduction; see How do I limit the number of reservations or guests per time?.
- Example
-
On 24 December you are full with a private party. You create a Time limitation Christmas party, set Day restriction to Yes, choose all reservation types and tick 24 December. That day can no longer be booked in the widget.
- Related
-
What can you set under Location restriction, Crowd reduction and Time limitation?, How do the Opening times at Restaurant work?
Keywords: close day, block reservations, private party, time limitation, location restriction, close terrace, holiday closure
Related questions - How do I close a day to online reservations, for example for a private party?
- How do I make sure the terrace can no longer be reserved?
- Why can guests still reserve while I have set the day to closed?
- How do I block a certain time for reservations?
How do I limit the number of reservations or guests per time?
- Answer
-
Under Restaurant > Crowd reduction create a restriction. You choose the reservation types, whether Jimani counts Number of reservations or Number of guests, and the maximum per arrival time. If a time is full, it shows in the widget as fully booked.
- Explanation
-
- Turning on. The Crowd reduction belongs to the add-on Reservation blocks (Settings > Add-ons > Reservations; free).
- Step 1. Go to Restaurant > Crowd reduction and choose the plus button. Give the restriction a name (only for you).
- Step 2. Under Limiting reservations choose what counts: Number of guests (default) or Number of reservations.
- Step 3. Choose the reservation types for which the limit applies. The restriction only counts reservations of those types.
- Step 4. Under Per time slot fill in the maximum for each time. In the column header you fill in one value that then applies to all times; then adjust individual times. A time with 0 has no limit.
- Step 5. Choose Save. The restriction applies every day; it has no dates. You turn it on or off with the switch Active in the list.
- How Jimani counts. Jimani counts per arrival time: all reservations of the chosen types that start at exactly that time. If that number (or the total number of guests) is equal to or higher than the maximum, that time can no longer be chosen in the widget (Time slot is fully booked).
- The times. The table shows every quarter of an hour. Only the times that are also in the widget count; those are the times of the Time interval between reservations. If that is set to 30 minutes, Jimani only uses the whole and half hours.
- The overview. In the list you see per restriction the name, the reservation types (or All Booking Types), the Maximum number of reservations, the Maximum quantity of guests and Active.
- Example
-
The kitchen can handle 20 covers per quarter of an hour. You create a Crowd reduction Kitchen, choose Number of guests and fill in 20 for every time. As soon as there are twenty guests at 19:00, 19:00 can no longer be chosen in the widget; 19:15 remains available.
- Related
-
How do I block a day, a time or a location for reservations?, What can you set under Location restriction, Crowd reduction and Time limitation?
Keywords: crowd reduction, maximum number of guests per quarter of an hour, do not overload kitchen, fully booked time slot, spread crowds
Related questions - How do I make sure not too many guests come at the same time?
- Can I set a maximum number of guests per quarter of an hour?
- How do I prevent the kitchen from being overloaded by reservations?
- Why does a time show as fully booked in the widget?
How do I set up locations, tables and combination tables?
- Answer
-
Go to Restaurant. First create your spaces under Locations, such as terrace and conservatory, then your tables under Tables with number and seats, and if needed under Combination tables tables that together form one large table. The order matters: a table belongs to a location and a combination consists of tables.
- Explanation
-
- Step 1: a location. Choose Restaurant > Locations and then Add > Location. Fill in the Name (only visible internally) and the Maximum quantity of guests, and set Outdoor location to Yes for a terrace. Choose Save.
- Step 2: tables. Choose Add > Tables. Choose the Location, leave Can be reserved via widget on Yes if guests may book the tables online, and fill in the Number of tables (1 to 50). Then fill in per table the number and the number of seats. For a single table use the window Table with Table number, Location and Seats.
- Step 3: an image. Under the table choose a Map image; it appears on the floor plan.
- Step 4: combinations. Choose Add > Combination tables (only with the add-on Combine tables). Give the combination a name, choose at least two tables and check the number of Seats. Set Bookable online to Yes if guests may book the combination in the widget.
- Step 5: main guest tables. If you have a table for regular guests, in the list Tables set Main guest to Yes: that table can only be reserved manually.
- Step 6: linking to the reservation type. Under Restaurant > Reservation types you choose per type which tables are used. A new type already has all tables on.
- Changing and turning off. In the list Tables you adjust seats, image and location directly. Choose the pencil to change numbers and Main guest or to delete tables. A location that still has tables cannot be turned off.
- Importing. Locations, tables and combination tables can also be managed in Excel with the buttons for exporting and importing on the tab.
- Example
-
You have a restaurant with a dining room and a terrace. You create two locations (Dining room and Terrace, with Outdoor location on Yes for Terrace), twenty tables in the dining room with Add > Tables and six on the terrace. For a large group you create the combination Table 5 and 6.
- Related
-
What can you set under Locations and Tables?, What can you set under Combination tables?
Keywords: add tables, create location, terrace, combination table, seats, table number, floor plan tables
Related questions - How do I add tables to Jimani?
- How do I create a terrace or conservatory?
- How do I set that two tables together form one large table?
- In what order must I create locations and tables?
Why do I see no times in the reservation widget, or why can't a time be chosen?
- Answer
-
A time only appears if everything is right: the reservation type is active and visible, there is an active Availability that applies on that day and time, the business is open, there is no Time limitation, Location restriction or full Crowd reduction, the minimum time until the reservation has been met and there is a free table that can be reserved online. Check these points.
- Explanation
-
- The reservation type. Restaurant > Reservation types: is the type on Active and Show in widget on Yes? Does it belong to an Availability (not None (not bookable online))?
- The Availability. Restaurant > Availability: is it on Active and Show in widget on Yes, is the day ticked in the calendar, and does the time fall within a time slot (Available from to Available until)? If you have more than one guest group on, the guest must choose guests for all active guest groups.
- The opening times. Restaurant > Opening times: the time must fall within Open from and Open until. If a day is set to Closed or has no times, there is no limit for that day.
- Minimum time until the reservation. At the reservation type: under a day counts from now, from a day in whole days. This way a time for tonight may already no longer be selectable.
- Blocks. A Time limitation (day or time) and a Location restriction remove times or tables from the offer. A Crowd reduction closes a time when the maximum has been reached; the message is Time slot is fully booked.
- Tables. There must be an active table free that fits the number of guests and the tables of the reservation type, with Can be reserved via widget on Yes. Main guest tables are never offered online, not even as part of a combination table. If no single table is free, Jimani offers a combination table with Bookable online on Yes. Without a free table, Table is not available appears, or the time is missing.
- Groups. If the widget setting Automatic request from how many guests is on, a time for a group from that number remains selectable, even without a free table; the booking comes in as a request.
- Past. A time that has already passed is not shown.
- The grid. The times follow the Time interval between reservations (under Reservation settings).
- Double bookings. Jimani does not offer a table if it is already occupied at that time (the reservation duration counts), so a table cannot be booked twice online.
- Example
-
A guest sees no times for your dinner on Saturday. You check: the Availability Dinner has Saturday 16:30 to 21:30, but Saturday is not ticked in the calendar. You tick it; the times appear.
- Related
-
What can you set under Availability?, How do I block a day, a time or a location for reservations?
Keywords: no times widget, time not available, widget shows nothing, online reservations not working, time slot fully booked, table not available
Related questions - Why can't guests on my website choose a time to reserve?
- My reservation widget shows no times, what do I check?
- Why is a time greyed out or not selectable in the widget?
- Online reservations do not work, why is that?
What happens if I book a table that is already occupied, and can I combine tables?
- Answer
-
A guest in the widget cannot book an occupied table. An employee gets a warning, for example Table 5 is already occupied at this time. Are you sure you still want to book it?, and may deliberately continue. Jimani records that and by whom it was done. For larger groups choose a combination table.
- Explanation
-
- Guest in the widget. The widget only shows times for which a free table exists. No reservations without a table are created and an occupied table is not offered.
- Employee in the dashboard, the POS or the handheld. If you choose a table that is already occupied at that time, the warning appears with the name of the table(s). If you deliberately confirm that you still want to book, the reservation goes through. For a combination table the warning reads The chosen table combination is not completely free at this time. Are you sure you still want to book it?.
- Recorded. The reservation's history says Deliberately booked on an occupied table, with the tables and from which screen.
- Choosing tables. In the window Available tables you choose between Tables, Combination table and Locations. By default you see the free tables; with a drop-down you filter on location. Show all tables and Show all combination tables also show the occupied ones. If there are none, it says No tables available, No table combination available or No location available.
- Multiple tables for a group. You can choose one or more tables (Choose one or more tables to book the reservation) or a combination table that you created under Restaurant > Combination tables. See How do I set up locations, tables and combination tables?.
- Table change. Locking table change keeps a reservation at its table; see How do I move or swap reservations in the timeline? to move tables.
- Example
-
A regular guest calls for table 5, but it is already booked at 19:00. You choose table 5 anyway, get the warning and deliberately confirm that you still want to book it because the earlier guest leaves at 20:00. Table 5 is on both reservations.
- Related
-
Why do I see no times in the reservation widget?, What can you set under Combination tables?
Keywords: double booking, table occupied, table already reserved, double booked, combi tables, combine tables
Related questions - Can I accidentally book a table twice?
- What happens if I reserve an occupied table anyway?
- How do I book a large group on multiple tables at once?
- Can guests book a table online that is already occupied?
How do I let guests reserve a table online?
- Answer
-
Turn on the add-on Online reservations, set up Restaurant with locations, tables, opening times, a reservation type and an Availability, and place the reservation widget on your website. Reserving online costs nothing extra.
- Explanation
-
- Step 1: add-on. Go to Settings > Add-ons > Reservations and turn on Restaurant and Online reservations. Only then does Show in widget appear in the screens.
- Step 2: locations and tables. Restaurant > Locations and Tables. For every table leave Can be reserved via widget on Yes; see How do I set up locations, tables and combination tables?.
- Step 3: opening times. Restaurant > Opening times: fill in per day Open from and Open until, for the coming months. Guests only get times within the opening times.
- Step 4: a reservation type. Restaurant > Reservation types > Add > Reservation type: a name, the minimum and maximum number of guests, the Reservation duration, and Show in widget on Yes. Choose the Availability and the Fields you want to ask the guest.
- Step 5: an Availability. Restaurant > Availability > Add: a time slot (for example 16:30 to 21:30), the days in the calendar, Show in widget on Yes and the reservation type. Without an Availability the guest gets no times.
- Step 6: the grid. Under Reservation settings choose the Time interval between reservations, for example 15 minutes, and if needed a Minimum time until the reservation on the type.
- Step 7: the widget. Under Settings > Guests and bookings > Widgets create your reservation widget and place the code or the link on your website.
- Checking. Open the widget yourself and reserve a test time. If you see no times, go through Why do I see no times in the reservation widget?.
- What the guest gets. A confirmation email with pdf; see How do guests get a confirmation and a reminder of their reservation?.
- Deposit. If you want to ask for payment when reserving, see How do I ask for a deposit with a reservation?.
- Example
-
Your restaurant is open Tuesday to Sunday from 12:00 to 22:00. You create the types Lunch and Dinner, the Availabilities Lunch (12:00 to 14:30) and Dinner (17:30 to 21:00) for those days, and place the widget on your site. Guests can now book a table online.
- Related
-
What can you set under Reservation types?, What can you set under Availability?
Keywords: turn on online reservations, reservation widget, book table online, reserve on website, set up restaurant, reservation widget
Related questions - How can guests book a table via my website?
- What do I need to set up before online reservations work?
- Does online reserving cost extra?
- How do I place the reserve button on my site?
How do I set opening times, different days and closing days?
- Answer
-
Go to Restaurant > Opening times. Choose the year and the month and fill in per day Open from and Open until; set the switch to Open or Closed. Changes save themselves. To really close a day for online reserving, also create a Time limitation with Day restriction on Yes.
- Explanation
-
- Step 1. Open Restaurant > Opening times. At the top choose the year (this year, next year or the year after) and the month.
- Step 2. For each day fill in Open from and Open until and set the switch to Open. Set the switch to Closed for a day you are closed. Next to the switch you see Saving..., Saved or an error with Try again.
- A different day. Simply adjust the times of that day, for example 17:00 to 22:00 on Christmas Eve. Every day has its own opening times; no fixed weekly layout is needed.
- For two years at once. Make an export, edit the file in Excel and choose Import.
- After midnight. If you close after midnight, fill in the closing time of the next morning, for example Open from 11:00 and Open until 02:00. The hours after midnight belong to the day you opened. Equal times are not possible; if you are open all day, fill in 00:00 to 23:59.
- What the opening times do. In the reservation widget the guest only gets times within Open from and Open until. On a timeline you cannot move or extend outside the opening times (Outside opening hours is not possible.).
- A closing day. A day set to Closed sets no limit on the times a guest can choose for that day. If you really want to block the day, create a Time limitation with Day restriction on Yes; see How do I block a day, a time or a location for reservations?.
- Part of the day closed. For a staff lunch or cleaning use a Time limitation with Time from and Time to.
- A location temporarily closed. Use a Location restriction. If the closure is permanent, adjust the opening times.
- Example
-
You are normally open from 12:00 to 22:00, but on New Year's Eve from 17:00 to 02:00. You change 31 December to Open from 17:00 and Open until 02:00. Guests get times from 17:00 to 02:00 that evening.
- Related
-
How do the Opening times at Restaurant work?, How do I let guests reserve a table online?
Keywords: set opening times, different opening times, closing day, restaurant closed, christmas opening times, open until after midnight
Related questions - How do I set my opening times for reservations?
- How do I set a public holiday such as Christmas to closed?
- Can I fill in different opening times per day?
- How do I set that I am open after midnight?
How do I ask guests about dietary wishes or other questions of my own when they reserve?
- Answer
-
Under Restaurant > Fields create a field of your own, for example Dietary wishes, and link it to one or more reservation types. The guest sees the question in the last step of reserving, Guest details and information. You can show the answer right away in the reservation overview.
- Explanation
-
- Step 1. Go to Restaurant > Fields and choose Add > Fields.
- Step 2. Choose for which reservation types the field is asked.
- Step 3. Choose the Type: for example Text box, Large text box, Drop-down, Radio button, Selection box multiple choices, Date, Period, Number field, Phone, Label, Link or Terms and conditions. For a choice field you fill in the choices under Options, one per line (XXX after a line preselects that option).
- Step 4. Give the field a Name and a Description. The description appears as light grey text in the field.
- Step 5. In the settings you choose Required, Show field name, Show in widget and Show when booking manually. Set List view to Yes to see the answer in the memo of the reservation overview, for example an allergy.
- Step 6. Choose Save. Afterwards you can drag the order of the fields in the reservation type's window.
- A field that only sometimes appears. Set Do you want to make this field dynamic? to Yes, under Which field is the main field? choose an earlier question with choices and under Show this field when the following is selected the answer for which this field appears (for example the question Which allergy? only if someone chooses Yes at Allergy?). This works with the add-on Dynamic reservation fields.
- Only for quotations. Set Show only in quotation mode to Yes for questions that only belong with a quotation (add-on Quotations).
- The answer in an email. Each field has a Label (tag), by default {naam}. Put the tag in an email template; Jimani replaces it with the guest's answer.
- Manually. Set Show when booking manually to Yes to also fill in questions yourself, for example for a wedding: you fill in all questions together with the guest.
- For all guests. Details that belong to every reservation (name, email, phone) you manage under Settings > Guests and bookings > Guest information; see What can you set under Guest information?.
- Example
-
You create the field Dietary wishes (Large text box, not required, Show in widget Yes, List view Yes) and link it to Dinner. In the overview an allergy appears in the memo of each reservation.
- Related
-
What can you set under Fields?, What can you set under Reservation types?
Keywords: dietary wishes reservation, guest allergies, own fields reservations, question to guest, dynamic field, customise reservation form
Related questions - How do I ask guests about allergies or dietary wishes when they reserve?
- Can I add a question of my own to the reservation form?
- How do I show the guest's answer directly in the reservation overview?
- Where does the extra question for the guest appear when booking?
Can I manage multiple branches in Jimani, and what does that cost?
- Answer
-
Yes. Each branch is a business of its own in Jimani, with its own settings, tables, products, reservations and figures. If your account is linked to more than one business, you switch with the name of your business at the top of the menu. Settings and reports are per branch.
- Explanation
-
- Switching. Click the name of your business in the menu. If you have more than one business, a list of your businesses opens; choose the business and you land on that business's dashboard. If you only have one, nothing opens.
- Who may switch. Only to businesses your account is linked to. You cannot open another business by changing a number in the address.
- Separate. What you set in one branch does not apply in the other: opening times, locations, tables, reservation types, products, permissions and reports are per business.
- Own subscription and features. Each business has its own subscription and turns add-ons on or off itself. The prices of the paid features therefore apply per business; the overview is in the article Which features cost money? under Pricing.
- Reserving per branch. Each branch has its own reservation widget and reservation list.
- A guest at two businesses. If the same guest has booked at two businesses, each business only sees their visits at its own business. If you delete their data at one business, that business gets an empty guest and the data at the other business remains.
- Costs. The price list of the features has no separate price for an extra branch. Ask Jimani what an extra branch costs in your situation.
- Example
-
You have a restaurant in Utrecht and one in Leiden. You log in and click the name at the top of the menu. In the list you choose Leiden. You now see the reservations and tables of Leiden; the data of Utrecht stays there.
- Related
-
How do I set up locations, tables and combination tables?
Keywords: multiple branches, manage multiple locations, second restaurant, switch shop, chain, branch
Related questions - Can I manage two restaurants in one account?
- How do I switch between my businesses?
- Are settings and figures separate per branch?
- How do I add an extra branch?
A reservation type is what a guest reserves for, such as dinner, drinks or high tea. Under Restaurant > Reservation types you determine per type the number of guests, the duration, the tables, the questions to the guest and whether a payment goes with it.
Where to find it: Menu Restaurant > tab Reservation types (/Horeca). New type: button Add > Reservation type. Existing type: click the line.
All buttons, settings and messages of this screen
An Availability is a fixed time slot on certain days in which guests can book a reservation type, for example Dinner from 16:30 to 21:30. You set it under Restaurant > Availability.
Where to find it: Menu Restaurant > tab Availability (/Horeca). New: button Add > Availability. Existing: click the line.
All buttons, settings and messages of this screen
Products with a reservation are what the guest pays or orders in addition: a deposit, an extra product or transaction costs. You manage them under Restaurant > Products, or you create them from the Reservation type window.
Where to find it: Menu Restaurant > tab Products (/Horeca). New: button Add > Products, or Add > Transaction costs. The tab Products is only there if the add-on Products and deposits is on (Settings > Add-ons > Reservations).
All buttons, settings and messages of this screen
Fields are the questions of your own that a guest gets when reserving, such as dietary wishes or the occasion. You create them under Restaurant > Fields and link them to one or more reservation types.
Where to find it: Menu Restaurant > tab Fields (/Horeca). New: button Add > Fields. Existing field: click the line.
All buttons, settings and messages of this screen
A location is a part of the business where tables are, such as the terrace or the conservatory. Under Restaurant > Locations and Restaurant > Tables you record which locations and tables you have and how many guests fit.
Where to find it: Menu Restaurant > tabs Locations and Tables (/Horeca). New: button Add > Location, Add > Tables, or in the Reservation type window the button Create a new table.
All buttons, settings and messages of this screen
A combination table is two or more tables that can be reserved together as one large table, for example Table 5 and 6 for a group. You create them under Restaurant > Combination tables.
Where to find it: Menu Restaurant > tab Combination tables (/Horeca). New: button Add > Combination tables. The tab is only there if the add-on Combine tables is on (Settings > Add-ons > Restaurant and kitchen).
All buttons, settings and messages of this screen
With these three restrictions you hold back reservations: a Location restriction closes a location on certain days, a Crowd reduction limits how many reservations or guests may come per arrival time and a Time limitation blocks a period or a whole day for chosen reservation types.
Where to find it: Menu Restaurant > tabs Location restriction, Crowd reduction and Time limitation (/Horeca). New: the plus button on the tab itself. The tabs are only there if the add-on Reservation blocks is on. In the reservation overview the button Time limitation has a shortcut.
All buttons, settings and messages of this screen
Under Restaurant > Opening times you fill in per day when you are open. A change is saved immediately. The online times for guests fall within the opening times of that day.
Where to find it: Menu Restaurant > tab Opening times (/Horeca).
All buttons, settings and messages of this screen
Under Reservations you see all reservations of the business in six views: Overview (the timeline), List view, Weekly list, Last 100 reservations, Upcoming reservations and Reservation totals. With the Reservation settings cog you decide how the timeline looks and how booking works.
Where to find it: Menu Reservations (/Reservations). The Reservation settings cog is at the top right.
All buttons, settings and messages of this screen
The Reservation settings window (the cog under Reservations) brings together how the reservation overview looks and how booking works: the time interval, check-in, automatically setting no-show and what can be chosen under Add reservation. Everything applies to the whole business.
Where to find it: Menu Reservations > Reservation settings cog at the top right (/Reservations). You save changes with Save.
All buttons, settings and messages of this screen
In the Add reservation window you create a reservation yourself: type, date, time, table, guest and any products. In Update reservation you change it later, with tabs for attachments, history, emails, guest messages and an internal memo.
Where to find it: Menu Reservations > Create reservation (/Reservations); you open an existing reservation by clicking its name (Reservation information window > Edit).
All buttons, settings and messages of this screen
A combination links two or more reservations that a guest books in one go, for example bowling and then dinner. You create them under Settings > Guests and bookings > Packages. While booking one of the linked reservations, the guest can also choose the combination.
Where to find it: Settings > Guests and bookings > Packages (/Combinations/CombinationContainer, the page is called Combinations). New: Adding combinations. The tile only appears if the Packages add-on is on (Settings > Add-ons > Book).
All buttons, settings and messages of this screen
Under Search you see all your guests and reservations across all modules on one screen. You search by name, address, email or phone, choose a period and open a customer card for each guest with everything they did with you.
Where to find it: Menu Search (/searchforreservations), or Settings > Guests and bookings > Search guests and reservations.
All buttons, settings and messages of this screen
Under Cancellations you see all cancelled reservations and mark them as read. The Refunds overview lists the cancelled reservations that were paid online; there you refund the amount in full or in part via Mollie, or reject the refund with a reason.
Where to find it: Menu Cancellations (/cancellations) and menu Refunds overview (/Refunds). The Refunds overview only appears if the Products and down payments add-on is on.
All buttons, settings and messages of this screen
Under Guest information you decide which details you ask a guest for when booking, which are required and where they are visible: in the widget, in manual booking, for a group and for walk-ins.
Where to find it: Settings > Guests and bookings > Guest information (/settings/GuestDetails). Click a row for the details of that field.
All buttons, settings and messages of this screen
Under Guest payments you see which reservations were not kept or stayed unpaid (Unpaid and no-show) and which prepaid money is still outstanding after the visit day (Outstanding prepayments). There you refund or keep it. The Reservations at the till block determines what the till does with a deposit that is too high.
Where to find it: Settings > Guests and bookings > Guest payments, with the tabs Unpaid and no-show (/Settings/UnpaidAndNoShow) and Outstanding prepayments (/Vooruitbetalingen). For a business without reservations the entry is under Money and figures. The permissions are called Unpaid and No Show and Outstanding prepayments.
All buttons, settings and messages of this screen
The Reservation information window opens when you click a reservation in the reservation overview. You see the guest, the table, what is to be paid, and you set the reservation to Arrived, Left or No-show, send an email or cancel.
Where to find it: Menu Reservations (/Reservations) > click a name. It can also be opened from Requests, Quotations, Cancellations and Search.
All buttons, settings and messages of this screen
On Floorplan you see your tables per location, in the colour of their status at the chosen time. Tap a free table to make a reservation on it; tap another table for the reservation or the receipt of that table, with Guest arrived, Order and Settle. With Edit you arrange the room: moving tables, a floor, objects, zones, text and, per device, the start screen.
Where to find it: Menu Floorplan (/Floorplan); in the POS, Floorplan in the bar at the top (/Pos/Floorplan); on the handheld, Floorplan in the menu (/Handheld/Floorplan)
All buttons, settings and messages of this screen
In the POS layout, Reservations is in the bar at the top. There you see the reservations per day, per week or the last 100, with filters, and you set the status of a guest (for example Arrived). With Reservation (or the plus) you create a new one; tapping a reservation opens the details, the history and the attachments. Booking on an occupied table is allowed, but only after a warning.
Where to find it: POS > Reservations in the bar at the top (/Pos/Reservation); a new reservation with Reservation in the bar (/Pos/AddReservation)
All buttons, settings and messages of this screen
Webshop
Webshop
- What
- Jimani's webshop lets guests order online from a hospitality or retail business, with a choice of pickup, delivery, shipping or eat here. The webshop shares its database with the POS, so an online order lands on the same kitchen and order screen as a POS order.
- Who it is for
- Hospitality and retail businesses that want to offer online ordering.
- Core features
-
- Customers choose: pickup, delivery, shipping or eat here
- Delivery costs and a minimum order amount configurable per postcode area
- Choosing a time slot when ordering
- Supplements and product sets (combo deals) in the shopping cart
- Online payment via Mollie; business customers can order on account via Customer CRM (€20 per month)
- Managing orders in Order management and following them on the kitchen screen
- Price
- No monthly fee (pricing decision 14-10-2026). See "Which features cost money?".
- Difference from competitors
- Lightspeed sells eCommerce/delivery functionality as a separately purchased add-on. unTill integrates with delivery platforms such as Thuisbezorgd, with its own one-off licence costs (in one example found, €295 for the licence plus €395 for the integration). Jimani has this built in, without a monthly fee and without a separate licence per integration.
Keywords: hospitality retail webshop, order online webshop, webshop module price, webshop with POS
Related questions - Can I offer pickup, delivery and dine-in ordering with Jimani?
- What does the webshop module cost per month?
- Does a webshop order land on the same screen as a POS order?
Choosing a time slot and spreading busy periods
- What
- Guests choose a time slot for their order; the system can limit the number of orders per time slot to spread the load on the kitchen.
- Who it is for
- Hospitality businesses with online ordering.
- How it works
- A time slot choice in the widget is linked to a setting for the maximum number of orders per time period.
- Delivery
- with Own delivery and delivery scheduling, a time slot (quarter-hour slots) is full when there are already as many deliveries for that time as the maximum under Order Restrictions (for webshop or kiosk) allows. The widget then shows the slot as unavailable and the server rejects the order with "This delivery time is full. Choose another time." For pickup and eat here this has not been checked.
- Difference from competitors
- No public comparison material found.
Keywords: order time slot, spread busy periods webshop, maximum orders per time period
Related questions - Can a hospitality business limit the number of orders per time slot?
Paying online and ordering on account
- What
- The webshop supports direct online payment via Mollie, and business customers can order on account via Customer CRM (€20 per month).
- Who it is for
- Hospitality and retail businesses, and their business customers (invoiced).
- How it works
- An order is paid through the business owner's Mollie connection; for customers on account the invoice email contains the Payment link placeholder and you set the status manually to Unpaid or Paid. This is a separate flow alongside direct payment, meant for customers who buy on account instead of paying per order.
- Difference from competitors
- No public comparison material found.
Keywords: pay online webshop, Mollie integration, order on account webshop
Related questions - Which online payment methods does the Jimani webshop support?
- Can a business customer order on account?
Promotional prices and temporary offers
- What
- A product can be given a temporary promotional price, with its own start and end date.
- Who it is for
- Hospitality and retail businesses.
- How it works
- Besides the normal price, a product can have a separate promotional price with a `specialpricefrom` and `specialpriceto` date; outside that period the normal price simply applies. The webshop can include these promotional prices when retrieving the product list.
- Difference from competitors
- No public comparison material found on temporary promotional prices at Lightspeed, unTill or SumUp specifically.
Keywords: promotional price webshop, temporary product offer, set discount period
Related questions - Can I put a product on temporary offer with its own start and end date?
- Does a promotional price automatically stop applying outside the set period?
Switching between modules on the same POS
- What
- One POS device remembers which module is active (hospitality, webshop, salon, activities, ticketing) and adapts the menu accordingly; a user can switch this themselves via a dropdown.
- Who it is for
- Business owners who combine multiple modules on the same POS device.
- How it works
- The active module is remembered for thirty days per device/user. If the POS is on the hospitality module, the shared POS screen shows the reservation menu and the table floor plan; with another module the corresponding menu appears. Without a valid, known module the system falls back to the company's own main module, so the POS never gets stuck in the wrong menu.
- Difference from competitors
- No public comparison material found on a comparable shared POS interface that can be switched per module at Lightspeed, unTill or SumUp specifically.
Keywords: switch module POS, POS to reservation screen, switch hospitality webshop salon
Related questions - Can I switch on the same POS between, for example, booking and just taking payment?
- Does the POS remember which module I used last?
How are cancelled webshop orders handled?
- Answer
- You can refund a return with Gift voucher; the customer then receives a gift card with the amount. An unpaid online order that is cancelled returns the stock.
- Explanation
- The credit voucher belongs to a return: with a refund by Gift voucher, a real gift card is created if the business works with Gift cards. Cancelling an unpaid online order puts the stock back.
- Example
- A customer returns a product; the business owner refunds the amount with Gift voucher and the customer receives a gift card for the same amount.
Keywords: refund cancelled order, credit voucher cancellation, webshop refund
Does my webshop need a withdrawal button, and how does it work in Jimani?
- Answer
-
If you sell at a distance to consumers, a customer must be able to withdraw from the purchase online. That follows from Directive (EU) 2023/2673 (new Art. 11a in the Consumer Rights Directive), applicable from 19 June 2026. For this Jimani has the Withdrawal button. You turn it on under Settings > Guests and bookings > Delivery and pickup > Webshop settings (or type "Webshop settings" in Search for a setting…), block Webshop legal rules. By default it is on for shops and off for hospitality and treatments.
- Explanation
-
- For the customer. In the webshop and below the confirmation email of an order it says "Withdraw from contract here". The customer enters name, order number and the email address of the order, with an optional explanation, and chooses "Confirm withdrawal". An account is not needed. The customer immediately receives a confirmation with date and time.
- Period. 14 days after receipt. If the receipt is not known, 30 days after ordering.
- Which orders. Only distance orders: not the POS, the kiosk, eat here or a manual order.
- For you. You receive an email with the amount. The order shows "Withdraw" with date and time. You arrange the return and the refund yourself, within 14 days.
- Terms. Before paying, the customer sees that they agree to the terms and conditions which include the right of withdrawal.
Perishable products, custom-made goods and services on a fixed date are usually outside the right of withdrawal. That is why the button is off by default for hospitality.
- Example
-
A clothing shop ships a jacket. The customer withdraws on day 10 via the link in the email. The shop sees "Withdraw" and refunds after receiving the jacket.
- Related
-
How does OSS VAT work in my webshop?
Keywords: withdrawal button, right of withdrawal webshop, webshop return, art 11a, cooling-off period online
Related questions - Does my webshop need a withdrawal button?
- How can a customer withdraw from an online order?
- How do I turn on the withdrawal button?
- What is the new law on withdrawal for online purchases?
- Where will the Withdraw from contract here button appear?
How does OSS VAT work in my Jimani webshop?
- Answer
-
If you sell online to consumers in other EU countries for more than €10,000 per year, you charge the VAT of the buyer's country. To do so, turn on "OSS active" under Settings > Guests and bookings > Delivery and pickup > Webshop settings (or type "Webshop settings" in Search for a setting…). Jimani then converts the VAT and creates a quarterly report per country for your OSS return.
- Explanation
-
- Turning on. Settings > Guests and bookings > Delivery and pickup > Webshop settings (or type "Webshop settings" in Search for a setting…), block Webshop legal rules: "OSS active (VAT of the buyer's country)", Yes or No, default No. Below it you see how much you sold to other EU countries this year. If you reach €10,000 or more, the OSS report warns you; you decide yourself.
- When it applies. Only when shipping to another EU country. Not for the Netherlands, countries outside the EU, the POS or pickup.
- What changes. The price including VAT stays the same; only the VAT is converted to the country's rate (high, low or 0%). The confirmation email and the invoice show for example "VAT DE 19%".
- Report. In the financial overview (Settings > Money and figures > Reports) there is the button "Foreign VAT report (OSS)": per year and quarter, per country and rate the revenue excl. VAT, the VAT, the revenue incl. VAT and the number of orders. Downloadable as CSV. Only paid, non-cancelled and non-withdrawn orders count.
- Return. You file that yourself via the OSS portal of the Belastingdienst. A refund in a later quarter you correct in that quarter.
- Example
-
A customer in Germany buys for €119 incl. VAT. With OSS on, that is €100 + €19 VAT (DE 19%) instead of NL 21%.
- Related
-
Does my webshop need a withdrawal button?
Keywords: oss vat webshop, foreign vat webshop, one stop shop, eu vat sales, 10000 euro threshold
Related questions - How does VAT work when selling to customers in other EU countries?
- What is OSS and do I need to turn it on?
- From what amount do I have to charge the VAT of the buyer's country?
- How do I file my OSS return?
- Can I have foreign VAT calculated automatically in my webshop?
How do I turn on my business's online webshop and what do I get?
- Answer
-
Set Online webshop to Yes under Settings > Guests and bookings > Online webshop. Then create a webshop widget and set how guests receive their order. The online webshop has no monthly fee.
- Explanation
-
- What you get. Your own ordering page where customers order and pay themselves: the online store with its own address, the settings for delivery, pickup and eat here, and the orders straight on the kitchen screen and in Order management.
- Step 1. Go to Settings > Guests and bookings > Online webshop and set the question to Yes. You also find the function under Settings > Add-ons.
- Step 2. Open Online webshop in Settings and choose Add widget. Give the widget a name (only you see it) and choose the kind of widget. Under What the guest chooses, pick which categories it contains and finish the layout.
- Step 3. Adjust the webshop itself with Edit webshop: the front page, the menu, the categories, the products and the colours, with a live preview.
- Step 4. Set how guests receive their order: pickup, delivery, shipping or eat here. See How do I turn on delivery, pickup or eat here in my webshop?
- Step 5. Place the webshop on your website with View code (the widget code), or use the link. With Test, the webshop opens in a new tab, exactly as the customer sees it.
- Step 6. Orders arrive in Order management. See How do I manage the orders of my webshop?
The POS and the webshop share the same products and the same orders. What you ring up at the POS and what comes in online, you see together in Order management and in the Financial overview.
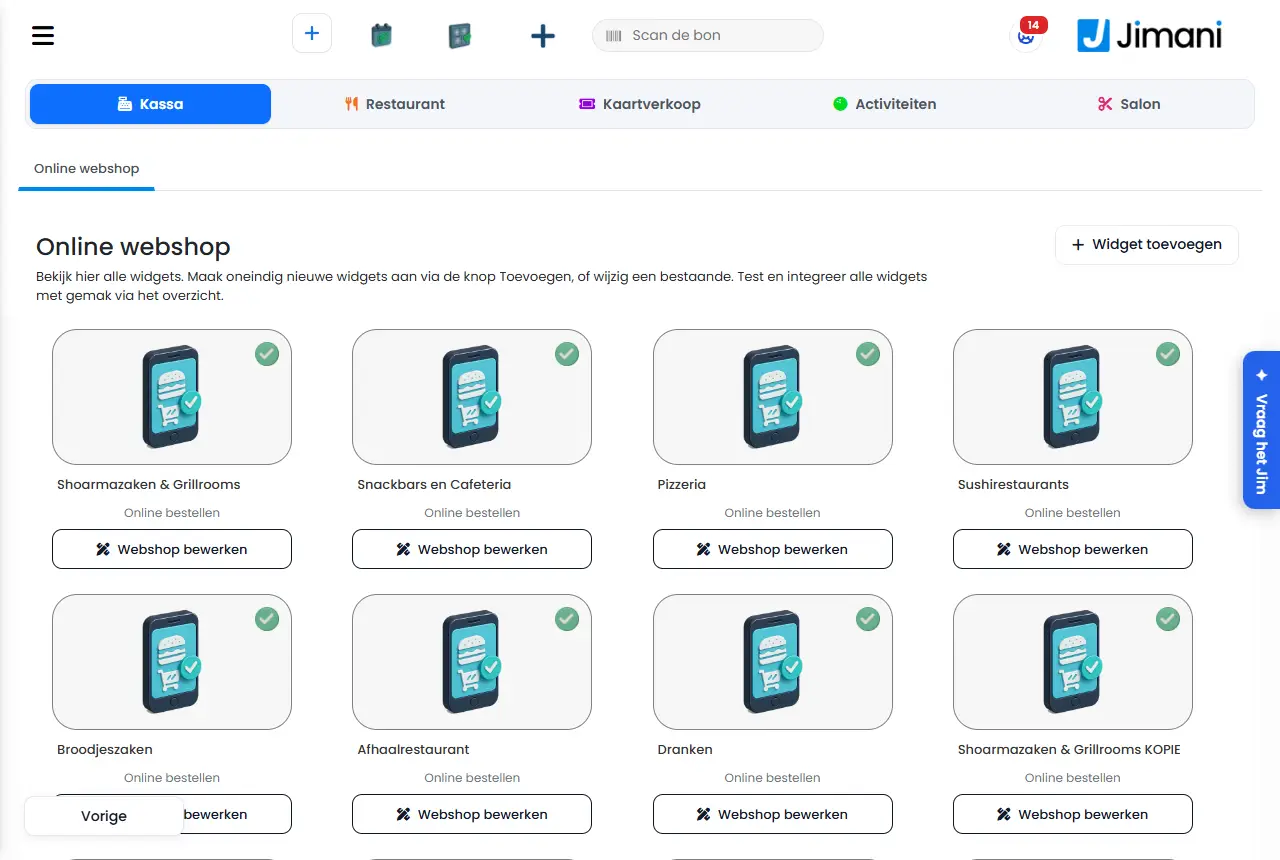
- Example
-
A baker turns on Online webshop, creates a widget Pickup orders with the categories bread and pastry, sets Pickup to Yes and places the code on their website. Customers order online and the order appears on the kitchen screen right away.
- Related
-
How do I turn on delivery, pickup or eat here in my webshop?, Can I manage multiple webshops in one account?, Which features cost money?
Keywords: turn on online webshop, activate webshop, order online webshop, create webshop widget, start online store, ordering page customers
Related questions - How do I turn on an online webshop?
- What does the online webshop cost?
- How do I let customers order and pay online?
- Do online orders automatically appear on the kitchen screen?
How do I turn on delivery, pickup or eat here in my webshop?
- Answer
-
Open the webshop widget under Settings > Guests and bookings > Online webshop, choose Edit and, on the Settings tab, set Pickup, Delivery and Eat here to Yes or No. For Delivery, you then choose How do you deliver?: yourself by bike, scooter or car, or with a carrier. Choose Save.
- Explanation
-
- Step 1. Go to Settings > Guests and bookings > Online webshop (or Delivery methods and shipping costs; this opens the same list of widgets). At your webshop widget, choose Edit and open the Settings tab.
- Step 2. Under Pickup, Delivery and Eat here, set to Yes what you offer. Pickup: The customer collects the order, with a pickup time. Delivery: The order comes to the customer's home: by yourself or with a carrier. Eat here: The guest orders at the table or at the counter.
- Step 3. Under Delivery, choose the question How do you deliver?: Bike, Scooter, Car (you deliver yourself, with a time slot and delivery schedule) or Carrier (a parcel service delivers, without a time slot). With Carrier, you choose Which carrier?: PostNL, DHL, UPS, DPD, GLS or Other.
- Step 4. Under When do you deliver? choose Right after the order, The next day or Within 1-2 working days. If you enter a delivery time in working days yourself, the question is set to Custom delivery time. With Right after the order, the standard preparation time applies and the customer chooses a time within your delivery times. Otherwise, the customer sees when their order will arrive and does not choose a time slot.
- Step 5. If you have more than one method on, you use When do you ask for delivery or pickup? to decide whether the customer chooses this Before checkout or At the beginning. With exactly one method, you can set Show pre-selection screen to No: the customer then goes straight to the products.
- Step 6. Choose Save at the bottom of the widget. The choices are then kept and the preview next to it follows every choice immediately. Only the shipping costs per country are saved immediately per line.
Own delivery and shipping cannot be on at the same time: How do you deliver? has one answer per webshop widget. An order can only be placed for a method that is on; the webshop rejects other choices.
- Example
-
A pizzeria sets Pickup and Delivery to Yes, chooses Scooter and Right after the order, and sets the neighbourhoods it delivers to under Delivery postcodes. A clothing online store sets only Delivery to Yes, chooses Carrier and PostNL and Within 1-2 working days.
- Related
-
How do the delivery and pickup options of the webshop widget work?, How do I set delivery costs, free delivery and a minimum order amount?, How do I set delivery days, delivery times and postcodes?, How do I have orders shipped with a parcel service and what does the customer pay?
Keywords: turn on delivery webshop, turn on pickup, eat here webshop, delivery methods, bike scooter car delivery, set up parcel service shipping, postnl dhl webshop
Related questions - How do I turn on delivery in my webshop?
- How do I let customers collect their order themselves?
- Can I choose between own delivery and a carrier?
- How do I turn off eat here in my webshop?
How do I set delivery costs, free delivery and a minimum order amount?
- Answer
-
You set the standard Delivery/shipping costs with the limit Delivery costs free after amount, and per postcode range your own Delivery costs and a Minimum order amount under Delivery times and postcodes. An amount for a postcode takes precedence over the standard costs. Above the free limit, the customer pays nothing.
- Explanation
-
- Step 1. Standard costs: go to Settings > Guests and bookings > Delivery and pickup > Webshop settings (or type "Webshop settings" in Search for a setting…), Delivery settings step. Fill in Delivery/shipping costs and Delivery costs free after amount. The same two fields are in the webshop editor (Edit webshop, View tab) as Delivery costs and Free from; they apply to all webshop widgets of the business.
- Step 2. Costs per town or neighbourhood: go to Settings > Guests and bookings > Delivery and pickup (Delivery times and postcodes), Delivery postcodes tab. Fill in Delivery costs and Minimum order amount per range.
- Step 3. Minimum for the whole webshop: in the webshop editor, View tab, fill in Minimum order amount. It applies to pickup and delivery, over the products without delivery costs, and not to eat here. 0 means: no minimum.
- Step 4. Minimum number of products: under Webshop settings, Delivery settings step, fill in Minimum order quantity.
- Step 5. If you ship with a parcel service, the costs per country are with the delivery methods; see How do I have orders shipped with a parcel service and what does the customer pay?
- How the webshop calculates
-
- The delivery costs only apply to delivery or shipping, never to pickup or eat here.
- If the customer's postcode has Delivery costs above 0, those are the costs. Otherwise the webshop's Delivery/shipping costs apply.
- If Delivery costs free after amount is filled in and the amount of products reaches that limit, the costs are 0. A limit of 0 does not count as a limit: delivery is then never free.
- The postcode's minimum order amount applies alongside the webshop's minimum; if the order stays below either one, it does not go through.
- The server recalculates every order itself, even if the customer saw a different amount.
- Example
-
Standard € 4.95, free from € 40. Postcodes 9500 to 9510 cost € 2.50 with a minimum of € 15. A customer in 9501 with € 30 of products pays € 2.50; with € 45 they pay nothing. A customer in another range with € 30 pays € 4.95.
- Related
-
How does the Webshop settings window work?, How do I set delivery days, delivery times and postcodes?, How do I turn on delivery, pickup or eat here in my webshop?, What can you set for Delivery?
Keywords: set delivery costs, free delivery from amount, minimum order amount, delivery costs per postcode, shipping costs webshop, threshold free delivery
Related questions - How do I set delivery costs?
- How do I let customers have free delivery above an amount?
- Can I set a minimum order amount?
- Can I charge different delivery costs per postcode?
How do I set delivery days, delivery times and postcodes?
- Answer
-
Go to Settings > Guests and bookings > Delivery and pickup (Delivery times and postcodes). There you set Use delivery schedule to Yes, create delivery areas with their delivery days and link the postcodes to an area. The delivery hours per day are with the opening hours of your webshop.
- Explanation
-
- Step 1. Open the Delivery schedule tab and choose Yes under Use delivery schedule. Set Same-day orders until (for example 13:00), choose Today, Tomorrow or Day after tomorrow under Earliest delivery and fill in under Days ahead how far ahead the customer may choose (maximum 120). Every choice is saved immediately.
- Step 2. Set the delivery hours per day with the opening hours of the webshop: the columns Delivery from, Delivery to and Delivery (in the Excel export of the opening hours they are called Delivery from and Delivery until). If Delivery is off for a day (a public holiday or holiday), no delivery orders can be placed that day.
- Step 3. If you work with different neighbourhoods or towns, open the Delivery areas tab. Click the plus, give the area a Name, set the Delivery days to Yes or No and optionally fill in Delivery from and Delivery until if this area has different hours than the opening hours.
- Step 4. Open Delivery postcodes. Use the plus to add a range (Postcode from and Postcode to, the digits of the postcode) and choose the Area. Or import them in one go with an Excel file: Export gives you the format.
- Step 5. Test the webshop: enter a postcode and see which days and times you get.
- How the webshop determines the days and times
-
- The customer enters their postcode as soon as they choose delivery (adjustable with Ask for postcode before checkout). If the postcode does not belong to an active area or the range is excluded, they get the message that you do not deliver there.
- Only the delivery days of the area count. Within those, the delivery hours of that day apply, unless the area has its own hours.
- The times come in blocks of 15 minutes. For today, the first block only starts after the preparation time plus the travel time (rounded up to the next quarter of an hour), and choosing today is only possible before the time under Same-day orders until.
- If a maximum is set for a time under Order Restrictions (for the webshop or the kiosk), the block is full when that many deliveries are already scheduled at that time. A day without a free block drops out.
- Without a delivery schedule and without delivery areas, the webshop works as always: only today and no postcode check.
- Example
-
Stadskanaal gets delivery on Tuesday and Friday and Westerwolde on Wednesday and Saturday. You create two areas with those days, link the postcodes to the right area and set Same-day orders until to 13:00. A customer from Westerwolde only sees Wednesday and Saturday.
- Related
-
What can you set for Delivery?, How do I set delivery costs, free delivery and a minimum order amount?, How do I turn on delivery, pickup or eat here in my webshop?
Keywords: set delivery days, delivery times webshop, delivery areas, postcodes delivery, delivery schedule, order for today until, delivery from
Related questions - How do I set on which days I deliver?
- Until what time can a customer order for delivery today?
- How do I limit delivery to certain postcodes?
- How do I set delivery areas?
- How far ahead may a customer plan a delivery?
How do I have orders shipped with a parcel service and what does the customer pay?
- Answer
-
In the settings of your webshop widget, set Delivery to Yes and choose Carrier under How do you deliver? The customer then sees the delivery time in working days and pays the Shipping costs of their country. When you send the parcel, you enter the code under Track & trace in the order.
- Explanation
-
- Step 1. Open the webshop widget (Settings > Guests and bookings > Online webshop, choose Edit at the widget) and go to the Settings tab. Set Delivery to Yes and choose Carrier under How do you deliver?
- Step 2. Under Which carrier? choose PostNL, DHL, UPS, DPD, GLS or Other. From the code you enter with the order, Jimani makes the track & trace link for the customer.
- Step 3. Under When do you deliver? choose The next day or Within 1-2 working days, or enter a from and to yourself under Delivery time in working days (for example 1 to 3); the question is then set to Custom delivery time. There is no time slot: the customer only sees when their order will arrive.
- Step 4. Optionally fill in Same-day shipping until. Ordered before that time, shipped today. If you leave it empty, it is not shown.
- Step 5. Under Shipping costs per country, fill in per country the Shipping costs and Free from. With Add country, a line is added; with the bin you remove a line. Every line is saved immediately. Countries to choose from: the Netherlands, Belgium, Germany, Luxembourg, France, Austria, Denmark, Spain, Italy, Portugal, Sweden, Finland, Poland, the United Kingdom, Ireland, Switzerland, Norway and Greece.
- Step 6. Choose Save at the bottom of the widget.
- Step 7. When you send the parcel, open the order in Order management (Search order) and fill in the code or the link under Track & trace. The field saves as soon as you leave it, and the link Track the shipment then appears with it.
- How the webshop calculates
-
- If you have filled in at least one country, the webshop looks up the country of the delivery address (without a country: the Netherlands). If that country is not in your list, the customer cannot order: the webshop says you do not ship to this country.
- If there is a Free from amount for the country and the amount of products (incl. VAT) reaches it, the shipping costs are 0. Otherwise the country's shipping costs apply.
- If you have not filled in any countries, the webshop's Delivery/shipping costs and the Delivery costs free after amount limit apply to every address.
- When shipping, the webshop does not check the delivery schedule and the delivery areas: those only apply if you deliver yourself.
- Example
-
An online store ships within the Netherlands for € 6.95 (free from € 50) and to Belgium for € 9.95. A customer from Germany cannot order until the store adds Germany.
- Related
-
How do I turn on delivery, pickup or eat here in my webshop?, How do I set delivery costs, free delivery and a minimum order amount?, How does Order management work for the orders of my webshop?
Keywords: shipping webshop, shipping costs per country, parcel service postnl dhl, track and trace order, free shipping from, delivery time working days
Related questions - How do I send webshop orders with PostNL or DHL?
- How do I show the customer a track-and-trace code?
- How do I set shipping costs per country?
- Can I send parcels abroad from my webshop?
How do I manage the orders of my webshop?
- Answer
-
Open Order management in the menu. There you set orders to In progress and Done, and complete them on the Delivery, Pickup or Eat here screen. You find an older order with the Search order tab.
- Explanation
-
- Step 1. Choose Order management. The screen is called Order overview. New orders are on the Orders tab with the status Order received.
- Step 2. Click the status of an item: it becomes In progress. Click once more: it becomes Done. When everything in an order is Done, the order appears under Order Status and on the screen of its kind.
- Step 3. Give the order to the guest and open the Delivery, Pickup or Eat here screen. Click the status Done of the order. The status becomes Delivered, Picked up or Eat here.
- Step 4. If you want to view an order, click the info icon in front of the line. You see the items, the steps of the order, the payment and the buttons Refund, Print receipt and Mark as complete.
- Step 5. Find an earlier order with Search order: type an item, order number, amount, name or email, or open Search options for date, category, product, status, payment method, kind of order and user.
What you see is your business's working day. If you also want to see the orders that have already been completed, turn on View completed orders. If no item in your business has a kitchen printer, every order immediately goes to done and you only see Search order. What a line or button means is explained in How does Order management work for the orders of my webshop?
- Example
-
A pickup order comes in with two sandwiches. You click twice on the status of each sandwich: they are Done and the order is on the Pickup screen. The guest collects it and you click Done: the status becomes Picked up.
- Related
-
How does Order management work for the orders of my webshop?, How do I follow the status of an order and how does the kitchen screen work?, How do I refund a webshop order?
Keywords: manage orders, order management, set order ready, order picked up, search order, complete webshop order
Related questions - How do I see new orders from my webshop?
- How do I set an order to done?
- How do I find an older order?
- Where do I complete a delivery or pickup order?
How do I follow the status of an order and how does the kitchen screen work?
- Answer
-
In Order management, you see the status per order: Order received, In progress, Done and then Delivered, Picked up or Eat here. The kitchen screen on a TV or tablet shows the same orders with only the order number, in three columns: New, Being prepared and Done.
- Explanation
-
- Statuses in Order management. An item starts at Order received, goes to In progress with a click and to Done with another click. When everything in an order is Done, the order is done. You then complete it as Delivered, Picked up or Eat here. An item that has to wait for a moment is on Hold.
- The order window. The steps Order received, Payment, In progress, Done and Completed are shown with the time for each order.
- Opening the kitchen screen. On the TV or tablet, open the address
/tv/login of the Jimani widget environment. Log in with Customer number, Email and Password and choose Log in. With Remember me, the screen saves your customer number and email address. There is no button in the dashboard itself that opens this screen. - Choosing a type. After logging in, you choose under Choose the type of screen: Dine-In (guests who eat here), Pickup (pickup orders) or Both (eat here and pickup together). The screen shows today's orders.
- What you see. At the top Jimani and Kitchen screen, below it the columns New, Being prepared and Done with the order number per order (for example #12). Being prepared shows orders of which items are In progress; Done shows orders that are completely done. Each column shows at most 15 orders. The New column is always empty at the moment.
- Updating. The screen refreshes by itself as soon as you change a status in Order management. If the connection drops, the screen fetches the orders again regularly.
- Without a valid login. The screen shows No access and says that a valid access key is needed.
- Another kitchen screen. This TV screen with order numbers is something different from the kitchen screen that you connect as a device under Registers and hardware, on which the cook taps New, In progress and Done per product. See How does the kitchen screen work?.
- Example
-
The kitchen hangs up a TV with Both. An employee sets an order to In progress in Order management: the number appears in the Being prepared column. When everything is Done, the number jumps to Done.
- Related
-
How does the kitchen screen work?, How do I manage the orders of my webshop?, How does Order management work for the orders of my webshop?
Keywords: kitchen screen, tv screen orders, order status, order ready screen, tv kitchen orders, order number screen
Related questions - Which statuses does an order have?
- What do I see on the kitchen screen on the TV?
- How do I put an item on hold (On-Hold)?
- What do In progress and Done mean for an order?
Can I link a table or table number to an order?
- Answer
-
Yes, at the POS, with the Parking tables function. You create tables and use the Tables button to put an order on a table until it is paid. In the online webshop, a guest cannot enter a table number themselves.
- Explanation
-
- Step 1. Turn on the Parking tables function (Settings > Add-ons). Without this function, the Tables tab is missing.
- Step 2. Go to Settings > Till and products > Menu and settings and open the Tables tab. It says: Here you can create tables to park the order for later. This can be handy when you take an order by phone or when you want an order to be paid later.
- Step 3. Click the plus. Under Table name, enter a name (maximum 20 characters) and, if you use Restaurant, choose the Location where the table is. With Add as main guest you mark the table as a main guest table when placing an order; in the POS table list, the Show main guests button then shows only those tables. Choose Save.
- Step 4. At the POS, ring up the products and choose the Tables button. You see the Choose Parking Table list: Choose the table on which the order should be booked. Without a choice, you get the message Select a table to proceed.
- Step 5. When the guest pays, you choose the same table again: the open receipt of that table appears and you take payment.
You can enter many tables at once with Excel: use Select Excel file, Choose a file and the import button, or download the list with Export. In the list, you can per table turn Add as main guest and Active on or off, and delete a table.
- Example
-
A guest phones in an order. You ring up the products, choose Tables and put the order on table Phone 1. When the guest collects the order an hour later, you open table Phone 1 and take payment.
- Related
-
How do I manage the orders of my webshop?
Keywords: table number order, link table order, parking tables, put order on table, parking table, table phone order
Related questions - Can a customer enter a table number when ordering online?
- How do I link an order to a table at the POS?
- How do I park an order until the guest wants to pay?
- How do I create tables at the POS?
Can I manage multiple webshops in one account?
- Answer
-
Yes. Under Settings > Guests and bookings > Online webshop, you create as many webshop widgets as you like, each with its own name, its own categories, its own layout and its own delivery methods. All orders come together in Order management.
- Explanation
-
- Step 1. Choose Add widget and give the widget a name you recognise yourself, for example Terrace or Pickup orders. Only you see the name, in the list of widgets.
- Step 2. Under What the guest chooses, pick which categories are in this webshop. Everything is on; remove what the guest may not choose in this widget. This way you make a webshop with only drinks and one with only dishes.
- Step 3. Finish the layout. If you already have a webshop in your own house style, use Make a copy: this makes an exact copy of the widget including house style.
- Step 4. Set per widget how the guest receives their order (Pickup, Delivery or Eat here). Each widget has its own delivery questions on the Settings tab.
- Step 5. Place each webshop in its own spot with View code, and test it with Test.
- This is the same for all webshops
-
the products (per widget you only choose which categories it contains), the standard delivery costs and the free limit (which apply to all webshop widgets of the business), the delivery postcodes and delivery areas, the stock and the orders in Order management and in the Financial overview.
- Example
-
A lunchroom has a Pickup webshop with sandwiches and soups and a Catering webshop with platters and pastries, each on its own page of the website. Both orders appear in the same list in Order management.
- Related
-
How do I turn on my business's online webshop and what do I get?, How do I turn on delivery, pickup or eat here in my webshop?
Keywords: multiple webshops, second webshop, copy webshop, multiple widgets, separate webshop categories, webshop per department
Related questions - Can I run two webshops side by side?
- How do I create a separate webshop for pickup orders?
- Do all orders from my webshops come in one place?
- Can each webshop have its own categories?
Where do I see the revenue and figures of my webshop?
- Answer
-
Open Settings > Money and figures > Reports. The Financial overview shows the revenue of the webshop, kiosk and POS over a period, with filters on category, product and employee. From there you also open the Foreign VAT report (OSS) and the Own consumption overview.
- Explanation
-
- Financial overview. Choose Date as of and Date to and click the magnifying glass. You see the number of orders, the number of products sold, the total revenue (with the revenue excl. VAT below it), the employee with the highest turnover, the payment methods, the number per order kind (Pickup, Delivery, Eat here) and per channel (Online store, Kiosk, POS), and the VAT per rate. Export gives an Excel file and Print a pdf, with the same filters.
- Revenue of a product or category. Choose a Category or a Product. Two amounts are then shown: the Turnover of this selection and the turnover of the Whole orders it was part of. At the bottom are the tables Margin by category and Margin by product with Quantity, Revenue excl., Purchasing and Margin.
- Revenue per employee. The Employee with highest turnover block shows the best seller. With the User list, you view the sales of one employee.
- What does not count. Under Not included in revenue are Cancelled, Practice and Refunded. A cancelled or practice receipt does not count, just like on the day closing.
- Foreign VAT report (OSS). The button is on the Financial overview. Choose the Year and the Quarter; per country and rate you see the revenue excl. VAT, the VAT, the revenue incl. VAT and the number of orders, and Export gives a file for your return. See How does OSS VAT work in my Jimani webshop?
- Own consumption. If the Own consumption function is on, there is a block and a button Own consumption. Choose the Year: per Type of consumption you see the number of receipts, the Quantity, the Cost price excl. VAT, the VAT on cost price and the Sales value (for info), per month and per receipt. Export and Print also work here. See How do I book own consumption, staff consumption or shrinkage?
- Returns. The Refunds overview shows the returns; see How does the Refunds overview of my webshop work?
- Example
-
You want to know what you earned from soft drinks in September. Choose Date as of 01-09 and Date to 30-09, choose Soft drinks under Category and click the magnifying glass. Under Margin by product, you see the quantity and the margin per soft drink.
- Related
-
How does the Financial overview of my webshop work?, How does OSS VAT work in my Jimani webshop?, How do I book own consumption, staff consumption or shrinkage?
Keywords: webshop revenue, financial overview webshop, revenue per product, oss report, own consumption overview, sales statistics, popular products
Related questions - Where do I see the revenue of my webshop?
- How many orders have I had via the webshop?
- How do I see which product sells best?
- Where do I find the VAT report for abroad?
How do I refund a webshop order?
- Answer
-
Open the order in Order management and choose Refund. The receipt then opens in the POS, where you choose per item what you take back, give a reason and refund. What you take back is then listed in the Refunds overview.
- Explanation
-
- Step 1. Go to Order management and find the order with Search order, or open it on the Delivery, Pickup or Eat here screen. Click the info icon in front of the line.
- Step 2. Choose Refund. The button is missing if there is nothing left to take back and is grey if the Refund function is off. Turn it on under Settings > Add-ons; Refund has no monthly fee.
- Step 3. The order opens in the POS, just like when you scan the receipt. So nothing has been booked back yet: you remove what you take back line by line.
- Step 4. Under Reason, choose: Ordered incorrectly, Incorrect order, Complaint about the article, Something is missing or Other. If you choose Other, you fill in an Other reason. Always give a reason.
- Step 5. Complete the return. If the receipt was paid via Mollie (card payment, Tap to Pay or online), the money can go back to the customer's card or account via Mollie with Refund to card, up to 120 days after the payment. It is in the account within a few days. If that is not possible for the whole sum, you refund the rest in cash. If you choose Gift voucher as the refund and your business works with Gift cards, the customer receives a gift card with a number and the amount as balance.
- Step 6. Check the result in the Refunds overview: per return the date, the quantity, the amount, the reason, whether the product went back into stock and who took the return.
The Refunds overview also shows what was struck from a receipt before it was paid. That is not a refund: no money went back.
- Example
-
A guest ordered two sandwiches and a coffee via the webshop and brings one sandwich back because it was wrong. You open the order, choose Refund, remove one sandwich from the receipt, choose Ordered incorrectly as the reason and refund the amount.
- Related
-
How does the Refunds overview of my webshop work?, How do I manage the orders of my webshop?, Does my webshop need a withdrawal button?
Keywords: refund webshop, return webshop order, take back order, refund to card, refund reason, return to stock
Related questions - How do I refund a customer of my webshop?
- How do I take back an item of an online order?
- Why is the Refund button missing?
- Where do I see which refunds have been made?
Can I connect Uber Eats to Jimani and receive orders?
- Answer
-
Not yet for your own business. The dashboard has no screen or button to connect Uber Eats, and orders from Uber Eats do not appear in Order management. Jimani does have a prepared connection, but it is not yet open to customers.
- Explanation
-
- What does exist. A sign-up address (
/ubereats/connect) sends a logged-in user to Uber Eats to grant access. They then return to a page that shows whether connecting succeeded. There is also a receiver for notifications from Uber Eats, which only stores them. - What does not exist. There is no menu entry, no button under Add-ons and no setting. An order from Uber Eats is not created in Jimani and does not appear in Order management.
- What you can do. Let guests order directly from you with your own online webshop, with pickup, delivery or eat here. See How do I turn on my business's online webshop and what do I get?
- Messages
-
these texts can appear on the page after connecting.
| Message | What it means | What you do |
|---|
| Uber Eats connected. | Uber Eats granted access and Jimani stored it. | Nothing. |
| Uber Eats authorization code is missing. | Uber Eats did not send a code. | Start connecting again. |
| Uber Eats authorization state is invalid. | The connection has expired (after an hour) or does not belong to your business. | Start connecting again, logged in to the right business. |
| The Uber Eats authorization failed | Uber Eats refused access; the reason follows. | Check your Uber Eats account and try again. |
| Exchanging the Uber Eats token failed | Jimani could not record the access; the reason follows. | Try again and contact us if it keeps failing. |
- Example
-
A restaurant wants Uber Eats orders on the kitchen screen. That is not possible automatically right now: the Uber Eats orders stay in the Uber Eats app. Orders via your own webshop do appear on the kitchen screen.
- Related
-
How do I turn on my business's online webshop and what do I get?
Keywords: connect uber eats, uber eats orders, delivery platform integration, uber eats pos, uber eats webshop
Related questions - Can I connect Uber Eats to my POS?
- Do orders from Uber Eats come into Jimani?
- Can I connect delivery platforms such as Thuisbezorgd or Uber Eats?
Which details does my webshop ask the customer when ordering?
- Answer
-
You decide that yourself under Settings > Guests and bookings > Guest information. For each guest field, you turn on a switch for Eat here, Pickup and Delivery: where the switch is on, the webshop asks the customer for that field. With the plus, you add a question of your own.
- Explanation
-
- Step 1. Open Guest information. The list shows each field with the columns Name, Eat here, Pickup and Delivery. For a shop, the name Sale appears instead of Eat here.
- Step 2. Turn a switch off to stop asking for a field for that kind of order, or on to ask for it. The change is saved immediately; if you see Not saved, try again.
- Step 3. Click the plus for a question of your own, for example a delivery instruction. Fill in the Name for every language of your business and turn on Visible In Here-Eating, Visible in delivery and Visible in takeout for the kinds of order for which you want to ask the question. Choose Save.
- Step 4. What the customer filled in, you see later in the order window in Order management, with the customer's details.
A field of your own that you have once created cannot be changed or deleted on this screen: the line does not open when you click it. Turn the field off with the switches if you no longer want to ask for it.
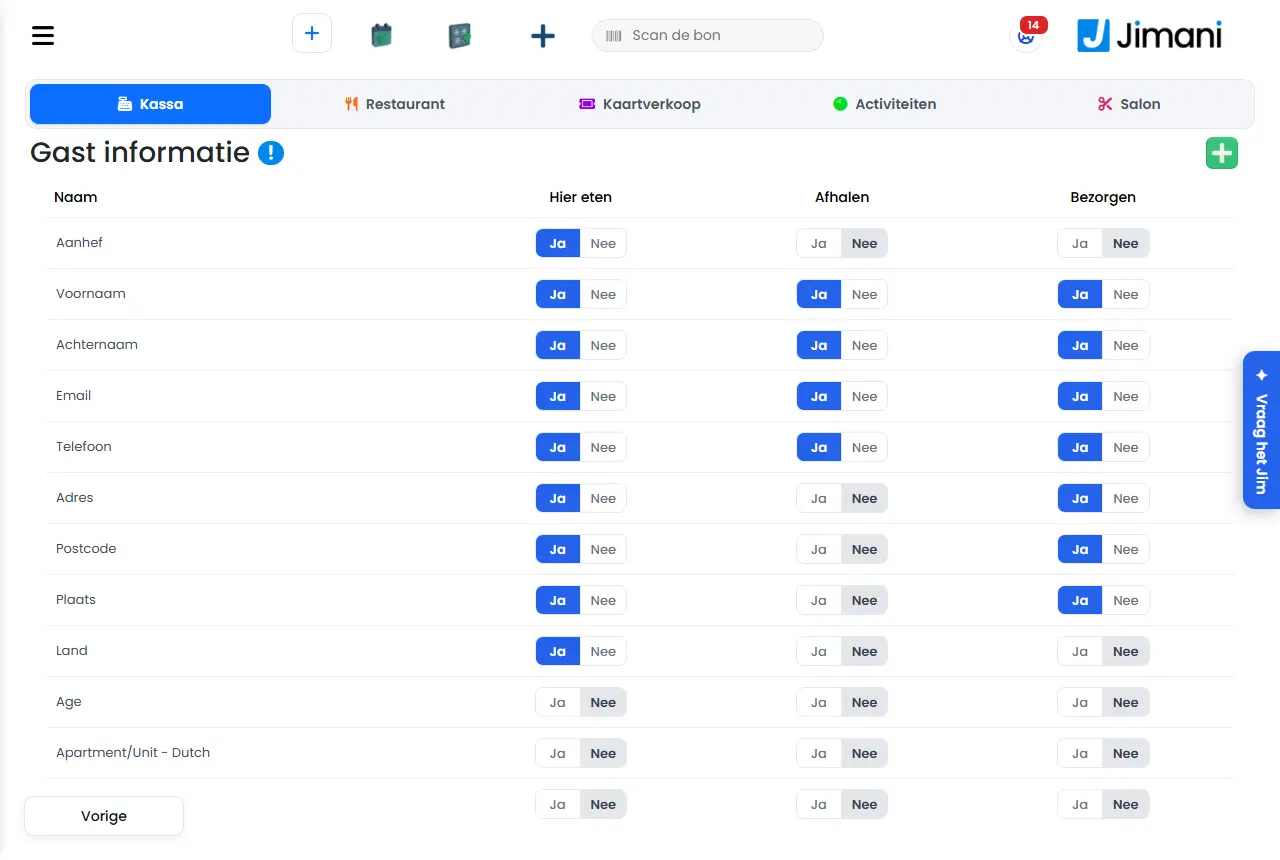
- Example
-
A delivery service adds the field Ring at the door and turns on only Visible in delivery. For pickup and eat here, the customer does not see that question.
- Related
-
What can you set under Guest information of the webshop?
Keywords: customer details ordering, customer data webshop, extra question at order, fields delivery pickup, add guest field, delivery instruction field
Related questions - Which details does my webshop ask the customer?
- How do I add a question of my own to the order form?
- How do I make sure the customer does not have to fill in their address or phone number?
- Can I ask for different details for pickup or delivery?
How do I let business customers order on account?
- Answer
-
Turn on the Customer CRM function (€ 20 per month), create the business customer under Webshop CRM and set Allowed to pay on account to Yes. At the POS, you choose the customer under Tables, On account. From then on, you follow the invoice under Send invoices and Outstanding invoices.
- Explanation
-
- Step 1. Turn on Customer CRM under Settings > Add-ons. The Webshop CRM entry then appears under Settings > Guests and bookings.
- Step 2. Open Webshop CRM and click Customer. On the first step, fill in the company details (all fields are required) and choose Next.
- Step 3. On the second step, set Allowed to pay on account to Yes, fill in the Payment term in days and choose the Email template: pay on account. Choose Save.
- Step 4. At the POS, you ring up the products and choose the Tables button. With the button Add to regular guests (On account), you see the business customers. Choose the customer and confirm with Customer order. During checkout, you then pay on account (Pay on account).
- Step 5. Under Send invoices are the latest orders on account with Invoice date, Due date and Invoice Total. The due date is the invoice date plus the customer's payment term.
- Step 6. When the customer has paid, set the invoice to Paid and choose Save. An invoice that has not been paid on time also appears under Outstanding invoices. The payment counts as Others.
You adjust the email with the invoice under Email template. Use the placeholders (such as Customer name, Invoice number, Amount due and Payment link) to insert details. Fill in subject and text in every language, or leave both empty: the standard text is then used.
- Example
-
A wholesaler lets a canteen order on account with a 30-day payment term. It appears under Send invoices. After 30 days without payment, the invoice also appears under Outstanding invoices. The wholesaler sets it to Paid as soon as the money is in.
- Related
-
How does the Customer CRM work for business customers who order on account?, Which features cost money?
Keywords: order on account, customer crm, business customer invoice, payment term, outstanding invoices, set invoice as paid
Related questions - How do I let a company order on account?
- How do I create an invoice for a business customer?
- Where do I see customers' outstanding invoices?
- What does the function for customers on account cost?
The Foreign VAT report (OSS) shows per quarter your webshop sales to other EU countries, per country and VAT rate, for your OSS return. You export it as a CSV file.
Where to find it: Settings > Money and figures > Reports, in the POS Financial overview the button Foreign VAT report (OSS) (/Settings/OssFinancialReport)
All buttons, settings and messages of this screen
In Order management you see today's orders from your webshop, kiosk and POS. You move them from received to done and then to Delivered, Picked up or eaten here. Delivery, Pickup and Eat here each have their own screen.
Where to find it: Menu > Order management (/WebshopOrderManagement), with below it Delivery (/WebshopOrderManagement/Delivery), Pickup (/WebshopOrderManagement/Pickup) and Eat here (/WebshopOrderManagement/DineIn). If you don't see a menu entry, you lack the permission for it; the owner sets this under Settings > Your business > Users and permissions.
All buttons, settings and messages of this screen
Under Delivery you set on which days and until what time customers of your online webshop can choose a delivery, which delivery areas you have and what delivery costs per postcode. The screen has three tabs: Delivery schedule, Delivery areas and Delivery postcodes.
Where to find it: Settings > Guests and bookings > Delivery and pickup (Delivery times and postcodes) (/Settings/DeliveryZipcodes). With a POS, the entry is there if your online webshop is on. A link with #bezorggebieden or #bezorgpostcodes after it opens that tab straight away.
All buttons, settings and messages of this screen
Three short settings screens determine per ordering channel (kiosk, widget and POS) whether delivery, pickup and eat here are on, and how long and how fast delivery is. The same settings are in the Webshop settings window; preferably use that window. Whether the webshop widget offers pickup and delivery is chosen in the widget itself; see How do the delivery and pickup options of the webshop widget work?.
Where to find it: Settings > Guests and bookings > Delivery and pickup > Webshop settings (or type "Webshop settings" in Search for a setting…), with the steps Delivery settings, Eat here settings and Pickup settings. The separate screens are also at /Settings/DeliverySettings, /Settings/DineInSettings and /Settings/PickupSettings. No menu entry leads to them; they can be reached by anyone who has the permission (Delivery settings, Settings for "Eat here" and Pickup settings under Users and permissions) and knows the address.
All buttons, settings and messages of this screen
Under Guest information you decide which details a customer fills in when ordering in your webshop, and whether they are asked for eat here, pickup or delivery. With the plus you add a question of your own.
Where to find it: Settings > Guests and bookings > Guest information (/Settings/WebshopGuestDetails).
All buttons, settings and messages of this screen
In the CRM you manage your business customers who order on account, see the invoices of those orders and decide the email with which the invoice is sent to the customer. You set an invoice to Paid as soon as the customer has paid.
Where to find it: Settings > Guests and bookings > Customer CRM (/Settings/WebshopCRM). The entry is only there if the Customer CRM add-on is on (Settings > Add-ons).
All buttons, settings and messages of this screen
The Financial overview shows the revenue, payments, VAT and margin of your webshop and POS orders over a period. You filter by date, category, product and employee and export it to Excel or PDF.
Where to find it: Settings > Money and figures > Reports (/Settings/WebshopFinancialReport). The page is called Financial overview.
All buttons, settings and messages of this screen
The Refunds overview shows all returns from your POS and webshop: what was taken back, by whom, why and whether the product went back into stock. You filter by date, product and employee.
Where to find it: Settings > Money and figures > Reports, the overview Refunds overview (/Settings/WebshopRefunds). The Refund feature must be on (Settings > Add-ons; it is free). The permission is called Returns at the POS.
All buttons, settings and messages of this screen
The Ordering and payment tab is next to QR codes, Call waiter to table and Show menu at the QR codes. It belongs to ordering and paying by the guest at the table, but currently has no settings that save anything.
Where to find it: Settings > Till and products > QR codes (/Settings/QRCodes), fourth tab Ordering and payment. The QR codes are an add-on of €10 per month that requires the online webshop.
All buttons, settings and messages of this screen
In Edit webshop you adjust your online webshop with the real webshop on the left and a panel on the right with the tabs Edit, Homepage, Menu, Categories, Products, Product tile, Style, View and Versions. Save stores your changes as a draft; your guests only see them after Publish.
Where to find it: Settings > Guests and bookings > Online webshop > open the webshop widget > Edit webshop (/Webshopeditor), or in My website by clicking the Order block
All buttons, settings and messages of this screen
In Edit widget of a webshop widget (Online ordering) you choose with Yes or No which ways of ordering there are: Pickup, Delivery and Eat here. For Delivery you then choose How do you deliver? (Bike, Scooter, Car or Carrier), When do you deliver? and what goes with it: travel time, delivery areas, delivery time or shipping costs per country.
Where to find it: Settings > Guests and bookings > Online webshop > open the webshop widget > Edit > Settings tab (/Settings/WidgetsetupList)
All buttons, settings and messages of this screen
In Webshop settings you set which texts the customer sees while ordering, what is shown in the POS and the widget, and how delivery, eat here and pickup work. The window runs in steps: Order and pickup settings, POS settings, Delivery settings, Eat here settings and Pickup settings. At the top are the Webshop legal rules.
Where to find it: Settings > Guests and bookings > Delivery and pickup > Webshop settings (or type "Webshop settings" in Search for a setting…); for the webshop module also Menu and settings > Webshop settings
All buttons, settings and messages of this screen
Ticketing
Automatic reminder email before the booking
- What
- A business owner sets up communication rules that automatically send an email before (or after) an activity or ticket reservation, with a configurable number of days, hours and minutes.
- Who it is for
- Activity and ticketing businesses.
- How it works
- A communication rule defines how many days, hours and minutes before (or after) the booking an email must be sent, linked to an email type and an on/off switch. Each reservation is assigned its own send time (`NextMailSendTime`) based on this rule. For hospitality too, Jimani schedules the pre-arrival messages 1 to 4 when sending the confirmation: message 1 in hours before arrival, messages 2 to 4 in days with a time (default 12:00). You set them under Settings > Communication > Email > Customer contact > Send times.
- Difference from competitors
- No public comparison material found on configurable reminder emails at Lightspeed, unTill or SumUp specifically.
Keywords: booking reminder email, automatic email before reservation, set communication rule
Related questions - Can I automatically send a reminder email before an activity or event?
- Can I set how many days or hours in advance the reminder is sent?
- Does this also work for regular table reservations? Yes, hospitality also schedules pre-arrival messages.
Switching between modules on the same POS
- What
- One POS device remembers which module is active (hospitality, webshop, salon, activities, ticketing) and adapts the menu accordingly; a user can switch this themselves via a dropdown.
- Who it is for
- Business owners who combine multiple modules on the same POS device.
- How it works
- The active module is remembered for thirty days per device/user. If the POS is on the hospitality module, the shared POS screen shows the reservation menu and the table floor plan; with another module the corresponding menu appears. Without a valid, known module the system falls back to the company's own main module, so the POS never gets stuck in the wrong menu.
- Difference from competitors
- No public comparison material found on a comparable shared POS interface that can be switched per module at Lightspeed, unTill or SumUp specifically.
Keywords: switch module POS, POS to reservation screen, switch hospitality webshop salon
Related questions - Can I switch on the same POS between, for example, booking and just taking payment?
- Does the POS remember which module I used last?
Can I set different VAT rates per ticket type?
- Answer
- Yes, each ticket type has its own VAT percentage, independent of the other ticket types for the same event.
- Explanation
- Besides its own name, price and maximum number of tickets, a ticket type has its own VAT field.
- Example
- A museum charges 9% VAT on an adult ticket and makes a child ticket for under 4s with a price of 0.00.
Keywords: VAT per ticket type, free ticket with price 0.00, event VAT rate
Can I manage multiple events at the same time?
- Answer
- Yes, event tickets (with their own dates and times) and standard tickets (a ticket per open day) are managed side by side on two tabs, Event tickets and Standard tickets, each with tiles.
- Explanation
- A standard ticket is a ticket with a price and a quantity per day, on sale on the days when ticket sales are open (think of a day pass). You manage them in Ticketing management or Ticket sales and can offer as many side by side as you like. This way a business owner with multiple events does not have to switch between separate screens to manage them.
- Example
- An amusement park manages both the single day ticket and three separate evening events side by side on two tabs.
Keywords: manage multiple events, events overview, standard ticket vs event
What can I do with Ticket sales in Jimani?
- Answer
-
With Ticket sales you sell tickets for events (with their own date and time) and standard tickets such as a day pass, online through a widget on your website and at the door through the POS. Each ticket gets its own QR code that you scan at the entrance. You pay €0.49 excluding VAT per ticket sold and no monthly fee.
- Explanation
-
- Two kinds of tickets. An event ticket belongs to a performance or day with its own date and time. A standard ticket is a pass with a price per day, for example a day pass or a pass that is valid for several days. See What is the difference between an event ticket and a standard ticket?.
- Ticket types. Within an event or standard ticket you offer ticket types, such as Adult, Child or VIP, each with its own price, VAT, quantity and scan rule.
- Selling online. The buyer chooses a day and tickets in the widget, pays via Mollie and receives the tickets with a QR code as a PDF by email. See How do I sell online tickets for my event or day pass?.
- At the door. In the POS your ticket types are in the Tickets category. Ringing one up creates a real ticket with a QR code from the same stock as your online sales. See How do I sell tickets at the POS?.
- Scanning. At the entrance you scan the QR code; the scan rule determines how many times a ticket is valid. See How do I scan tickets at the entrance?.
- Overview. Under Tickets (or Reservations) you see all tickets sold per day and week, with totals. See How do I see how many tickets I have sold?.
- Not in Ticket sales. There is no seating plan with seats or zones. You arrange different prices or a VIP ticket with separate ticket types.
- Example
-
A museum sells a standard ticket Day pass with a price per day and an event Evening opening with two dates. Both are in the same widget and use the same scanner at the entrance.
- Related
-
What does ticket selling via Jimani cost?, How do I sell online tickets for my event or day pass?, How does Ticket sales management work?
Keywords: ticket sales jimani, ticketing system, sell tickets, ticketing module, event tickets, sell day pass
Related questions - Can I sell tickets for my event with Jimani?
- What does ticket sales cost per ticket?
- Can I sell tickets both online and at the door?
- Is there a monthly fee for ticket sales?
How do I sell online tickets for my event or day pass?
- Answer
-
Turn on Ticket sales and Online ticket sales under Settings > Add-ons, create a ticket type and an event (or standard ticket) in Ticketing management, then create a widget for your ticket sales under Widgets and paste the code on your website. You pay €0.49 excluding VAT per ticket sold, without a subscription.
- Explanation
-
- Step 1. Go to Settings > Add-ons and turn on Ticket sales. The tabs Event tickets and Standard tickets turn on automatically. Then turn on Online ticket sales: these are the widgets with which a visitor buys a ticket themselves. Online ticket sales only works together with Ticket sales.
- Step 2. Open the management of your tickets. In the POS module the menu item is called Ticketing management, in a separate ticket module it is called Ticket sales. You see the tabs Opening hours, Event tickets, Standard tickets, Ticket types, Products, Fields and Time limitation.
- Step 3. Create a ticket type (for example Adult or Child), with price and quantity. See How do I create a ticket type?.
- Step 4. Create an event for a performance with its own date and time, or a standard ticket for a day pass that applies on open days. See What is the difference between an event ticket and a standard ticket?.
- Step 5. Create a widget: go to Settings > Guests and bookings > Widgets, choose Add widget and choose the ticket module as the main module. Select which events and standard tickets go in it. With View code you get the code that you paste on your own website.
- Step 6. Online payment goes through your own Mollie account. Mollie charges its own rate per payment.
- What the buyer sees. A calendar or list of days, the events with "from" the lowest price and, if you want, "N left" places. After the order the buyer receives a confirmation with the tickets as a PDF, each with its own QR code.
- When does something appear in the widget? An event or standard ticket only appears in the widget if it is active, not deleted, has Show in widget set to Yes, sales have already started and you have chosen it in the widget. A standard ticket is only for sale on an open day for which a day price exists and which is not blocked for the whole day by a Time limitation. An event is for sale on its dates that have not yet passed, up to 400 days ahead.
- Example
-
A theatre creates the ticket types Adult and Child, an event "Summer performance" with three dates and a widget Ticket sales. After pasting the code, visitors buy online; with 600 tickets in a month, the theatre pays Jimani 600 × €0.49 = €294 excl. VAT.
- Related
-
What does ticket selling via Jimani cost?, How do I create a ticket type?, How do I create an event with tickets?, What can I do with Ticket sales in Jimani?
Keywords: sell tickets online, ticket sales website, ticket widget, sell event tickets, sell tickets online, set up ticketing system
Related questions - How do I start selling tickets online?
- What does selling tickets in Jimani cost?
- How do I put a ticket widget on my website?
- Which add-ons do I need to turn on for ticket sales?
What is the difference between an event ticket and a standard ticket?
- Answer
-
An event ticket belongs to a performance or day with its own dates and times and with a fixed number of tickets per ticket type. A standard ticket is a pass with a price and a quantity per day, which you sell on the days you are open, such as a day pass. You choose this per ticket type under "Choose your ticket type".
- Explanation
-
- Event ticket. You create an event with a Date list: per date a Start time and End time. Per date you choose which ticket types are for sale. The price and the Ticket quantity are on the ticket type. The Ticket quantity applies per ticket type for the whole event, so for all dates together.
- Standard ticket. You do not create a date list. The buyer chooses a day on which you are open. You set the price and the Ticket limit per day on the ticket type (Ticket types tab, Prices step), or with Excel. A day without a day price is not for sale.
- Opening hours. For a standard ticket, the Opening hours (Opening hours tab) and a Time limitation for a whole day determine which days are for sale. A day that is set to Closed is not for sale.
- Guest groups. For a standard ticket, the buyer can choose a quantity per guest group (for example Adults and Children); each group has its own price per day. An event ticket has one price per ticket.
- Where do you find them? Event tickets are on the Event tickets tab, standard tickets on the Standard tickets tab (Ticketing management or Ticket sales in the menu). Both tabs belong to the add-ons Events and Standard ticket sales, which turn on together with Ticket sales.
- Several at once. You can manage as many events and standard tickets side by side as you like; they are on separate tabs with a tile per item.
- Example
-
An amusement park sells a standard ticket Day pass with a different price in the holidays and an event Halloween night with two dates. For the day pass the buyer chooses an open day; for Halloween night they choose a date from the list.
- Related
-
How do I create an event with tickets?, How do I sell day passes with a price and quantity per day?, How do I create a ticket type?
Keywords: event ticket, standard ticket, day pass, difference event and day ticket, manage multiple events, ticket type
Related questions - When do I choose an event ticket and when a standard ticket?
- What is a standard ticket?
- What is the difference between a day pass and a performance?
- How do I choose the type of ticket for a ticket type?
How do I create a ticket type, such as Adult, Child or VIP?
- Answer
-
Go to Ticketing management (or Ticket sales), open the Ticket types tab, click the plus button at the top right and go through the steps: name, image, colour and validity, kind of ticket and price. Each ticket type has its own price, VAT, quantity and scan rule, so you create an adult, child and VIP ticket as three ticket types.
- Explanation
-
- Step 1. Open the Ticket types tab and click the plus button at the top right. You see the "Ticketing settings" window; choose Ticket types. This opens the Ticket type window.
- Step 2. Under Ticket type, enter the name (at most 50 characters) and a description (at most 200 characters, visible in the widget). If your business has more languages, fill them in per language. Under Image, add a photo (4:3 ratio, at most 5 MB).
- Step 3. Under Colour and duration, choose the colour (internal only, for the overview) and the validity: 1 to 6 days, 1 or 2 weeks, 1, 3, 6 or 9 months or 1 year. See Can I sell annual passes, weekly passes or multi-ride passes?.
- Step 4. Also choose the scan rule here (default "Same as event"), the VAT and the VAT group. See How often may a ticket be scanned and how do I set that?.
- Step 5. Under Type and category, choose whether it is a Standard ticket or an Event ticket. For an event ticket, you enter the price (including VAT) and the ticket quantity right there. For a standard ticket, you set the price and the quantity per day in the Prices step.
- Step 6. Optionally choose transaction costs (only if you have created them as a product), extra products and fields that belong to this ticket type, and click Save.
- VIP or another variant. Make it a ticket type of its own with its own name, price, colour and, for example, a smaller ticket quantity. See Can I set up zones, tiers or VIP tickets?.
- Linking. A ticket type is only for sale once you link it to an event (per date) or to a standard ticket. See How do I create an event with tickets, also with multiple dates?.
- Editing, copying or deleting. Click the tile to change it. The three-dot menu (Actions) has Deactivate or Activate, Create a Copy and Send to Trash. A deactivated ticket type gets the label Inactive.
- Example
-
You create "Adult" (standard ticket, € 12.50 on weekdays) and "Child" (standard ticket, € 7.50). You attach both to the standard ticket Day pass.
- Related
-
What is the difference between an event ticket and a standard ticket?, How does the Ticket type window work?
Keywords: create ticket type, adult child ticket type, vip ticket, set up ticket type, price per ticket type, new ticket type
Related questions - How do I create a child rate and an adult rate?
- How do I create a VIP ticket?
- How do I set the price and VAT of a ticket?
- Do I have to create a separate ticket type for every rate?
Can I set up zones, tiers or VIP tickets?
- Answer
-
Ticket sales has no seating plan with seats or zones. You can, however, create as many ticket types as you like, for example Standing, Grandstand or VIP, each with its own name, price, VAT, quantity, colour and scan rule. In the widget, the buyer chooses the ticket type, not a seat.
- Explanation
-
- Zone or tier as a ticket type. Create a ticket type per zone or tier (Ticket types tab) with its own price and ticket quantity. This way you keep track of the quantity per zone.
- VIP or backstage. Create a VIP ticket type with a higher price and choose, under Extra products, for example a drink or parking pass that comes with it. Give it its own colour and you will recognise it right away in the overview.
- Checking access. Each ticket type has its own scan rule. For VIP you can choose "Unlimited", for example, and "1x" for a regular ticket. See How often may a ticket be scanned and how do I set that?.
- Linking. You can only sell a ticket type once you link it to an event (per date) or to a standard ticket. See How do I create an event with tickets, also with multiple dates?.
- Example
-
A concert hall creates the ticket types "Standing € 25" (500 pieces), "Balcony € 35" (120 pieces) and "VIP € 80" (30 pieces, with a welcome drink as an extra product). Each type has its own price and its own quantity.
- Related
-
How do I create a ticket type, such as Adult, Child or VIP?, Can I sell extra products with a ticket, such as a drink or parking pass?
Keywords: vip tickets, zones tickets, tiers, grandstand ticket, choose seats, seating plan tickets, backstage ticket
Related questions - Can I create seats or a seating plan for my event?
- Can I sell VIP tickets and grandstand tickets separately?
- Can the buyer choose a seat?
- How do I create zones with different prices?
How do I create an event with tickets, also with multiple dates?
- Answer
-
Go to the Event tickets tab, click the plus button at the top right, choose Event tickets and go through the steps: name, date and location, the Date list with your dates and times (with the ticket types per date), colour and scan rule, sales options and optionally a discount. Finish with Save.
- Explanation
-
- Before you start. First create the ticket types you want to sell, with "Event ticket" as the kind of ticket and a price and ticket quantity. See How do I create a ticket type, such as Adult, Child or VIP?.
- Step 1. Open Ticketing management (or Ticket sales) > Event tickets tab, click the plus button and choose Event tickets. Enter the name (at most 50 characters) and description (at most 350 characters) and optionally add an image.
- Step 2. Enter Date and time (free text, for example "Saturday 8:00 pm"), Address and Locations. All three are required.
- Step 3. Under Date list, add your dates: choose a date, a start time and an end time. The plus button adds an extra date, the minus button removes a line. You need at least one date.
- Step 4. After each date comes a step to choose the Ticket types for that date. Choose at least one. With Add Type you create a new ticket type right away.
- Step 5. Choose the colour (internal only), the Scan rule and optionally the scan interval and the maximum number of scans.
- Step 6. Set the sales options: Show sold out tickets in widget?, Show sale notification, Start time sale, Ticket limit per sale and Show in widget (default Yes).
- Step 7. Optionally set Discount 1 and Discount 2 and click Save.
- Afterwards. The event appears as a tile on the Event tickets tab. Create a widget (or add the event to your existing widget) to sell it online. See How do I sell online tickets for my event or day pass?.
- Places. The ticket quantity is set on the ticket type and applies to all dates of the event combined. If you want a separate quantity per date, create a separate ticket type per date.
- Example
-
"Summer Show" has three dates: 12, 13 and 14 July, each time from 20:00 to 22:30. For each date you choose the ticket types Adult and Child. Finally, you set the Ticket limit per sale to 8.
- Related
-
What is the difference between an event ticket and a standard ticket?, How do I copy an event or standard ticket?, What can you set for an event ticket or standard ticket?
Keywords: create event, event multiple dates, date list, event tickets, add show, split event
Related questions - How do I create an event with ticket sales?
- Can I create an event with multiple dates and times?
- How do I link ticket types to a date?
- Which steps do I go through for a new event?
How do I copy an event or standard ticket?
- Answer
-
On the event tile, click the three-dot menu (Actions) and choose "Create a Copy". Confirm the question "Do you want to make a copy of this item?". Jimani makes a copy with the same settings, dates and ticket types and adds "(copy)" after the name.
- Explanation
-
- Step 1. Go to the Event tickets tab (or Standard tickets) in Ticketing management or Ticket sales.
- Step 2. On the tile, open the three-dot menu (Actions) and choose Create a Copy.
- Step 3. Confirm. You see "Copy created successfully." If it does not work, it says "Copying did not work. Please try again."
- What is copied. The name and description in all languages, the image, the settings (scan rule, discount, sales options) and, for an event, also the dates, times and chosen ticket types per date. The copy is immediately Active and is placed at the bottom of the order.
- The name. The copy is called, for example, "Summer Party (copy)". A second copy is called "Summer Party (copy 2)".
- Adjust the dates. The copy has the same dates as the original. Open the copy and adjust the Date list before you put it in the widget.
- Also for ticket types. The Actions menu has the same option for Ticket types and for the extra products and transaction costs on the Products tab.
- Example
-
An organiser who gives a similar performance every month copies the previous event and only changes the dates and the name.
- Related
-
How do I create an event with tickets, also with multiple dates?, How do I temporarily turn off an event or delete it?
Keywords: copy event, duplicate event, make copy event, recurring event, copy standard ticket
Related questions - How do I duplicate an event?
- Can I copy an event with the same dates and tickets?
- How do I make a copy of a standard ticket?
- What happens to the name when I make a copy?
How do I temporarily turn off an event or delete it?
- Answer
-
On the event tile, choose Deactivate or Send to Trash in the Actions menu (three dots). A deactivated event no longer appears in the widget but is kept. You restore it from the trash with the switch "Show only deleted items".
- Explanation
-
- Temporarily off sale. Choose Deactivate in the Actions menu of the tile. The event can then no longer be bought in the widget. With Activate you put it back. You can also set Show in widget to No in the event settings.
- Deleting. Choose Send to Trash. You get the question "Do you want to delete the data?" with the title "Delete this object". Inside the event window there is also a Delete button.
- Restoring. At the top right, turn on the switch Show only deleted items. You then see only deleted items. Activate one with Activate and confirm "This has been deleted, do you want to make it active again?". The switch stays on for a day (or until you turn it off).
- Also for ticket types. The Actions menu works the same for Ticket types (a deactivated ticket type gets the label Inactive).
- Example
-
A show has been rescheduled. You deactivate the event, adjust the dates and activate it again.
- Related
-
How do I copy an event or standard ticket?, Can I hide an event until sales begin?
Keywords: delete event, deactivate event, restore event, trash event, remove event from widget
Related questions - How do I temporarily take an event off my website?
- How do I delete an event?
- Can I get a deleted event back?
- What is the difference between deactivating and sending to the trash?
Can I hide an event until sales begin?
- Answer
-
Yes. For the event (or standard ticket), set "Start time sale" to Yes and choose the date and time when sales open. Until then, the event does not appear in your ticket widget. If you do not want to show it at all, set "Show in widget" to No.
- Explanation
-
- Step 1. Open the event on the Event tickets tab (or Standard tickets) and use Next to go to the step with the sales options.
- Step 2. Set Start time sale to Yes. A date field and a time field appear; fill in both. You cannot save without a date or time.
- Step 3. Click Save. From the chosen moment, the event appears in the widget automatically.
- Show in widget. If this is set to No, the event stays out of the widget even after the start time. Use this to sell an event only through the POS or the dashboard.
- The event itself stays visible in your management. You can keep editing it; only the buyer does not see it yet.
- Example
-
You announce an event for next month, but only open sales in two weeks: Start time sale set to Yes, date in two weeks, 10:00.
- Related
-
How do I create an event with tickets, also with multiple dates?, How do I temporarily turn off an event or delete it?
Keywords: hide event, start sales later, start time sale, tickets available later, do not show event widget
Related questions - How do I make sure ticket sales only start at a certain moment?
- Can I prepare an event without it being visible?
- How do I set a start time for sales?
- How do I hide an event in the widget?
Can I set a maximum number of tickets per order?
- Answer
-
Yes, in two places. For the event, set "Ticket limit per sale" to Yes and choose a number; under View in the widget, enter "Maximum tickets per order". If the buyer exceeds a limit, they cannot continue. A new ticket widget automatically gets 20.
- Explanation
-
- Per event. Open the event or standard ticket, set Ticket limit per sale to Yes and use the plus and minus buttons to choose the number. It applies to the number of tickets for that event in one order.
- Per widget. Open Settings > Guests and bookings > Widgets, open your ticket widget and choose the View tab. Under Ticket sales you find Maximum tickets per order. 0 means no limit. The limit applies to all tickets in the whole order combined.
- Which one applies? If an event has its own limit, the lower of the two applies.
- What the buyer sees. Above the limit, the widget says: "You can buy at most N tickets in one order." The server checks this once more, so bypassing it via the browser does not work.
- Existing widgets. A widget that already existed without this setting has no limit until you enter one yourself.
- How many are left. In addition, the buyer can never buy more than what is left. If there are too few, the widget says "Only N tickets are still available."
- In the dashboard. When you create a ticket reservation yourself, the event's Ticket limit per sale also applies.
- Example
-
You set the widget to 10 and a popular event to Ticket limit per sale 6. Someone who buys tickets for only that event may buy 6; someone who also buys for another event may buy 10 in total.
- Related
-
How do I create an event with tickets, also with multiple dates?, Can I give a discount for multiple tickets at once?
Keywords: maximum tickets per order, ticket limit, prevent scalpers, limit tickets per purchase, maximum number of tickets
Related questions - How do I limit the number of tickets someone can buy at once?
- Why can't a buyer order more than 20 tickets?
- Where do I set the ticket limit per sale?
- How do I prevent one person from buying up all the tickets?
Can I give a discount for multiple tickets at once?
- Answer
-
Yes. For each event or standard ticket you can set two discounts: "Discount 1" and "Discount 2". You choose a percentage and from how many tickets in one order it applies. The buyer automatically gets the highest discount their quantity qualifies for.
- Explanation
-
- Step 1. Open the event or standard ticket and use Next to go to the last step. There you find Discount 1 and Discount 2.
- Step 2. Set Discount 1 to Yes. You see two fields: a percentage ("% Discount per") and a number of tickets. Enter 10 and 4, for example: 10% discount from 4 tickets. The percentage has at most two digits.
- Step 3. Use Discount 2 for a second tier, for example 20% from 8 tickets. Click Save.
- How is it calculated? The server counts the tickets for that event in the order (all ticket types combined) and picks the highest discount for which the quantity is large enough. The discount applies to the amount of those tickets, rounded to cents. Extra products and transaction costs get no discount.
- Where does it work? In the ticket widget and when you create a ticket reservation yourself in the dashboard.
- Price tier per ticket type? No, the discount belongs to the event, not to a ticket type.
- E-ticket. After the order, the buyer receives the tickets with a QR code by email. See How do I resend a ticket to the buyer or print it?.
- Example
-
Discount 1 is 10% from 4 tickets and Discount 2 is 20% from 8 tickets. A group of 5 pays 10% less, a group of 9 pays 20% less.
- Related
-
Can I set a maximum number of tickets per order?, How do I create an event with tickets, also with multiple dates?
Keywords: group discount tickets, discount multiple tickets, tiered discount event, bulk discount, discount from number of tickets
Related questions - How do I give a group discount when buying multiple tickets?
- Can I give a discount from five tickets?
- Can I set two discounts with different percentages?
- Which discount does the buyer get automatically?
How do I sell day passes with their own price and quantity per day?
- Answer
-
Create a ticket type of the kind Standard ticket and, in the Prices step, enter the price and the Ticket limit per day, or import them with Excel. Attach the ticket type to a standard ticket, set your Opening hours to Open and create a widget. A day without a day price is not for sale.
- Explanation
-
- Step 1. In Opening hours, turn on the Open switch for the days you are open (see How do I set the opening hours of ticket sales, also for public holidays?). Only open days can be sold.
- Step 2. On the Ticket types tab, create a ticket type with kind of ticket Standard ticket. In the Prices step, you choose a year (this year and the next two) and a month and enter the price per day. If you have more guest groups (for example Adults and Children), you see a price column per group. Also enter the Ticket limit: how many tickets there are on that day.
- Step 3. It is faster with Excel: click the Excel icon to export all days, adjust the prices and limits, choose the file under Select Excel file ("Choose a file") and click the import icon. The file must contain all days of this year and the next two years, so use the export as a basis.
- Step 4. If a cell contains something that is not an amount, Jimani reports it with the column name first: "'abc' is not an amount. Write it as 2.50." Correct the cell and import again.
- Step 5. On the Standard tickets tab, create a standard ticket and choose the ticket types that belong to it. See What is the difference between an event ticket and a standard ticket?.
- Stock. The number of tickets sold counts per day. Once the Ticket limit of a day is reached, that day is sold out. An empty Ticket limit counts as 0, so nothing is for sale.
- Day price also as a product. The same day prices appear on the Products tab as a product of the kind Day price. There you can also open them, adjust the VAT group and import or export the prices.
- Example
-
A zoo sets the Adult Day Pass at € 18, and at € 21 in the summer holidays, with a Ticket limit of 1500 per day. A day without a filled-in price does not appear in the widget.
- Related
-
How do I set the opening hours of ticket sales, also for public holidays?, How do I create a ticket type, such as Adult, Child or VIP?, What can you set for the products of Ticket sales?
Keywords: day price tickets, sell day pass, price per day, excel import prices, ticket limit per day, standard ticket price
Related questions - How do I sell day passes with a different price per day?
- How do I set a maximum number of tickets per day?
- Can I fill in day prices in Excel and import them?
- Why is a day not for sale in the widget?
How do I set the opening hours of ticket sales, also for public holidays?
- Answer
-
Go to Ticketing management (or Ticket sales) and open the Opening hours tab. Choose the year and the month and set the switch for each day to Open or Closed, with the times Open from and Open until. Changes are saved automatically. Standard tickets can only be bought on days that are set to Open.
- Explanation
-
- Step 1. Open the Opening hours tab. At the top, choose the year (this year and the next two) and the month.
- Step 2. For each day you see the Date, Open from, Open until and the Open/Closed switch. Adjust the times and set the switch to Open or Closed. No Save button is needed: "Changes are saved automatically."
- Mind the times. The times Open from and Open until only count if the day is set to Open. A day that is set to Closed is not for sale.
- Public holiday or exception. Set that one day to Closed or give it different times. The other days do not change.
- Fill in quickly with Excel. Click the Excel icon to export all days of the next three years, edit the file and choose it under Select Excel file ("Choose a file"). Then click the import icon. The file must contain all days of this year and the next two years, and for every day Open from must be earlier than Open until.
- New days. In the export, days for which nothing has been filled in yet are shown as closed (10:00 to 22:00). So set the days you are open to Open yourself.
- Today. After today's closing time, today is no longer for sale (if Open until says 00:00, midnight applies).
- Blocking days. If you want to block one day or a time slot without changing the opening hours, use the Time limitation tab. See How do I block a day or time slot for ticket sales?.
- Example
-
Your park is closed on 25 December. Set the switch for 25 December to Closed; the day pass is not for sale that day, and the other days stay as they were.
- Related
-
How do I block a day or time slot for ticket sales?, How do I sell day passes with their own price and quantity per day?, How does the Opening hours tab work?
Keywords: opening hours ticket sales, public holiday closed, close day tickets, import opening hours, tickets only on open days
Related questions - How do I set the days on which I sell tickets?
- How do I set a public holiday to closed for ticket sales?
- Can I adjust the opening hours of ticket sales per month?
- Why is a standard ticket not for sale on a certain day?
How do I block a day or time slot for ticket sales?
- Answer
-
Go to the Time limitation tab, click the plus button at the top right and choose Time limitation. Give the block a name, choose Yes under "Day restriction" for whole days or No for a time slot, choose the ticket types and the dates in the calendar, and click Save.
- Explanation
-
- Step 1. Open Ticketing management (or Ticket sales) > Time limitation tab and click the plus button at the top right. Choose Time limitation.
- Step 2. Enter a Name. The name is only visible internally. Under Day restriction, choose Yes if the block applies for the full duration of the chosen dates. Choose No for a time slot: you then enter Time from and Time to.
- Step 3. If you want to block something until 19:00, for example, set the time to 18:59.
- Step 4. Select at least one ticket type. Without a ticket type, the screen says "Please select at least one ticket type."
- Step 5. In the calendar, choose the Dates: single days, whole weeks or whole months by clicking on them. Use the arrows to go to other years. Click Save.
- On and off. In the window of an existing block there is Active. If you turn it off, it no longer blocks, without you having to delete it.
- Overview. The list shows for each block the Name, the ticket types, the Date ("More than one date has been selected" for many dates), Blocking of and Block up to.
- Effect on the widget. A block for a whole day removes that day from the sale of standard tickets in the widget.
- Fixed closed days. For days on which you are structurally closed, use the Opening hours. See How do I set the opening hours of ticket sales, also for public holidays?.
- Example
-
Because of a staff shortage, you do not sell day passes on 3 and 4 March. Create a Time limitation "Staff shortage March", Day restriction Yes, choose the ticket type Day pass and the two dates.
- Related
-
How do I set the opening hours of ticket sales, also for public holidays?, What can you set for a Time limitation for tickets?
Keywords: time limitation, block day tickets, stop sales temporarily, staff shortage, block time slot
Related questions - How do I stop ticket sales for a certain day?
- Can I block tickets for a time slot, for example during a staff shortage?
- How do I close sales for one ticket type?
- Where do I create a time limitation for tickets?
Can I pass on transaction costs to the buyer of a ticket?
- Answer
-
Yes, with the Transaction costs add-on (which requires a Mollie connection). On the Products tab, you create a product of the kind Transaction costs with a fixed amount and choose it on the ticket type under "Transaction costs". The costs are added to the customer's bill.
- Explanation
-
- Step 1. Turn on the Transaction costs add-on under Settings > Add-ons. Without a connected Mollie account, it is not available.
- Step 2. Open the Products tab, click the plus button and choose Transaction costs. Enter the name, optionally a description, the price (including VAT) and the VAT group.
- Step 3. Open the ticket type (Ticket types tab) and choose the product under Transaction costs. "No transaction cost" is on by default. Click Save.
- How is it charged? As one fixed amount per order, not per ticket. The amount comes from the first ticket type in the order. It appears separately on the buyer's invoice with its own VAT.
- Only if the amount is above 0. If the price is set to 0, no line is added to the order.
- Mollie. Mollie also charges you its own rate per payment; that is separate from what you charge the buyer.
- On/off. On the product tile, you can deactivate or copy it with the Actions menu.
- Example
-
You create "Service costs € 1.50" and link it to all ticket types. A buyer who orders 4 tickets pays for the tickets plus € 1.50 once.
- Related
-
Can I pass transaction costs on to my guests?, What does ticket selling via Jimani cost?, Can I sell extra products with a ticket, such as a drink or parking pass?
Keywords: transaction costs tickets, pass on service costs, administration fee ticket, costs to buyer, pass on mollie costs
Related questions - Can I charge the buyer booking fees?
- What do I need to pass on transaction costs?
- How do I set a fixed amount of service costs per ticket?
- Where do I choose transaction costs on a ticket type?
How do I scan tickets at the entrance?
- Answer
-
Open Scan in the menu, scan the QR code with a handheld scanner or the camera (or type the ticket number) and tap Check. The screen turns big green if the ticket is valid and red if it is rejected, with the reason. Scanning works when the Scanner add-on is turned on.
- Explanation
-
- Step 1. Under Settings > Add-ons, turn on the Scanner add-on. This makes Scan appear at the bottom of the menu, unless the scanner button is set to No in the module's menu settings.
- Step 2. Open Scan. The screen has no menu, so on a tablet or phone at the door it fills the whole screen. If you want to go back, choose "Back to dashboard".
- Step 3. Scan the code. A handheld scanner works like a keyboard: it types the code in the "Scan or type a code" field and presses Enter. With the Camera button you use the device's camera. With Check you run a typed code.
- Step 4. Optionally choose one event under Event, so that tickets for another event are rejected. "All events" allows everything.
- Step 5. Read the result. Green is access, red is rejected. You see the message, the name, the ticket type, "Ticket 2 of 4" for an order of multiple tickets and "Scan 2 of 3" if there is a maximum. Under Recent scans is the list for this session.
- Multiple entrances. You can scan on multiple devices at the same time. If two devices scan the same ticket at the same moment, only one becomes valid.
- What is checked? Whether the ticket belongs to your business, is not cancelled, belongs to the chosen event, has been paid, is valid at this moment (not too early, not expired) and whether the scan rule still allows a scan.
- Where do you see it again? A valid scan counts as the arrival of that ticket: in the reservation overview, Total visitors shows, for example, 2/4. In the ticket information, the QR scan logbook tab lists every scan with Date and time, Status, Reason, Device and User.
- Which messages? See What do the messages mean when scanning tickets?.
- Which code? The ticket number, the QR code on the ticket (also on the ticket receipt from the POS) and the reservation key are recognised. The POS app uses the same check.
- Example
-
At the entrance of a concert, an employee scans with a handheld scanner. A buyer with 3 tickets arrives and has each ticket scanned; the screen shows "Ticket 1 of 3", then "Ticket 2 of 3".
- Related
-
How often may a ticket be scanned and how do I set that?, Does every ticket have its own QR code?, What do the messages mean when scanning tickets?
Keywords: scan tickets, access control, scan qr code, handheld scanner tickets, check entrance, scan multiple entrances
Related questions - How do I scan visitors' tickets?
- Can I scan with my phone's camera?
- Can I enter a ticket number manually?
- Why isn't scanning working?
How often may a ticket be scanned and how do I set that?
- Answer
-
For the event or the ticket type, choose the Scan rule: 1x, 1x per day, 1x per number of minutes or Unlimited. With "Maximum number of scans" you limit the total. The ticket type's rule takes precedence; if it is set to "Same as event", the event's rule applies.
- Explanation
-
- 1x. The ticket works once. Every following scan is rejected. This is the default for a new event.
- 1x per day. The ticket works once per calendar day, handy for a pass that is valid for several days.
- 1x per number of minutes. Under Scan interval, choose how many minutes must at least pass between two scans of the same ticket (1, 5, 10, 15, 30, 45, 60, 120 or 240). The field only appears with this rule.
- Unlimited. The ticket may be scanned again and again, for example for a pass with which guests may come and go freely.
- Maximum number of scans. An optional total that you can enter for every rule except "1x". If you leave it empty, there is no maximum. Once it is reached, the scanner says "Maximum number of scans reached (N)".
- Where do you set it? For an event, in the step with Colour and Scan rule. For a ticket type, in the Colour and duration step; there you can also choose "Same as event". This way VIP can be unlimited while the regular ticket type is set to 1x.
- Pass valid for several days. If the rule is set to 1x via the event or standard ticket, such a pass may still enter once per day. Only a rule "1x" of its own on the ticket type is truly once.
- Example
-
A swimming pool sells a weekly pass (Validity 1 week) with the scan rule 1x per day. A guest can enter once every day.
- Related
-
How do I scan tickets at the entrance?, What do the messages mean when scanning tickets?
Keywords: scan rule, scan ticket multiple times, rescan, maximum number of scans, scan interval, prevent double scanning
Related questions - How often may a ticket be scanned?
- Can I set a ticket to work only once per day?
- How do I limit the total number of scans of a pass?
- What is the difference between the scan rule of the event and of the ticket type?
Does every ticket have its own QR code?
- Answer
-
Yes. Every ticket sold gets its own ticket number and QR code. If someone orders four tickets, that is four QR codes, and you scan each ticket separately. The tickets are in the confirmation email as a PDF and you can also print them yourself.
- Explanation
-
- Ticket number. The number is the reservation key with a sequence number after it, for example "…-001". When scanning, the scanner shows "Ticket 2 of 4".
- View it yourself. Open a reservation under Tickets (or Reservations) and choose the Tickets tab. For each ticket you see Valid from, Valid until, Ticket type, Name, the Status (Valid, Used or Cancelled) and the QR Code button. There you can also Print the QR code.
- Cancel one ticket. If the order has more than one open ticket, you see the Cancel ticket button for each ticket. The QR code of that ticket then becomes invalid and the place goes back on sale.
- Print PDF. In the ticket information, choose Print (PDF) under More: the same PDF with the tickets as in the email.
- Preventing misuse. A ticket works according to the scan rule; a second scan of a ticket that has already been used is rejected. See How often may a ticket be scanned and how do I set that?.
- POS. Tickets that you sell at the door also get a QR code on a receipt, one receipt per ticket, after the bill.
- Example
-
A visitor buys two tickets online and receives one PDF with two QR codes. At the entrance, the employee scans each code separately.
- Related
-
How do I scan tickets at the entrance?, How do I cancel a ticket or a whole ticket order?
Keywords: qr code ticket, ticket number, unique qr per ticket, ticket pdf, print ticket, cancel single ticket
Related questions - Does every visitor get their own QR code?
- With four tickets, is that four QR codes?
- Where are the tickets in the confirmation email?
- Can I print tickets myself?
What do the messages mean when scanning tickets?
- Answer
-
Green means access: "Welcome" at the first scan and "Welcome back" at a following permitted scan. Red means rejected, with the reason in the message, for example "Already scanned at 14:05", "Not paid", "Cancelled" or "Too early: valid from ...". The table below says what to do then.
- Explanation
-
| Message | What it means | What you do |
|---|
| Welcome | Valid ticket, first entry | Let the guest in |
| Welcome back | Valid ticket that the scan rule allows once more | Let the guest in |
| Still to pay at the POS | The ticket is valid but not yet paid (only if paying on arrival is allowed) | Have the guest pay first |
| Already scanned at (time) | The scan rule does not allow a new scan | Refuse; the logbook in the ticket information shows the earlier scan |
| Maximum number of scans reached | The ticket has been used as often as allowed | Refuse, or raise the maximum on the ticket type |
| Not paid | The order has not been paid | Have the guest pay via the POS or the dashboard |
| Cancelled | The reservation or that one ticket has been cancelled | Refuse |
| Too early: valid from (time) | The ticket is not valid yet | Ask the guest to come back later |
| Expired: was valid until (time) | The validity has ended | Refuse |
| This ticket is for another event | You have chosen an event on the screen and the ticket belongs to another one | Choose the right event or All events |
| This ticket is from another business | The code does not belong to your business | Refuse |
| Unknown code | The code is not known anywhere | Check the code or type the ticket number |
| Something went wrong, please scan again | A technical error | Scan once more |
- Below the message. You see the name, the ticket type, "Ticket 2 of 4" and "Scan 2 of 3" if there is a maximum.
- User and device. Every scan, including a rejected one, goes into the QR scan logbook of the reservation.
- Related
-
How do I scan tickets at the entrance?, How often may a ticket be scanned and how do I set that?
Keywords: scan message, already scanned, ticket rejected, not paid scan, scanned too early, expired ticket
Related questions - What does the red message when scanning mean?
- What does welcome back mean when scanning?
- Why is a ticket rejected if it has already been scanned?
- What should I do if a ticket has not been paid at the entrance?
How do I sell tickets at the POS or at the door?
- Answer
-
With Ticket sales turned on, your ticket types automatically appear as tiles in the POS, in the Tickets category. Tap a tile, choose the day or time slot and the quantities, tap "On the receipt" and pay. After payment, one receipt with a QR code comes out of the receipt printer per ticket. The stock is the same as for online sales.
- Explanation
-
- Requirement. The Ticket sales add-on is turned on and the ticket type is active. You do not need to create anything in the POS: the POS keeps track of the ticket types itself (new, renamed, off).
- Step 1. In the POS, open the Tickets category. Each ticket type has a tile with "N left", "Sold out" or "Not for sale today".
- Step 2. Tap the tile. A window opens with the days or time slots that are for sale, each with "N left" or "Sold out". A standard ticket shows every open day from today; for an event, you choose the date and the time slot.
- Step 3. Use minus and plus to choose the quantity per guest group (for example Adults and Children). You see the number of tickets and the amount. If the quantity equals what is left, it says "There are N tickets left."
- Step 4. Tap On the receipt. You see "N tickets on the receipt". Then pay as usual with cash, card payment or another payment method.
- Step 5. After payment, the POS prints the tickets: one receipt per ticket with a QR code, on this POS's receipt printer. If the POS has no printer, it asks which printer you want to use.
- If the ticket is not on a paid receipt. The ticket then stays reserved for at most three hours; after that it goes back into stock.
- Internet. Selling and scanning tickets in the POS only works with internet: "Selling tickets only works with an internet connection."
- Scanning at the bar. The Scan ticket button looks up a ticket ("Scan the QR code or type the ticket number") and lets you put a credit on the receipt, if the ticket has a credit.
- Viewing it again. The tickets sold are under Tickets (menu) in the reservation overview. See How do I see how many tickets I have sold, per day, week or ticket type?.
- By phone or at the desk with a name. If you want to record the guest's details, create a reservation yourself. See How do I create a ticket reservation myself, for example by phone or at the desk?.
- Example
-
A visitor is at the door and wants 2 adults and 1 child. You tap the Day pass tile, choose today, set 2 for Adults and 1 for Children, tap On the receipt and charge € 40. Three receipts with a QR code come out.
- Related
-
How do I scan tickets at the entrance?, What can I do with Ticket sales in Jimani?
Keywords: tickets pos, door sales, tickets at the desk, sell tickets at the door, ticket receipt qr, pos tickets
Related questions - How do I sell tickets at the door?
- Where do I find the tickets in the POS?
- Does a receipt with a QR code come out of the printer after payment?
- Is the stock at the POS the same as online?
How do I create a ticket reservation myself, for example by phone or at the desk?
- Answer
-
Go to Tickets (or Reservations), click the plus button "Create reservation", choose the event, the date, the ticket type and the quantities, fill in the guest details and click Pay. You choose the payment method or "Pay later" and decide whether the guest receives an email.
- Explanation
-
- Step 1. In the menu, open Tickets (in the POS module) or Reservations (in a separate ticket module) and click the plus button Create reservation.
- Step 2. Under Event tickets, choose the event or standard ticket. Under Arrival date and time, choose the date (for an event, one of the dates; for a standard ticket, an open day using plus and minus). You see the Opening hours and the number of tickets available.
- Step 3. Choose the Ticket types and the quantities. For a standard ticket, you enter the quantity per guest group; for an event, the Quantity. The Ticket limit per sale and the available tickets limit the quantity.
- Step 4. Look up an existing guest under Search (by email address or phone number) or fill in the details. Choose the Language for the email. For a visitor without details, tick Passer-by (no guest details) and enter only the Reservation name. With Check in now you immediately set the guest to arrived.
- Step 5. Under Products, choose the extra products and, under Extra information, fill in the fields you created for the event. Optionally put a note in Internal memo.
- Step 6. Under Your invoice, you see the Total excluding VAT, the VAT, the Total amount, the Total paid and the Outstanding amount. Click Pay.
- Step 7. In "Choose a payment method", choose: Cash, Card, Tap to Pay, Pay later, Pay other or Pay on account. Which ones appear depends on your settings. With Pay later, the reservation is booked without payment.
- Step 8. After booking, Jimani asks "What action should be taken?": Send email sends the confirmation with the tickets, No email does not.
- Editing. Open the reservation in the overview and choose Open reservation to change it.
- Unpaid. A reservation that has not been paid yet appears in the overview as Unpaid; the scanner rejects it with "Not paid", unless paying on arrival is allowed.
- Example
-
A customer calls for 4 tickets for Saturday. You choose the event, the date, the ticket type Adult, set Quantity to 4, look up the customer by email address, click Pay and choose Pay later. The customer receives the confirmation with 4 QR codes.
- Related
-
How do I sell tickets at the POS or at the door?, How does the Add reservation window for tickets work?
Keywords: create ticket reservation, manual booking tickets, tickets by phone, desk sales, passer-by, pay later tickets
Related questions - How do I sell tickets to someone who calls?
- How do I create a ticket order at the desk?
- Can I let an order be paid later?
- How do I decide whether the customer gets an email?
How do I see how many tickets I have sold, per day, week or ticket type?
- Answer
-
Open Tickets (or Reservations) in the menu, choose the day and look at the List view, Weekly list or Totals tab. Under Totals you see per ticket type how many tickets were sold per day or per week. For development over a longer period, use the Progress report.
- Explanation
-
- List view. Choose a day with the minus button, the date field and the plus button. You see "Overview of reservations on:" the chosen day, with for each reservation the Name, the Quantity, the Ticket type and whether it is Paid or Unpaid. Filter on Select event and Select Type or search with "Search by:".
- Weekly list. The same list for a whole week ("Weekly list … Up to …").
- Last 100 reservations. The 100 newest reservations, handy for seeing what has just come in.
- Totals. This tab has two parts: Day totals and Week totals. Per ticket type, you count the number of tickets per guest group and the Total, with a total line at the bottom.
- Choose columns. With the filter icon above the list, you choose which columns you see: Total visitors, Date, Date to, Name, Ticket group, Duration, Quantity, Ticket type, Payment, Created and Memo. This icon and the Excel icon are available to the owner and to employees with the Exports permission.
- Print and export. The print icon (Printing permission) makes a printout of the list, the Excel icon exports it.
- Only paid tickets? For the income, look at the Payment column: Paid or Unpaid.
- Development over time. In Settings > Money and figures > Reports, choose the Progress report for tickets. You compare a period with an earlier period, per day, week or month, and filter on Source (Widget, Employee or POS).
- What counts? Cancelled tickets do not count by default in the Progress report ("Include cancelled" is set to No).
- Example
-
On Friday morning you open Totals > Day totals and see that 143 tickets have been sold for tonight, of which 98 Adult and 45 Child.
- Related
-
Can I keep track of visitor numbers per day?, How does the Reservations overview for tickets work?
Keywords: tickets sold, sales figures tickets, tickets per day, totals tickets, insight ticket sales, report tickets
Related questions - How many tickets have I sold today?
- Can I view sales per ticket type?
- Where do I see sales per week?
- Where do I find the development of my ticket sales over a longer period?
Can I keep track of visitor numbers per day?
- Answer
-
Yes. Every valid scan counts as an arrival. In the reservation overview, you see for each reservation the Total visitors column as "arrived/quantity", for example 2/4. This way you know how many guests are already inside and how many are still to come.
- Explanation
-
- Step 1. Open Tickets (or Reservations) and choose the day in the List view.
- Step 2. Look at Total visitors. The value 2/4 means that 2 of the 4 tickets of that reservation have been scanned. If the column is not in your list, turn it on with the filter icon (choose columns).
- Hide arrived. Turn on Hide "Guest arrived" to remove the reservations with the status Arrived from the list.
- Status. With Select status (for the owner and employees with the Filters permission), you filter on the status of the reservations.
- Who came in when. Open the reservation (info icon) and choose the QR scan logbook tab: Date and time, Status, Reason, Device, User and Ticket key of every scan, including rejected ones.
- Total over the day. In the Progress report for tickets, the Tickets series shows the quantities per day, week or month.
- Scanning is required. Without a scan, a ticket does not count as arrived. A guest you create yourself can be recorded as arrived right away with Check in now.
- Example
-
A family booked 4 tickets. After two of the four QR codes have been scanned, their reservation shows 2/4.
- Related
-
How do I see how many tickets I have sold, per day, week or ticket type?, How do I scan tickets at the entrance?
Keywords: visitor numbers, how many guests inside, arrived tickets, count visitors, no-show tickets, busyness per day
Related questions - How do I see how many visitors are already inside?
- Does every scan count as an arrival?
- What does 2/4 mean under total visitors?
- Can I keep track per day of how many guests have come?
How do I cancel a ticket or a whole ticket order?
- Answer
-
Open the reservation under Tickets (or Reservations) and click Cancel, or cancel one ticket via the Tickets tab with "Cancel ticket". You enter a reason. A cancellation of a paid order appears in the Cancellations overview, where you handle the refund. Cancelling is no longer possible once the guest is inside.
- Explanation
-
- Whole order. Open the reservation via the info icon in the list. At the bottom, click Cancel, enter the Reason (required) and confirm. If the order belongs to a combination, Jimani first asks whether you want to cancel only this part or the whole combination.
- One ticket. Open the Tickets tab of the reservation and click Cancel ticket at the ticket. You see "Ticket cancelled, the place is back on sale": the QR code of that ticket is invalid and the place returns to stock. The button is there as long as there is more than one open ticket; you cancel the last ticket with Cancel for the whole reservation.
- Messages. If the ticket has already been cancelled, it says "This ticket has already been cancelled". If Jimani cannot find the ticket number, it says "Ticket not found".
- Already scanned or inside. A ticket that has been used cannot be cancelled as a ticket, and for a guest who is already inside, the Cancel button is off with the tooltip "Guest is already inside; cancelling is no longer possible".
- Email to the guest. If nothing was paid (amount 0), the cancellation email goes to the guest; if something was paid, the email with the request for a refund goes out.
- Refunding. Under Cancellations you find the Refunds overview: all cancellations on which a payment was made. There you indicate whether you want to process the refund automatically or reject it.
- Visible in the list. A cancelled ticket appears in the ticket list with Status Cancelled and can no longer be scanned: the scanner says "Cancelled".
- Example
-
A guest calls to say that two of his four tickets are no longer needed. You open his reservation, Tickets tab, and use Cancel ticket on two tickets. The two places are back on sale.
- Related
-
Does every ticket have its own QR code?, How do I resend a ticket to the buyer or print it?
Keywords: cancel ticket, cancel card, cancel order, refund tickets, cancellation email, invalidate ticket
Related questions - How do I cancel a ticket that someone has bought?
- Can I cancel one ticket from an order?
- Can I cancel a ticket if the guest is already inside?
- Where do I handle the refund of a cancelled order?
How do I resend a ticket to the buyer or print it?
- Answer
-
Open the reservation under Tickets (or Reservations), click More and choose Send email. If you have email templates for this ticket type, you choose which email and can adjust the text once. If you choose Print (PDF), you open the PDF with the tickets to print.
- Explanation
-
- After an order. The buyer receives the confirmation automatically, with the tickets as a PDF and a QR code per ticket. For a reservation you create yourself, you decide with "Send email" or "No email" whether the email goes out right away.
- Resending. Open the reservation via the info icon, click More at the bottom and choose Send email.
- Without templates. You get the question "Send email?" and confirm with Send email; the confirmation goes to the guest again. You see "Sent".
- With templates. If you have email templates for the ticket type (for example confirmation, change, cancellation, refund), you choose the kind of email, the recipient is shown under "To:", and with Editing set to Yes you can adjust the subject and the text for this one email. The tickets go along as an attachment. You can only send cancellation and refund for a cancelled reservation.
- No email address. If the guest has no email address, Jimani says "This guest has no email address." Add the address via the pencil next to the guest details.
- Printing. Under More, choose Print (PDF) for the confirmation with the tickets, the same PDF as in the email. If it does not exist yet (for example with door sales), Jimani creates it first. This is not available for a passer-by without guest details.
- Print receipt. If a printer is connected, Print receipt also appears under More.
- One QR code. A single ticket can be shown and Printed in the Tickets tab under QR Code.
- Example
-
A buyer has lost their email. You look up the reservation by name, click More and Send email, and the tickets go to their email address again.
- Related
-
Does every ticket have its own QR code?, How do I cancel a ticket or a whole ticket order?
Keywords: resend ticket, e-ticket email, lost ticket, print ticket, confirmation email tickets, pdf ticket
Related questions - The customer has not received their tickets, how do I resend them?
- How do I print tickets as a pdf?
- Can I adjust the email text before I resend the tickets?
- Where do I find the email with a customer's tickets?
Can I sell annual passes, weekly passes or multi-ride passes?
- Answer
-
Yes, as a pass that you pay for once and that is valid for a certain time. On the ticket type, choose a Validity of up to 1 year and use the Scan rule and the Maximum number of scans to decide how often the pass works. Automatic renewal or periodic charging of a subscription is not part of Ticket sales.
- Explanation
-
- Step 1. Create a ticket type of the kind Standard ticket (Ticket types tab). See How do I create a ticket type, such as Adult, Child or VIP?.
- Step 2. Under Validity, choose how long the pass works: 1 to 6 days, 1 or 2 weeks, 1, 3, 6 or 9 months, or 1 year. The validity starts on the day the buyer chooses.
- Step 3. Under Validity follows opening hours, choose Yes if only the days on which you are open count, or No for consecutive calendar days.
- Step 4. Under Show reservation on each active day, choose Yes if the pass should appear in the reservation overview on every day of the validity. If set to No, it only appears on the day of issue.
- Step 5. Set the Scan rule. For an annual pass that may always be used: Unlimited. For a pass with one visit per day: 1x per day. For a multi-ride pass: Unlimited with, under Maximum number of scans, the number of rides, for example 10.
- What the scanner does. It checks the validity ("Too early: valid from …" and "Expired: was valid until …") and counts the scans ("Scan 3 of 10"). If the maximum is reached, it says "Maximum number of scans reached".
- What is not possible. A recurring payment or automatic renewal of a subscription is not part of Ticket sales. The buyer buys a new pass when the old one has expired.
- Example
-
A swimming pool sells a Season pass (Validity 1 year, Validity follows opening hours Yes, Scan rule 1x per day) and a Ten-ride pass (Validity 6 months, Scan rule Unlimited, Maximum number of scans 10).
- Related
-
How often may a ticket be scanned and how do I set that?, What is the difference between an event ticket and a standard ticket?
Keywords: annual pass, subscription tickets, season pass, multi-ride pass, weekly pass, ticket validity
Related questions - Can I sell annual passes?
- How do I create a multi-ride pass with a maximum number of scans?
- Can a subscription be renewed automatically?
- How do I set how long a pass is valid?
If your business uses the Ticket sales module on the POS, the bar contains Reservations and POS. Under Reservations you see the ticket orders per day, per week or the last 100, with filters on status and ticket type. With a new reservation you sell tickets for an event or for a day and time, for a guest or as a passer-by.
Where to find it: POS > Reservations (/Pos/TicketingReservation); new via /Pos/AddTicketingReservations
All buttons, settings and messages of this screen
The management of your tickets has seven tabs: Opening hours, Event tickets, Standard tickets, Ticket types, Products, Fields and Time limitation. With the plus button at the top right you add a new item; the tiles are the existing items.
Where to find it: Ticketing management (in the POS module) or Ticket sales (in a separate ticket module) in the menu (/Ticketing)
All buttons, settings and messages of this screen
In the Event tickets (or Standard tickets) window, you record what the event is, when and where it takes place, which ticket types belong to it, how often a ticket may be scanned, when it appears in the widget and whether there is a discount. You go through the steps with Previous and Next and finish with Save.
Where to find it: Ticketing management or Ticket sales > Event tickets or Standard tickets tab > plus button (new) or a tile (edit) (/Ticketing)
All buttons, settings and messages of this screen
In the Ticket type window, you record what the buyer chooses (name, description, image), how long the ticket is valid, what it costs, how many there are, how often it may be scanned and which extra products and fields belong to it. You go through the steps with Previous and Next and finish with Save.
Where to find it: Ticketing management or Ticket sales > Ticket types tab > plus button (new) or a tile (edit) (/Ticketing)
All buttons, settings and messages of this screen
The Products tab shows four kinds of products: the day price of a standard ticket, the event product (price and quantity of an event ticket), extra products and transaction costs. You open a product to change the name, VAT group and price, or to import day prices with Excel.
Where to find it: Ticketing management or Ticket sales > Products tab (/Ticketing)
All buttons, settings and messages of this screen
A Time limitation is a block of one or more days (or a time slot on those days) for chosen ticket types, for example during a staff shortage. You give the block a name, choose the ticket types and choose the dates in a calendar.
Where to find it: Ticketing management or Ticket sales > Time limitation tab > plus button (new) or a row (edit) (/Ticketing)
All buttons, settings and messages of this screen
On the Opening hours tab, you set per day whether ticket sales are Open or Closed and from which time to which time. Standard tickets can only be bought on open days. Changes are saved automatically.
Where to find it: Ticketing management or Ticket sales > Opening hours tab (/Ticketing)
All buttons, settings and messages of this screen
The Tickets (or Reservations) overview shows all tickets sold per day, per week or as the last 100, with totals per ticket type. You filter on event, type and status, search by name, choose the columns, print and export to Excel.
Where to find it: Tickets (in the POS module) or Reservations (in a separate ticket module) in the menu (/TicketingReservationViews)
All buttons, settings and messages of this screen
The ticket information is the window that opens when you click the info icon of a reservation in the overview. You see the guest, the tickets with their status, the scans and the payment, and you can cancel the reservation, email it, print it or open it to change it.
Where to find it: Tickets or Reservations > info icon at a reservation (/TicketingReservationViews/TicketingReservationInfo)
All buttons, settings and messages of this screen
In this window, you create a ticket reservation yourself (Add reservation) or edit one (Update reservation): event, date, ticket type, quantities, guest, products, extra information and payment. At the bottom you see "Your invoice" with what the guest pays.
Where to find it: Tickets or Reservations > plus button "Create reservation", or open a reservation and choose Open reservation (/TicketingReservations/AddTicketingReservations)
All buttons, settings and messages of this screen
Activities
Activities
- What
- Jimani's activities module lets guests book a time slot for an activity online, with the business owner managing capacity per "spot" — a lane, table, boat, bike or other bookable object. Bowling was never a separately used part and was merged into Activities on 13-09-2026; there is no separate Bowling functionality any more.
- Who it is for
- Rental businesses (bikes, boats), bowling alleys, escape rooms, amusement parks.
- Core features
-
- Booking a time slot online with generic capacity management per spot
- Online deposit when booking an activity
- Price per person or per duration
- Price
- No monthly fee (pricing decision 14-10-2026). See "What does Jimani cost?".
- Difference from competitors
- The generic, non-sector-specific data model makes Activities usable for a wide range of rental and activity businesses without a separate sector version. No public comparison material found that points to a comparable built-in activities module at Lightspeed, unTill or SumUp.
Keywords: activities module, rental booking system, activities software price, bowling activities
Related questions - Is Jimani suitable for rental businesses (bikes/boats) or only for bowling/escape rooms?
- What does the activities module cost per month?
- Does "Bowling" still exist as a separate part of Jimani?
Upsell products for a reservation or booking
- What
- A business owner can set up separate upsell products (name, price, VAT, product group) that are offered to guests while booking a reservation or activity.
- Who it is for
- Hospitality, activity and salon businesses.
- How it works
- Each upsell product is separate from the regular POS products, with its own price and VAT rate, and can be switched on or off per module (hospitality, activities, salon). For activity reservations, the chosen upsell products are linked to the reservation.
- Difference from competitors
- No public comparison material found on built-in upsell products when booking at Lightspeed, unTill or SumUp specifically.
Keywords: upsell reservation, booking add-on sales, extra products with appointment
Related questions - Can I offer guests extra products while they book a reservation?
- Does upsell work the same for hospitality, activities and salon?
Automatic reminder email before the booking
- What
- A business owner sets up communication rules that automatically send an email before (or after) an activity or ticket reservation, with a configurable number of days, hours and minutes.
- Who it is for
- Activity and ticketing businesses.
- How it works
- A communication rule defines how many days, hours and minutes before (or after) the booking an email must be sent, linked to an email type and an on/off switch. Each reservation is assigned its own send time (`NextMailSendTime`) based on this rule. For hospitality too, Jimani schedules the pre-arrival messages 1 to 4 when sending the confirmation: message 1 in hours before arrival, messages 2 to 4 in days with a time (default 12:00). You set them under Settings > Communication > Email > Customer contact > Send times.
- Difference from competitors
- No public comparison material found on configurable reminder emails at Lightspeed, unTill or SumUp specifically.
Keywords: booking reminder email, automatic email before reservation, set communication rule
Related questions - Can I automatically send a reminder email before an activity or event?
- Can I set how many days or hours in advance the reminder is sent?
- Does this also work for regular table reservations? Yes, hospitality also schedules pre-arrival messages.
Switching between modules on the same POS
- What
- One POS device remembers which module is active (hospitality, webshop, salon, activities, ticketing) and adapts the menu accordingly; a user can switch this themselves via a dropdown.
- Who it is for
- Business owners who combine multiple modules on the same POS device.
- How it works
- The active module is remembered for thirty days per device/user. If the POS is on the hospitality module, the shared POS screen shows the reservation menu and the table floor plan; with another module the corresponding menu appears. Without a valid, known module the system falls back to the company's own main module, so the POS never gets stuck in the wrong menu.
- Difference from competitors
- No public comparison material found on a comparable shared POS interface that can be switched per module at Lightspeed, unTill or SumUp specifically.
Keywords: switch module POS, POS to reservation screen, switch hospitality webshop salon
Related questions - Can I switch on the same POS between, for example, booking and just taking payment?
- Does the POS remember which module I used last?
Setting up your own booking fields, including dynamic fields
- What
- A business owner puts together extra fields for the booking form (for example a dietary requirement, a question about children, or a comments field), with its own type, required/optional, and visibility.
- Who it is for
- Hospitality, hotel and activity businesses.
- How it works
- Each field has a name, a type, choice options (for a choice field), a help text, and settings for whether the field is required, publicly visible, and whether it is shown in list overviews. A field can also be made **dynamic**: it then only appears when another field (the "main field") has a specific answer — for example a field "Number of children" that only appears when "Are children coming along?" is answered yes. A field can also be set to appear only when drawing up a quotation, not for a regular booking.
- Difference from competitors
- No public comparison material found on a comparable dynamic, conditional form mechanism at Lightspeed, unTill or SumUp specifically.
Keywords: own booking fields, dynamic field reservation, conditional form field, customise booking form
Related questions - Can I add extra fields to the booking form myself?
- Can a field appear only depending on the answer to another field?
- Can a field appear only for a quotation, not for a regular booking?
Deposit on an activity reservation
- What
- Guests can pay a deposit online when booking an activity.
- Who it is for
- Rental businesses and activity businesses.
- How it works
- A separate entity and command record the deposit when the reservation is made, linked to the business owner's Mollie connection.
- Difference from competitors
- No public comparison material found.
Keywords: activity deposit, prepayment rental, prevent no-shows activities
Related questions - Can a guest pay a deposit online when booking an activity?
- What does a deposit cost when booking an activity? *(no fixed percentage/amount found in the code)*
Which pricing model can I choose for an activity: price per time or price per person?
- Answer
-
Per activity you choose between Price per time (the price depends on the chosen duration and the date, per lane or location) and Price per person (each guest pays their own price, with up to five price lines such as adults and children). The Activities module has no monthly fee.
- Explanation
-
- Step 1. Go to Activities management and open the Products tab. Click the plus button at the top right and choose Products. In the Products window choose Main product.
- Step 2. Under Choose a product type, choose between Price per time and Price per person.
- Price per time. You choose which Time blocks (durations) the product has, set a price per time block per date (see How do I set the price per duration?) and set Extra time between reservation and Can be booked per?. The price on a reservation is the price of the chosen duration on that date, multiplied by the number of chosen locations (lanes). Booking two lanes is therefore twice the price.
- Price per person. You enter one or more prices. The names of the price lines (for example Adults or Children) come from your widget's settings. The amount is per person and includes VAT. The price of a reservation is the number of guests per price line times that price.
- Step 3. Link the product to an activity: open Activities management > Activities, choose or create the activity, and under Choose a product type choose the same type (Price per time or Price per person) and the product. See How do I add an activity?.
- Additions. An Extra product (for example a drink or rental equipment) or Transaction costs are added to the price. See How do extra products and transaction costs work?.
- How the price appears in the widget. In the widget (View tab, Activities block) you use Show price as to choose whether the guest sees the price per person (the amount divided by the number of people) or the total the group pays together.
- VAT. For each product you choose a Product group (VAT group). The prices for Price per person, Extra product and Transaction costs include VAT.
- Example
-
A padel court with Price per time has the time blocks 60 minutes and 90 minutes, with its own price per date. A guest who books two courts for 90 minutes pays twice the price of 90 minutes on that date. A children's party with Price per person has two price lines: Adults and Children. With 3 adults and 8 children, the price counts 3 times the first and 8 times the second.
- Related
-
How do I set the price per duration?, How do extra products and transaction costs work?, What does Jimani cost?
Keywords: price per person activity, price per hour lane, pricing model activities, price per time, price children adults, lane rental rate
Related questions - Can I charge a price per person, with separate prices for children?
- What is the difference between price per time and price per person?
- Does the activities module cost a monthly fee?
- How do I charge a price per hour per lane?
How do I set the price per duration with time blocks?
- Answer
-
For a product with Price per time you turn on the durations you want to sell (the Time blocks) and then enter a price per date for each time block. You can do this in the price table itself or via Excel: first export, fill in and import again. The price table covers this year, next year and the year after.
- Explanation
-
- Step 1. Go to Activities management > Products, click the plus button at the top right and choose Products > Main product > Price per time. Enter the Name and choose the Product group (VAT group).
- Step 2. Under Time blocks, turn on the durations you want to offer. The list runs from 5 minutes (in steps of 5 minutes up to 55 minutes), via 1 hour, 75 minutes, 90 minutes and 1 hour 45 minutes up to 24 hours, then from 1 to 31 days, from 1 to 12 months and 1 year. If you turn none on, you get the message Select at least one time.
- Is the duration not there? Click the plus button below the time blocks. This opens the Manage the time settings window, where each duration has a Yes/No button that saves immediately. You will also find the same overview under Settings > Guests and bookings > Time blocks.
- Step 3. Under Extra time between reservation choose how much time you keep free after a booking (for example to clean) and under Can be booked per? at which minutes a guest may start. If you set this to 15 minutes, starting is only possible at :00, :15, :30 and :45. If you set it to 1 hour, only on the full hour.
- Step 4. In the last step you choose the year with the year buttons and see a table with all dates of that year and a column per time block turned on. Enter the price in each cell.
- Quick fill with Excel. Click the Excel icon to export the prices of all three years. Fill in the prices in Excel, choose the file via Select Excel file and click the import icon. The first column contains the date, the following columns the prices in the same order as the time blocks. Amounts such as 25.50 or €25.50 are read correctly. After importing you get Data has been applied; then save with Save.
- When booking. In the dashboard a staff member chooses a Duration from the product's time blocks. In the widget the guest also chooses the duration themselves, unless you set Let guest choose duration to No in the widget (View tab, Activities block): the widget then uses the activity's first duration. Jimani takes the price of that time block on the chosen date. If there is no price for that date, you see the message The price amount is not configured for this date. at the reservation.
- Example
-
You offer 60 and 90 minutes. In the table you set 60 minutes to 28 and 90 minutes to 40 for Saturday, and 24 and 34 for weekdays. A guest who books 90 minutes on Saturday sees 40 per lane.
- Related
-
Which pricing model can I choose for an activity?, How do Time blocks work in Settings?
Keywords: price per hour, price per duration, time blocks, import prices excel, price table activity, price per date, rate per day
Related questions - How do I set prices for an hour, two hours or a day?
- Can I fill in and import prices per date in Excel?
- Where do I choose which durations I sell?
- How do I change the price for a specific day?
Can I offer rental and equipment with an activity and ask for a deposit?
- Answer
-
Yes, you can offer equipment with an activity in two ways: as an Extra product that you link to the activity, or as a separate activity that acts as an extra product (for example shoes or bikes with their own quantity). Jimani does not have a separate security deposit setting with refund for activities. You can, however, have an amount paid in advance that is fully settled on arrival.
- Explanation
-
- Option 1: Extra product. Create an Extra product (Activities management > Products > plus button > Products > Extra product) with Name, Description, optionally a photo, the Price and the Product group (VAT group). Set Show in widget to Yes if guests may choose it online (you only see that choice if the Online reservations add-on is on). Then set Add extra products to Yes on the activity and in the next step choose the extra products under Product list. Guests choose the quantity when reserving.
- Option 2: an activity as an extra product. Create an activity with Price per time, for example Rent shoes. Create a Location for each item (Shoes 1, Shoes 2, and so on; you can create up to 50 at once) and link those locations to the activity. Set Acts as extra product to Yes on the activity.
- How that works when reserving. If you make a reservation for another activity in the dashboard, you see the activity as an extra product with a quantity. You cannot choose more than the number of free locations of that activity in that time period. The price is the price of that activity's product for the same duration and date as the main reservation. If that product has no price for that duration, it shows 0.
- Paying in advance and settling. Set Is this a deposit? to Yes on the activity. The screen states that this product is fully credited when the guest arrives. You only see this part if the Products and down payments add-on is on and a main product has been chosen for the activity.
- Security deposit. There is no Deposit field and no function to refund a security deposit separately. So you arrange a security deposit outside Jimani, or as a regular Extra product that you settle yourself.
- Example
-
A bike rental has the activity Rent bike with Price per time and 10 locations (Bike 1 through Bike 10). A guest books a boat tour in the dashboard and adds two bikes. There are 10 bikes, of which 3 are already rented in that time period, so you can choose at most 7.
- Related
-
How do extra products and transaction costs work?, How do I set up locations and capacity?, Which pricing model can I choose for an activity?
Keywords: rental equipment, activity rental, security deposit, deposit amount, extra product, link equipment, rent bikes, rent shoes
Related questions - Can I rent out shoes or bikes with an activity?
- Can I ask for a security deposit for rented items?
- How do I have guests pay an amount in advance?
- How do I offer equipment as an extra product?
Can I set a minimum age or other restrictions for an activity?
- Answer
-
Jimani has no fixed age check: the system does not verify age. You can handle it with two settings, however: a field of the type Terms and conditions that the guest must tick (with your text, for example "I am 16 years or older"), and the minimum and maximum number of guests per reservation.
- Explanation
-
- Having age or rules confirmed. In Activities management > Fields create a new field with the type Terms and conditions. Put the sentence the guest ticks under Explanation and the link to your rules under The link to the Terms and conditions. Set Required to Yes and Show in widget to Yes. In the widget the guest can only continue once the box is ticked. Link the field to the activity, under Fields in the activity's window.
- Informing only. If you only want to have something read, for example "From 12 years, under 16 only with supervision", create a field of the type Label. The guest sees the text but fills in nothing.
- Asking for a date of birth or a choice. Use the types Date, Radio button or Text box. Jimani does not check the answer; you see it in the reservation and can refuse the guest if necessary.
- Number of guests. In the activity's window you set Minimum number of guests and Maximum quantity of guests per reservation. The widget only shows the activity for a suitable number of guests.
- Location and time. Which locations an activity may use you set under Location; when booking is not possible you set with a Time limitation.
- Example
-
A climbing park sets the field "I am 14 years or older, or go along with an adult" (type Terms and conditions, Required Yes) on the activity High ropes course and sets Minimum number of guests to 1 and Maximum quantity of guests to 6.
- Related
-
How do I let guests answer extra questions when booking?, How do I add an activity?
Keywords: minimum age activity, age limit, booking restrictions, accept terms, required tick box, minimum number of guests, required field
Related questions - Can I set a minimum age for an activity?
- How do I have guests agree to my terms when booking?
- Can I set a minimum and maximum number of people per reservation?
- Does Jimani check guests' age?
Can I add photos and videos to my activity?
- Answer
-
Photos yes, videos no. For every activity, category and for the products Main product with Price per person and Extra product you can upload one image (maximum 5 MB). Uploading or embedding a video is not possible for activities; the upload box only accepts images.
- Explanation
-
- Step 1. Go to Activities management > Activities and open the activity (or choose the plus button to create a new one).
- Step 2. Under Activity type there is the Image box with the text "Drag an image here" and the Browse button. Drag a photo into the box or click Browse. A photo larger than 5 MB is refused with the message Maximum file size: 5 MB.
- Step 3. You crop the photo to the 4:3 ratio. Click Save to keep the activity.
- Where do you see the photo? In the widget the photo appears with the activity in the list the guest chooses from, and with the category if you use Categories. In the dashboard it appears on the activity's tile.
- Products. For a Main product with Price per person and for an Extra product you find the same upload box. Not for Price per time and not for Transaction costs.
- Widget background. You set the image at the top of the widget itself in the widget, not on the activity.
- Showing a video? Put the video on your own website (for example on the page where you embed the widget) and let the guest watch it there first.
- Example
-
An escape room uploads a photo per room. In the widget the guest sees the photo next to the name and description of the room.
- Related
-
How do I add an activity?, How do Categories work for activities?
Keywords: photo activity, image activity, video activity, upload photo, picture for activity, widget image
Related questions - Can I put a photo on my activity?
- Can I upload a video for an activity?
- How large may an image be?
- For which parts can I add an image?
How do I add an activity in Jimani?
- Answer
-
Go to Activities management, click the plus button at the top right and choose Activities. You go through the steps name and description, photo, product type and product, color and quantities, optionally extra products and transaction costs, locations and fields, and click Save at the end. Preferably create the product and the locations first, then you can link them immediately.
- Explanation
-
- Step 1: name and description. Enter the Name (maximum 50 characters, visible for all types of reservations) and the Description (visible when reserving via the widget). If you have more languages on, you enter them per language.
- Step 2: photo. Optionally add an image (see Can I add photos and videos?).
- Step 3: product type and product. Under Choose a product type choose between Price per time and Price per person, and below it choose the product. For Price per time the products are under Product list; an activity has one main product. Is the product not there yet? Use the plus button below the choice to create a new product right away.
- Step 4: color, quantities and duration. Choose a Color (for internal use only, so the overview per activity is easy to read), the Minimum number of guests and Maximum quantity of guests per reservation, and the Minimum time until the reservation. For Price per time choose the Duration (the reservation duration, from the product's time blocks), for Price per person the Duration of the activity.
- Manual times. Set Manual times may differ to Yes if you want to be able to make a shorter reservation in the dashboard than the reservation duration. Then choose the Minimum booking time. Whether a guest chooses a duration themselves in the widget, you determine in the widget with Let guest choose duration.
- Step 5: extra products and transaction costs. Set Add extra products and Add transaction cost to Yes if something belongs with it. You then get a step to choose them; with No the step is skipped.
- Step 6: locations. In the Tables step you choose under Location the locations (lanes, rooms) that belong to this activity. Choose at least one, otherwise you get the message Please select at least one table. With Add new table you create one directly.
- Step 7: fields. Under Fields choose the questions the guest gets when reserving. You can drag the order.
- Saving. After Save you see Your details have been saved! and the activity is on the Activities tab. You can change it later by clicking the tile.
- Booking online. Also put the activity in the widget (in the widget you choose which activities it shows) and make sure the opening times are right, otherwise there are no times to choose. See Why does a guest see no available times?.
- Example
-
You create the activity Padel 90 minutes: Price per time with the product Padel court, Duration 90 minutes, Minimum number of guests 2 and Maximum quantity of guests 4, linked to the locations Lane 1 through Lane 4.
- Related
-
How does Activities management work?, How does the Add or edit activity window work?, Can I temporarily turn off, copy or delete an activity?
Keywords: add activity, new activity, create activity, add lane, create reservation type, activities management
Related questions - How do I create a new activity, such as a lane or workshop?
- Which steps do I go through when creating an activity?
- What do I need to create first before I add an activity?
- Where do I click to add an activity?
Can I temporarily turn off, copy or delete an activity?
- Answer
-
Yes. Every tile in Activities management has an Actions menu with Deactivate (or Activate), Create a Copy and Send to Trash. A deactivated activity is kept, gets the label Inactive and can no longer be booked in the widget; what is in the trash you bring back with the Show only deleted items switch.
- Explanation
-
- Step 1. Go to Activities management and open the Activities tab (or Products, Categories). Open the Actions menu on the tile.
- Turning off temporarily. Choose Deactivate. The tile turns grey with the label Inactive. All settings remain. Later choose Activate to use the activity again. This works the same for products.
- Copying. Choose Create a Copy and confirm with Yes at Do you want to make a copy of this item?. You get Copy created successfully. The copy gets its own name and takes over the languages, the photo, the order of the fields and the extra products; you can then adjust it, for example with a different duration.
- Deleting. Choose Send to Trash and confirm at Delete this object with Do you want to delete the data?. You get Successfully removed!. The activity is then not really gone: it is turned off and marked as deleted.
- Restoring. At the top right turn on the Show only deleted items switch. The page reloads and shows only what is in the trash (the plus button is then gone). On such a tile choose Activate to put it back. Then turn the switch off again.
- Drag the order. On the Activities tab (and for Categories and Locations) you can drag the tiles; the new order is saved immediately.
- Want to know what something is linked to? Click the i icon on the tile: you see "... is linked to the following:" with the linked products, reservation duration, fields and locations.
- Example
-
A bike rental sets the activity Electric bike to Deactivate in winter. In spring they choose Activate and the activity is back with all prices and locations.
- Related
-
How do I add an activity?, How does Activities management work?
Keywords: pause activity, turn off activity, hide activity, copy activity, delete activity, trash, inactive, deactivate
Related questions - How do I temporarily turn off an activity so guests cannot book it?
- Can I copy an activity instead of entering it again?
- How do I bring a deleted activity back from the trash?
- What happens to reservations if an activity is inactive?
How do I set the opening hours for my activities?
- Answer
-
Go to Activities management and open the Opening times tab. Choose the year and the month, set the switch per day to Open or Closed and enter Open from and Open until; every change is saved immediately. Guests can only choose times on days that are set to Open.
- Explanation
-
- Step 1. At the top choose the year (this year, next year or the year after) and then the month. You see all days of that month listed with the columns Date, Open from, Open until and Open/Closed.
- Step 2. For a day on which you are open, set the switch to Open and enter the times. A day that has not yet been filled in is set to Closed, with 10:00 as Open from and 21:00 as Open until as a suggestion.
- Saving. You do not have to press anything: changes are saved automatically, per day. If a time does not go through, you get a message and nothing is kept. For example Not saved: enter a valid time (hh:mm). or Not saved: opening and closing time are equal. Open all day? Choose 00:00 to 23:59.
- Open until after midnight. If Open until is before Open from (for example 11:00 to 02:00), the business closes the next day. The hours after midnight belong to the day on which you opened.
- Filling in many days at once. Use the Excel icon to export three years of opening times (the columns are called Opening date, Opening time, Closing time and Company open). Adjust them in Excel, choose the file via Select Excel file and click the import icon. The file must contain all days of this year, next year and the year after, otherwise you get The number of lines does not match the number of dates in this year, next year and the year after. In Excel, Opening time must be before Closing time (going past midnight is only possible on the screen itself) and you leave the Company open column as it comes out of the export, or enter 1 (open) or 0 (closed).
- Start times. Guests can start from the opening time, in steps of Can be booked per? (on the product), until just before the closing time. A reservation may therefore end after the closing time. Today, times that have already passed can no longer be chosen, except the quarter of an hour you are currently in.
- Closing a whole day. Set the day to Closed, or use a Time limitation with Day restriction. See How do I block a time period or a whole day?.
- Example
-
You are open Tuesday through Sunday from 10:00 to 22:00 and closed on Monday. In each month you set the days Tuesday through Sunday to Open with 10:00 and 22:00, and leave Monday on Closed.
- Related
-
Why does a guest see no available times?, How do the Opening times of Activities management work?
Keywords: opening hours activities, set opening hours, open closed, import opening hours, opening hours excel, day closed, closing time
Related questions - How do I set when my activities are open?
- How do I close a day for bookings?
- How do I adjust opening times for a whole month?
- Why can't guests book on some days?
Why can't a guest see available times for my activity?
- Answer
-
Jimani only shows a start time when all conditions are met: the day is set to Open under Opening times, the activity is active and fits the number of guests, there is a free location with enough places, and the time does not fall within a Time limitation. Go through the list below; usually one item is missing.
- Explanation
-
- The day is not open. Go to Activities management > Opening times and check whether the day is set to Open with an Open from and Open until. A day set to Closed cannot be chosen in the widget, and a day you have never set up gives no times. See How do I set the opening hours for my activities?.
- The whole day is blocked. A Time limitation with Day restriction set to Yes closes that day. It then cannot be chosen in the widget.
- A time period is blocked. A Time limitation blocks the start times between Time from and Time to, for the chosen activities and dates. Please note: if you want to block until 19:00, enter 18:59. See How do I block a time period or a whole day for my activities?.
- The activity does not fit. The widget only shows activities that are active, that have been selected in the widget and for which the number of guests is between Minimum number of guests and Maximum quantity of guests. A deactivated activity (label Inactive) therefore disappears.
- No location is free. The activity must have Locations. For the widget, each location must also have Can be reserved via widget set to Yes. A location does not count as free if there is already a reservation on it in that time period, including the Extra time between reservation. If the number of guests does not fit in one location, Jimani combines several free locations until there are enough places; if that does not work, the time is not available.
- The start time itself. The times follow the step of Can be booked per? on the product, starting at the opening time. Times today that have already passed disappear; the quarter of an hour you are in right now remains available.
- No price for that date. If the product has no price under Price per time for that date and duration, you see The price amount has not been configured for this date. at the reservation. Enter the price, see How do I set the price per duration with time blocks?.
- Does the guest not see the day at all? Then also check the widget itself: the activity must be ticked there.
- Example
-
A guest wants a lane for 4 places on Saturday at 14:00 with 6 people. There are two lanes of 4 places, but lane 2 has Can be reserved via widget set to No. Jimani can then only use lane 1 (4 places) and does not show the time. If you set lane 2 to Yes, Jimani combines the two lanes.
- Related
-
How do I set the opening hours for my activities?, How do I set up locations and capacity for my activities?, How do I block a time period or a whole day for my activities?
Keywords: no times available, time slot not visible, widget shows no times, cannot book activity, activity availability, no location available, day cannot be selected
Related questions - Why can't guests choose a start time for my activity?
- My activity cannot be booked online, what is wrong?
- Why is a certain time missing in the widget?
- What do I check if no times appear?
How do I set up locations and capacity for my activities?
- Answer
-
A location is a lane, room, boat, bike or anything else that you rent out per time period. You create locations under Activities management > Locations, give each location a name and a Number of guests (the capacity), and link them to the activity. A location can only belong to one reservation at the same time; the capacity determines how many guests fit on it.
- Explanation
-
- Step 1. Go to Activities management, click the plus button at the top right and choose Locations. You get the Locations window with the text Create a new location.
- Step 2. Under Number of locations enter how many locations you want to add in one go (1 to 50). For each location enter the Location name and maximum quantity of guests; the name is only visible internally (maximum 50 characters), the number of people is at least 1.
- Step 3. Under Can be reserved via widget choose Yes if guests may book the location online. If this is set to No, you do see the location in the dashboard, but not in the widget.
- Step 4. Click Save and then link the locations to your activity, in the Tables step under Location (see How do I add an activity in Jimani?). In the window of an activity you can also create a location straight away with Add new table.
- Changing the capacity. In the list on the Locations tab, click the number of people: a minus and a plus appear, and every step is saved immediately. With the Edit button on a row you open the window where you can also change the name and Can be reserved via widget. The edit icon at the top right of the list puts the list in edit mode: you change names and numbers, tick locations to delete several at once and click Save.
- How Jimani uses the capacity. For a booking, Jimani first looks for the smallest free location that fits all guests. If the number of guests does not fit in one location, more free locations are used together (the largest first) until there are enough places. If too little is free in that time period, the time is not available.
- Order. Drag the locations in the list to change the order.
- What is a location linked to? Click the i icon: you see which activities the location belongs to.
- Example
-
A bowling centre creates 8 locations (Lane 1 through Lane 8) each with Number of guests 6. A group of 10 guests gets two free lanes. A group of 5 gets one lane.
- Related
-
How do I add an activity in Jimani?, Why can't a guest see available times for my activity?, How do the Locations of Activities management work in Jimani?
Keywords: add location, add lane, set capacity, number of people per lane, create lanes, add room, maximum number of guests
Related questions - How do I set how many people fit on a lane or in a room?
- What is a location in activities?
- Can two reservations be on the same lane at the same time?
- How do I link a lane to an activity?
How do I block a time period or a whole day for my activities?
- Answer
-
Use a Time limitation: go to Activities management > Time limitation, click the plus button and choose Time limitation. Enter a name, choose Day restriction Yes (whole day) or No (time period), choose the activities and the dates, and click Save. Guests can then no longer start in that time period.
- Explanation
-
- Step 1: name and type. Under Name enter a name (only visible internally, for example "Staff outing"). Under Day restriction choose: Yes for the whole day, No for a time period. The window is called Create a new time block.
- Whole day (Yes). You do not need to choose times or activities: the limitation applies to the whole day for all activities. Continue to the dates. Guests cannot choose that day in the widget.
- Time period (No). Enter Time from and Time to. Please note: if you want to block something until 19:00, enter 18:59. The block stops the start times that fall between Time from and Time to (up to and including that last time). If the time period runs past midnight (for example 20:31 to 01:30), you see +1 day and it also applies to the tail end on the following day. Time from and Time to may not be the same; for a whole day choose Day restriction Yes.
- Step 2: activities. Under Activity type choose which activities the time period applies to. If you choose none, you get Please select at least one ticket type.
- Step 3: dates. In the calendar click the days, weeks or months on which the limitation applies and use the arrows for other years. Without a date you get Select a date.
- Saving. Click Save. The overview shows the columns Name, Date, Blocking of, Block up to and Ticket type. A limitation with more than one date shows More than one date has been selected.
- Changing or deleting. Click the limitation in the overview. In the window you can change everything and save, or click Delete and confirm with Are you sure?.
- Example
-
Because of illness you can handle fewer lanes on Saturday between 14:00 and 17:00. You create the Time limitation "Illness Saturday" with Day restriction No, Time from 14:00 and Time to 16:59, choose the activity Bowling and the date of that Saturday. Guests can no longer start between 14:00 and 16:59 that afternoon.
- Related
-
Why can't a guest see available times for my activity?, How does the Time limitation of Activities management work in Jimani?
Keywords: time limitation, block time period, day closed activity, block staff shortage, stop reservations, closed for holiday, block for cleaning
Related questions - How do I block an afternoon because I have too little staff?
- How do I close a whole day for one activity?
- How do I make sure guests can no longer start in a certain time period?
- Where do I create a time limitation?
How do I prevent too many guests arriving at the same time (crowd reduction)?
- Answer
-
You spread the crowds with the capacity of your Locations, the Extra time between reservation and a Time limitation: Jimani only offers a time if there is a free location with enough places. In addition you have the Crowd reduction tab, where you enter a maximum number of reservations per arrival time. Do not use that tab as your only measure, because the available times of activities do not take it into account at the moment.
- Explanation
-
- Capacity via locations. Each Location can only belong to one reservation in a time period. So do not create more locations than you can serve at the same time. See How do I set up locations and capacity for my activities?.
- Time between reservations. On the product set Extra time between reservation (for example 15 minutes) and set Can be booked per? to a larger step, so guests do not all arrive at the same moment.
- Closing a busy period. Block a time period or a whole day with a Time limitation, see How do I block a time period or a whole day for my activities?.
- The Crowd reduction tab. Go to Activities management > Crowd reduction, click the plus button and choose Crowd reduction. Enter a Name (only visible internally), under Activity type choose the activities the limitation applies to, and then enter the Maximum number of reservations per time. With the fields in the header you fill in all times at once. Click Save.
- Changing. Click the limitation in the overview and change the numbers. The overview shows the columns Name and Activities.
- Intended for. The screen says: "This prevents too many guests or reservations from coming in at the same moment, and spreads the crowds more."
- Example
-
You have 6 lanes, but only two staff members who can receive guests. You create 6 locations with Number of guests 6, set Extra time between reservation to 15 minutes and use a Time limitation to block the peak hours when you have too little staff.
- Related
-
How do I set up locations and capacity for my activities?, How do I block a time period or a whole day for my activities?, How does the Crowd reduction of Activities management work in Jimani?
Keywords: crowd reduction, queue limit, too many guests at once, spread crowds, maximum number of reservations, peak hours, staff shortage
Related questions - How do I prevent too many people coming at the same time?
- Can I set a maximum number of reservations per start time?
- How do I spread the crowds over the day?
- Is the crowd reduction tab enough to prevent too many guests?
How do I create a reservation for an activity in the dashboard?
- Answer
-
In the left menu open Activities (the timeline) and click Create reservation at the top right, or click an empty box on the timeline. A side panel opens with the tabs Reservation, Fields, Products and Totals. Choose the activity, the number of guests, the time and the location, enter the guest details and click Save or Pay.
- Explanation
-
- Step 1: starting. Click an empty box on the timeline (next to the mouse you see a green box with a plus and Create reservation) and the lane, date and time are already filled in. Or click Create reservation at the top right and choose everything yourself.
- Step 2: activity and guests. Under Activities choose the activity (without a choice you get Select an Activity Type). Enter the number of guests per price line, with the names from your widget (for example Adults and Children); with the plus button under a line the next line is added.
- Step 3: time. Choose the Date and under From the start time. To and Duration go together: if you choose a Duration, Jimani fills in To. For an activity with Manual times may differ: Yes, the Duration may be shorter than the reservation duration, down to the Minimum booking time. In the full screen (Add reservation) the clock icon opens Available times, a list of the times that are free.
- Step 4: location. Under Locations the chosen lane is shown. Click the edit icon to open Available locations, tick one or more locations (or choose Select all) and click Save. If it says No location available, nothing is free in that time period.
- Step 5: guest. Enter the guest details that Jimani shows and choose the Guest's language. Set Passer-by (no guest details) to Yes for a guest without details; the field Reservation name then appears, the only name you enter. Set Check in now to Yes if the guest is already there; the reservation then immediately gets the status Arrived. In the full screen you can look up an existing guest with Search (the Find guests window).
- Step 6: products and fields. On the Products tab you see the main product with the price, the extra products and any transaction costs. On the Fields tab you answer the extra questions and you can add an Internal memo. On Totals you find the bill: Total amount, Total paid and Outstanding amount.
- Step 7: save or pay. Save stores the reservation. Pay opens the choice Cash, Pay later or Other. Cash shows the Return amount; with Other the payment is recorded as paid; with Pay later the reservation is recorded without payment, with the choices Remain in Pay Later status and Send email with Invoice. If Passer-by (no guest details) is set to No, you must fill in the required guest details and when saving Jimani asks What action should be taken? with Send email or No email.
- Example
-
A guest calls for Saturday 14:00 with 4 people. You click the empty box of Lane 2 at 14:00, choose the activity Bowling, set Adults to 4, enter the Reservation name and click Save. The guest pays later on arrival.
- Related
-
How do I change, move or cancel a reservation for an activity?, How do I see my reservations for activities per day, week or month?, How does the Create and change reservation screen work for Activities?
Keywords: create reservation activity, create reservation, reserve lane, manual booking, add reservation, check in guest, check in now, walk-in guest
Related questions - How do I book an activity myself for a customer who calls?
- How do I create a reservation on the timeline?
- Can I have the guest pay straight away for a manual reservation?
- What details do I enter for a new reservation?
How do I change, move or cancel a reservation for an activity?
- Answer
-
Click the reservation on the timeline or in a list: the Reservation information window opens. There you change details with Edit details or Open reservation, set the status to Arrived or Left, and cancel with Cancel. To move a reservation to another lane or time, drag the block on the timeline.
- Explanation
-
- Opening. Click the block on the timeline or a row in the List view. At the top are the status and the guest's details; at the bottom the buttons.
- Edit details. Click Edit details to change the guest details, the language and the remark. With Open reservation (where that button is shown) you open the full Update reservation screen, with Arrival date, Departure date, From, To, Duration, Locations, Products and the Internal memo.
- Internal memo. On the Overview tab there is an Internal memo with its own Save button.
- Moving. Drag the block on the timeline to another lane or time. While dragging, a preview block shows whether the spot is valid; do not let go on a spot where it does not fit. If the reservation belongs to a combination, the other part moves along if it fits.
- Guest is here. Click Arrived when the guest is here and later Left. The status goes from Waiting for guest to Arrived and Left. If the reservation is still on Waiting for guest while the start time has passed, the buttons Set to No-show and Set to No-show in 30 minutes appear.
- Cancelling. Click Cancel at the bottom left. You get the question Cancel booking? with a field Reason for cancellation. If the setting Reason required when cancelling is set to No, you only get Are you sure you want to cancel the reservation?. Who cancelled is always recorded. A reservation that is already Arrived or Left can no longer be cancelled; the button is then off or gone.
- Payments and receipts. Under More you find Cash, Pay later and Other (as long as there is an outstanding amount), Send email, Print receipt and Print (PDF). Order opens the order page if the guest has arrived.
- What else do you see? The tabs Attachment(s), History, Email History, Tickets and Reservation list are only there if there is something in them.
- Automatic. In the Advanced settings of Activities you find Automatically check in at start time, Automatically check out at end time, A reservation may overlap a running reservation and Reason required when cancelling.
- Example
-
A guest calls to say they will arrive an hour later. You open the reservation on the timeline, drag the block one hour to the right on the same lane and let go. The reservation is now an hour later.
- Related
-
How do I create a reservation for an activity in the dashboard?, How do I see unpaid reservations and no-shows for my activities?, How do I see my reservations for activities per day, week or month?
Keywords: change activity reservation, move reservation, cancel reservation, guest arrived, no-show, drag reservation timeline, edit details
Related questions - How do I move a reservation to another lane or time?
- How do I cancel a guest's booking?
- How do I change the details of a reservation?
- How do I set a guest to arrived or left?
How do I see unpaid reservations and no-shows for my activities?
- Answer
-
Open the Unpaid and no-show page via Settings > Guests and bookings > Guest payments. Choose a period with Date as of and Date to, choose the Filter and click Search. You see the number of no-shows, the number of unpaid reservations and the total loss, with the guest, the activity and the amount for each reservation.
- Explanation
-
- Step 1. Go to Settings > Guests and bookings > Guest payments. If you have the Activities module, the Unpaid and no-show page is there with the text Search by date range and quickly view no-shows and unpaid reservations.
- Step 2. Date as of is by default set to one month ago and Date to to today. With the minus and plus buttons you move one day, and the list then reloads immediately. You cannot choose a date in the future.
- Step 3. Under Filter choose between No-show only and Unpaid Only. Click Search.
- What you see. Above the list are Total 'No-show', Unpaid reservations and Total loss. The list contains Name, Email, Phone, Activity, Reservation date, Time, Total amount and Status. The status is No-show, or No-show and customer didn't pay. Click the information icon on a row to open the reservation.
- Setting no-show. A reservation becomes No-show when you do that in Reservation information (the buttons Set to No-show and Set to No-show in 30 minutes, as soon as the start time has passed).
- Customer did not pay. For a reservation without payment, in the Payment method: later window you choose the button Customer did not pay. The reservation then counts towards Unpaid reservations and Total loss.
- No data? Then it says No data found. If loading fails, or you do not choose a valid date, it says Unable to load data.; then try again.
- Example
-
You want to know how much you missed out on in the past quarter because guests did not show up. You set Date as of to the first day of the quarter, Date to to today, choose No-show only and click Search. Under Total loss you see the amount of the no-shows that did not pay.
- Related
-
How do I change, move or cancel a reservation for an activity?, What can you see on the Unpaid and no-show page of Activities?
Keywords: no-show activities, unpaid reservations, not showing up, no-show loss, customer did not pay, unpaid overview
Related questions - Where do I see which guests did not come?
- How do I see which reservations remained unpaid?
- How much revenue do I miss because of no-shows?
- Can I look up no-shows over a certain period?
How do extra products and transaction costs work for an activity?
- Answer
-
Besides the main product you can attach two kinds of products to an activity. An Extra product is an optional addition that the guest chooses, for example a drink or a rental item; Transaction costs are a fixed amount per reservation. You create both under Activities management > Products.
- Explanation
-
- Step 1: creating. Click the plus button, choose Products and then Extra product or Transaction costs.
- Extra product. Enter Name, Description (visible when booking) and optionally a photo, set the Price (including VAT) and choose the VAT group. Set Show in widget to Yes if guests may choose it online.
- Transaction costs. Enter Name, Description and the Price per reservation (including VAT) and choose the VAT group.
- Step 2: linking to the activity. Open the activity and set Add extra products or Add transaction cost to Yes. In the next step, under Product list, you choose which extra products belong to it, or for transaction costs which product applies. If you choose No transaction cost, nothing is added. If the step is set to No, it is skipped.
- When booking. On the Products tab of the booking screen a staff member chooses the quantity per extra product; the price is added to the total. In the widget the guest has a step Extra products for this. You can turn that step off per widget: at the widget, on the View tab, in the Activities block, Extra products is set to Yes or No.
- Add-on needed. You only see Transaction costs if the Transaction costs add-on is on. See Settings > Add-ons.
- Costs for you. Extra products and transaction costs are not on the list of paid features. See What does Jimani cost?.
- Example
-
For the activity Mini golf you create the Extra product Ice cream (Price 2.50) and for Children's party the Transaction costs Booking fee (Price 1.50). A group books Mini golf with 3 ice creams; the bill shows the main product and 3 times 2.50. If they book Children's party, 1.50 is added once.
- Related
-
Can I pass transaction costs on to my guests?, Can I offer rental and equipment with an activity and ask for a deposit?, Which pricing model can I choose for an activity: price per time or price per person?, How do the Products of Activities management work in Jimani?
Keywords: extra product activity, upsell activity, transaction costs reservation, booking fee, add a drink, addition to booking
Related questions - How do I offer a drink or rental item as an extra with an activity?
- Can I charge a booking fee per booking?
- What is the difference between an extra product and transaction costs?
- Where do I create extra products?
How do I divide my activities into categories?
- Answer
-
In the Advanced settings of Activities, turn on the setting Categories for your activities. The Categories tab then appears in Activities management, where you create categories (for example sports, workshops or children's parties) and link activities to them. In the widget the guest first chooses a category and then the activity.
- Explanation
-
- Step 1: turning on. Turn on Categories for your activities. The screen says: "If you turn this on, you can divide your activities into categories. You manage the categories in Activities management, on the Categories tab." The Categories tab sits between Opening times and Activities.
- Step 2: creating a category. Click the plus button at the top right and choose Categories. Enter the Name (maximum 50 characters) and the Description (visible when booking via the widget), optionally add an image and under Activity type choose which activities belong to it. If the activity is not there yet, you can create one with the plus button below the choice. Click Save.
- Changing. Click the category on the Categories tab; the window is called Update category. With the i icon you see which activities belong to it.
- Searching and sorting. Above the list choose an activity in the Activities filter to see which category it is in. Drag the tiles to set the order.
- Turning off, copying, deleting. The Actions menu on the tile works here too, see Can I temporarily turn off, copy or delete an activity?.
- Example
-
An amusement park creates the categories Water fun, Quiet and Children's parties and links each activity to one of them. In the widget the guest first chooses Water fun and then sees only the water sports.
- Related
-
How do I add an activity in Jimani?, How do the Categories of Activities management work in Jimani?
Keywords: activity categories, divide activities, groups of activities, add category, choose category widget
Related questions - How do I group my activities, for example sports and children's parties?
- Why don't I see the Categories tab?
- Can the guest first choose a type of activity in the widget?
- How do I link activities to a category?
How do I see my reservations for activities per day, week or month?
- Answer
-
In the left menu open Activities. There you find the tabs Overview (the timeline per lane), List view (one day), Weekly list, Last 100 reservations, Upcoming reservations and Totals; at the top choose the date and filter by status or activity. You can print the lists or export them to Excel.
- Explanation
-
- Overview. The timeline with the blocks of the reservations per location. Choose the day with the minus and plus button, filter with All activities on one activity, and use the cog View timeline to decide what the blocks look like (Normal, Compact or Extra compact, the number per location, the text size, the grid lines). Click a block to open Reservation information. Cancelled reservations are not on the timeline.
- List view. Overview of reservations on: the chosen day, with columns such as Reservation status, Date, Arrival time, Departure date, Departure Time, Name, Quantity, Activity, Duration, Locations, Payment, Created and Memo. The Payment is Paid or Unpaid.
- Weekly list. The same columns for the week, from the first to the last day.
- Last 100 reservations. The List of the last 100 reservations.
- Upcoming reservations. Under Reservation for the month: choose the month you want to see; months in the past are off. The list has pages with Back and Next.
- Totals. Day totals and Week totals as cards: per activity the number of guests per price line (Adults, Children, and so on) and the Total.
- Filtering. Above the lists you choose Select status and Select Type, and you turn on Hide "Guest left" or Hide "Guest arrived" to leave out those reservations.
- Choose columns. The filter icon opens Visible columns: set a column to No to hide it; your choice is remembered.
- Print and Excel. With the printer icon (Print) you print exactly what the view shows; with the Excel icon you export the list.
- Example
-
At the start of the day you open the List view, turn on Hide "Guest left" and print the list with Print. That gives you a list of who is still coming or is here.
- Related
-
How do I create a reservation for an activity in the dashboard?, How do I change, move or cancel a reservation for an activity?, How does the Activities screen with the timeline and the lists work in Jimani?
Keywords: view reservations, daily overview activities, weekly list, upcoming reservations, print reservations, timeline, total guests
Related questions - Where do I see all reservations of today?
- How do I view this week's reservations?
- Can I print the reservation list or export it to Excel?
- How do I filter reservations by status or activity?
Activities management is where you set up everything for your activities: opening hours, activities, products, fields, locations and limitations. You open it via the left menu. At the top are tabs; with the plus button at the top right you add something new and with the Actions menu on a tile you turn something off, copy it or remove it.
Where to find it: Left menu > Activities management (/Activities)
All buttons, settings and messages of this screen
In this window you create an activity (for example Pool, Padel or Children's party) or change one. You choose the name, the photo, the pricing model with the product, the colour, the number of guests, the duration, the extra products, the locations and the fields. The window is called Add activity or Change activity and consists of steps with Previous, Next and Save.
Where to find it: Activities management > Activities tab > plus button > Activities, or click a tile to change it (/Activities)
All buttons, settings and messages of this screen
Under Products you create what a guest buys or rents with an activity: the Main product with its price per time or per person, an Extra product and Transaction costs. You create them with a window of steps (Products) and change them later with the same window. Each product gets a Name, a VAT group and a price.
Where to find it: Activities management > Products tab > plus button > Products (/Activities)
All buttons, settings and messages of this screen
A field is an extra question or text that the guest gets when booking, such as an allergy, a drop-down or a box for your terms. You create fields under Activities management > Fields, choose the type, the name, the options and whether the field is required, and link it to one or more activities.
Where to find it: Activities management > Fields tab > plus button > Fields (/Activities)
All buttons, settings and messages of this screen
A location is a lane, room, boat or anything else that you rent out per time period. Under Activities management > Locations you create locations with a name and a capacity (the number of people), decide whether guests can book them online and link them to activities.
Where to find it: Activities management > Locations tab (/Activities)
All buttons, settings and messages of this screen
With a Crowd reduction you enter a maximum number of reservations per activity and per arrival time. You find it under Activities management > Crowd reduction. You give the limitation a name, choose the activities and enter a maximum for each time.
Where to find it: Activities management > Crowd reduction tab > plus button > Crowd reduction (/Activities)
All buttons, settings and messages of this screen
With a Time limitation you block a time period or a whole day for one or more activities, for example in case of a staff shortage or a cleaning moment. You find it under Activities management > Time limitation. Guests can no longer start in that period.
Where to find it: Activities management > Time limitation tab > plus button > Time limitation (/Activities)
All buttons, settings and messages of this screen
Under Opening times you set for each day whether you are open and from what time to what time. Guests can only choose times on days that are set to Open. You change days one by one, or you export all days to Excel, change them there and import them again.
Where to find it: Activities management > Opening times tab (/Activities)
All buttons, settings and messages of this screen
With Categories you divide your activities into groups, for example sports, workshops or children's parties. In the widget the guest first chooses a category and then an activity. The Categories tab is only in Activities management if the setting Categories for your activities is on.
Where to find it: Activities management > Categories tab > plus button > Categories (/Activities)
All buttons, settings and messages of this screen
Under Time blocks you determine which durations (5 minutes, 1 hour, 2 days and so on) you can offer with a product with Price per time. Each duration has a Yes or No button that saves immediately. You can only choose durations set to Yes in the details of a product.
Where to find it: Settings > Guests and bookings > Time blocks (/ActivitiesSettings/TimeSettings), or in the window of a product with the plus button under the time blocks
All buttons, settings and messages of this screen
With this screen you create a reservation for an activity yourself or change one. You choose the activity, the number of guests, the date and time and the location, fill in the Reservation name and save or let the guest pay. On the timeline it opens as a side panel with the tabs Reservation, Fields, Products and Totals.
Where to find it: Activities > Create reservation, or an empty box on the timeline; change via Reservation information > Open reservation (/ActivitiesReservations/AddActivitiesReservations, /ActivitiesReservations/UpdateActivitiesReservations)
All buttons, settings and messages of this screen
The menu item Activities opens the reservation overview of your activities: a timeline per location, lists per day, week and month and day totals. From here you create a reservation, open Reservation information and set the status to Arrived or Left.
Where to find it: Left menu > Activities (/ActivitiesReservationViews). The management is in Activities management.
All buttons, settings and messages of this screen
The Unpaid and no-show page shows the reservations of your activities where the guest did not come, with the total loss. You choose a period and a Filter and click Search. You find the page under Settings > Guests and bookings > Guest payments.
Where to find it: Settings > Guests and bookings > Guest payments > Unpaid and no-show (/ActivitiesSettings/UnpaidAndNoShow)
All buttons, settings and messages of this screen
If your business uses the Activities module on the POS, the bar contains Reservations and Reservation. Under Reservations you see the reservations per day, per week or the last 100, with filters on status, type and activity. With Reservation you create a new one; tapping a reservation shows the details, the history and the tickets, and can set it to no-show.
Where to find it: POS > Reservations (/Pos/ActivitiesReservation); new with Reservation (/Pos/AddActivitiesReservations)
All buttons, settings and messages of this screen
Salon
Upsell products for a reservation or booking
- What
- A business owner can set up separate upsell products (name, price, VAT, product group) that are offered to guests while booking a reservation or activity.
- Who it is for
- Hospitality, activity and salon businesses.
- How it works
- Each upsell product is separate from the regular POS products, with its own price and VAT rate, and can be switched on or off per module (hospitality, activities, salon). For activity reservations, the chosen upsell products are linked to the reservation.
- Difference from competitors
- No public comparison material found on built-in upsell products when booking at Lightspeed, unTill or SumUp specifically.
Keywords: upsell reservation, booking add-on sales, extra products with appointment
Related questions - Can I offer guests extra products while they book a reservation?
- Does upsell work the same for hospitality, activities and salon?
Switching between modules on the same POS
- What
- One POS device remembers which module is active (hospitality, webshop, salon, activities, ticketing) and adapts the menu accordingly; a user can switch this themselves via a dropdown.
- Who it is for
- Business owners who combine multiple modules on the same POS device.
- How it works
- The active module is remembered for thirty days per device/user. If the POS is on the hospitality module, the shared POS screen shows the reservation menu and the table floor plan; with another module the corresponding menu appears. Without a valid, known module the system falls back to the company's own main module, so the POS never gets stuck in the wrong menu.
- Difference from competitors
- No public comparison material found on a comparable shared POS interface that can be switched per module at Lightspeed, unTill or SumUp specifically.
Keywords: switch module POS, POS to reservation screen, switch hospitality webshop salon
Related questions - Can I switch on the same POS between, for example, booking and just taking payment?
- Does the POS remember which module I used last?
Online deposit via Mollie when booking at a salon
- What
- Guests can pay (a deposit) online when booking a salon appointment.
- Who it is for
- Salon businesses.
- How it works
- The widget booking uses the salon's Mollie connection to pay immediately when reserving. The guest pays online through a Mollie payment that belongs to the appointment; a refund goes through the Refunds overview.
- Difference from competitors
- No public comparison material found.
Keywords: salon online payment, beauty salon deposit, Mollie salon
Related questions - Can a customer pay a deposit online when booking a salon appointment via Jimani?
Terminal payment linked to the appointment
- What
- If a guest books an appointment online with an amount, Jimani creates a Mollie payment for that amount, linked to that specific salon reservation.
- Who it is for
- Salon businesses.
- How it works
- The guest completes the payment online (via a link from Mollie) and the payment automatically belongs to the appointment, without a staff member having to link it manually. If payment is switched off in the widget, nothing is paid. Nothing is sent to a card terminal.
- Difference from competitors
- No public comparison material found.
Keywords: salon online payment, link payment to appointment, automatic payment link
Related questions - How are payments automatically linked to the right appointment?
- Does an online payment automatically belong to the appointment?
How do I get insight into customer details and treatment history?
- Answer
- On the Add reservation screen, under Guest Reservation, you see the guest's earlier appointments and reservations.
- Explanation
- The Guest Reservation table shows for each earlier reservation the Module, Reservation type, Reservation date, Reservation time, Quantity, Revenue and Method. There is also a separate, searchable customer overview that also works for Salon.
- Example
- A hairdresser scheduling an appointment sees in the Guest Reservation table that this customer has been before and what those appointments brought in.
Keywords: salon customer history, customer treatment history, salon no-show customer
Can I ask for deposits when booking to reduce no-shows?
- Answer
- Yes, guests can pay (a deposit) online when booking a salon appointment through the salon's Mollie connection.
- Explanation
- The widget booking uses the salon's Mollie connection to pay immediately when reserving. Whether a treatment is a deposit, you set per treatment under "Is this a deposit?".
- Example
- A nail studio asks for a €10 deposit when booking an extended treatment, so that a no-show does not cost the business owner the full value of the time slot.
Keywords: salon deposit, prevent salon no-show, prepay salon appointment
Can I sell products alongside treatments (add-on sales)?
- Answer
- Yes, through separate upsell products that a salon sets up itself, with its own name, price and VAT rate.
- Explanation
- You create extra products on the Products tab of Salon management and link them to a treatment; the guest chooses them when booking, or you choose them when making the appointment. The price includes VAT.
- Example
- A hair salon offers a care product as a separate add-on sale when a haircut is booked.
Keywords: salon add-on sales, sell products alongside treatment, hair salon upsell
What can I do with Jimani in my salon?
- Answer
-
With Jimani you record your salon's appointments in one calendar per employee. Guests can choose a treatment, an employee and a time online, you make appointments yourself in the calendar, and you refund cancelled appointments. The appointments module has no monthly fee.
- Explanation
-
- Setting up. In Menu > Salon (or Salon management in the POS) you set up the Opening hours, Employees, Treatment, Products, Workstations, Treatment group and Fields. An employee has working hours, breaks and workstations; a treatment has a duration, price and VAT group.
- Booking by guests. In the online booking module (the widget), a guest chooses a treatment, an employee or No preference, a day and a time. See Can customers choose an employee themselves?.
- Booking by you. In Menu > Reservations you choose Create reservation. See How do I make an appointment for a customer myself?.
- Working day to day. In the calendar you see the day as a timeline per employee or as a list. You set a guest to Arrived and Left. In the POS with the Salon integration, Salon has an Appointments tab.
- Cancelling and refunding. Cancelled appointments are in Cancellations; amounts paid online you refund in the Refunds overview. See How do I refund a cancelled appointment?.
- Afterwards. You can have guests automatically receive an SMS or a survey. See Does a customer get a survey after the appointment?.
- Costs. The appointments module costs nothing per month. Only the paid features and the SMS credit are on the price list, see What does Jimani cost?.
- Example
-
A hair salon sets up three hairdressers, ten treatments and four workstations in Jimani. Customers book a haircut online with their own hairdresser; the owner sees everything in one calendar.
- Related
-
How do I set my salon's opening hours?, What can you set for an employee in the salon?, How does the salon calendar work?
Keywords: salon software, appointment system hairdresser, beauty salon calendar, book appointment online salon, salon POS, hair salon software
Related questions - Can I use Jimani for appointments in my hair salon?
- Can customers book an appointment online?
- What does the appointment system for my salon cost?
- Is there a calendar per employee?
How do I set my salon's opening hours?
- Answer
-
Go to Menu > Salon > Opening hours tab, choose the year and the month, and for each day set the switch to Open with an opening time and closing time. Every change is saved immediately. A day set to Closed cannot be booked online.
- Explanation
-
- Step 1. Go to Menu > Salon (in the POS: Menu > Salon management) and open the Opening hours tab.
- Step 2. At the top, choose the year (this year and the two years after) and then the month.
- Step 3. For each day you are open, set the switch to Open and enter the time under open from and open until. A day you have not filled in yet is set to 10:00 to 21:00 and to Closed.
- Step 4. You do not need to save: for each day, Saved briefly appears. If it says Not saved, click Try again.
- Quickly fill in a whole year. Make an export (Excel icon), adjust the times in Excel, choose the file with Select Excel file and Choose a file and load it in with the import icon. The text on the screen recommends doing this for the next two years.
- What it does. Online, only a day on which the salon is Open can be chosen. The times Open from and Open until only apply to days that are set to Open.
- Mind the working hours. If a guest wants to book with a particular employee, that employee's working hours on that day must fall within the salon's opening hours. Otherwise Jimani does not offer that day for that employee.
- Example
-
You are open Tuesday to Saturday from 09:00 to 18:00. Set those days to Open with 09:00 and 18:00; leave Sunday and Monday on Closed.
- Related
-
How does Salon management work in Jimani?, Why don't customers see any available times online?
Keywords: salon opening hours, salon closed day, set hairdresser opening hours, holiday salon closed, import opening hours
Related questions - How do I set my salon's opening hours?
- How do I close my salon on a particular day?
- Can customers book online on a closed day?
- How do I change the opening hours per month?
How do I add an employee and set when they work?
- Answer
-
Go to Menu > Salon > Employees tab, click the button with the plus signs at the top right and choose Employee. You go through seven steps: Employee, Image, Treatments, Working hours, Breaks, Chairs and Colour and notifications. On the last step you click Save.
- Explanation
-
- Step 1. Under Employee, enter the First name, Last name, Phone and E-mail. All four are required. The guest only sees the first name.
- Step 2. Optionally add an Image (maximum 5 MB).
- Step 3. Under Treatments, choose everything this employee does. Without treatments the employee cannot be booked.
- Step 4. Under Working hours, choose the year and the month and turn on Active on every day the employee works. Adjust Working from and Work on if necessary; a new day is set to 10:00 to 21:00 and to Active off. Or load in an Excel file with Select Excel file, Choose a file and Upload.
- Step 5. Under Breaks, record the regular breaks, see How do I record breaks for an employee?.
- Step 6. Under Chairs, choose the Workstations the employee works at. If one is missing, you create a workstation with the plus under Create a new table.
- Step 7. Under Colour and notifications, choose the Color for the calendar and check Show in widget and Active. Click Save.
- Month by month. The working hours of the month you are looking at are saved. Click Save before you go to another month; then open the employee again for the next month.
- What it does. Guests can only book online on days on which the employee has working hours with Active on, within the salon's opening hours.
- Example
-
Anouk works Tuesday to Friday from 09:00 to 17:00. In the month you set those days to Active with 09:00 and 17:00, leave the other days off and click Save.
- Related
-
What can you set for an employee in the salon?, How do I put someone's holiday or days off in the calendar?, How do I create a treatment?
Keywords: add employee salon, hairdresser working hours, salon work schedule, new stylist, employee calendar, import working hours
Related questions - How do I add a hairdresser or beautician?
- How do I set an employee's working hours?
- Which steps do I have to go through for a new employee?
- How do I link treatments to an employee?
How do I record breaks for an employee?
- Answer
-
Open the employee and go to the Breaks step. Give the break a name, enter a start and end time, tick the weekdays and click Save. Then, on the last step, click Save for the employee. A guest cannot book online during a break.
- Explanation
-
- Step 1. Go to Menu > Salon > Employees tab and click the employee (or create a new one).
- Step 2. Go to the Breaks step with Next.
- Step 3. Under Name of the break, enter a name for yourself, for example Lunch.
- Step 4. Under Break until, enter the Start time and End time. With minus and plus you go an hour back or forward.
- Step 5. Tick the days on which the break recurs every week (Monday to Sunday).
- Step 6. Click Save: the break now appears under Saved breaks. Then, on the last step, click Save for the employee; only then is the break stored.
- Removing. In the Saved breaks list, click the bin icon behind the break and save the employee.
- Errors. If the name is missing, you get Break name is missing. If the times are empty, Break time is missing. If you have not ticked a day, Selection box is not selected.
- Example
-
A lunch break from 12:30 to 13:15 on Monday, Tuesday, Thursday and Friday: one break with those four days ticked.
- Related
-
How does the Breaks step work for an employee?, How do I add an employee and set when they work?
Keywords: hairdresser break, lunch break salon employee, set breaks calendar, no appointments during break, regular break
Related questions - How do I set a lunch break for an employee?
- Can customers book online during a break?
- How do I set regular breaks on certain weekdays?
- Where do I find an employee's breaks?
How do I put someone's holiday or days off in the calendar?
- Answer
-
Open the employee, go to the Working hours step and turn off Active on the days that person is off. Then click Save. On those days guests cannot book online with that employee. Existing appointments stay.
- Explanation
-
- Step 1. Go to Menu > Salon > Employees tab and click the employee.
- Step 2. Go to the Working hours step with Next and choose the year and the month of the holiday.
- Step 3. For each day off, untick Active.
- Step 4. Go to the last step and click Save. If the holiday falls in two months, first save the first month, open the employee again and do the second month.
- Existing appointments. Jimani does not move or cancel appointments that are already there. Look them up in the calendar and move or cancel them yourself, see How do I change or reschedule an appointment?.
- The whole salon closed. Set the day in Opening hours to Closed.
- Example
-
Sanne is on holiday from 14 to 25 July. In the working hours for July you turn off Active for all days from 14 to 25 July.
- Related
-
How do I add an employee and set when they work?, What can you set for an employee in the salon?
Keywords: employee holiday salon, hairdresser day off, leave calendar, mark employee sick, unavailable calendar
Related questions - How do I put an employee's holiday in the calendar?
- How do I make sure customers cannot book with someone who is off?
- Do existing appointments stay when an employee takes time off?
- How do I report a day off for an employee?
How do I create a treatment?
- Answer
-
Go to Menu > Salon > Treatment tab, click the button with the plus signs at the top right and choose Treatment. You give the treatment a name, colour, duration and price, choose the employees and click Save. Set Show in widget to Yes if guests may book it online.
- Explanation
-
- Step 1. Under Treatment, enter the Name (maximum 50 characters) and optionally a Description and Image. The guest sees the name and description.
- Step 2. Under Colour and duration, choose the Color and the Duration (default 1 hour, in steps of 5 minutes). Set Show in widget to Yes to let the treatment be booked online and choose whether Show end time should be on.
- Step 3. Under Employees, choose who does the treatment. Without an employee it cannot be booked online.
- Step 4. Under For whom, choose the Treatment group, for example women or men.
- Step 5. Under Price, enter the amount (per person, including VAT) and choose the VAT group. Optionally choose additional products that go with it.
- Step 6. Click Save.
- What it does. The duration determines how long the appointment is and therefore the end time; the times online are shown per quarter of an hour. The price and VAT go on the appointment and the invoice.
- Example
-
Men's haircut: duration 30 minutes, price €28 including VAT, VAT group high, treatment group Men, linked to two hairdressers, Show in widget set to Yes.
- Related
-
What can you set for a treatment in the salon?, How do I sell extra products with a treatment?, What are workstations and treatment groups and do I need them?
Keywords: add treatment salon, set treatment duration, set haircut price, book treatment online, create treatment
Related questions - How do I add a new treatment, such as a haircut or a massage?
- How do I set the duration and price of a treatment?
- How do I make sure customers can book a treatment online?
- Which employees can I link to a treatment?
What are workstations and treatment groups and do I need them?
- Answer
-
A workstation is a workplace or chair; every appointment gets one so that two guests are not in the same place. A treatment group is a target group such as women, men or children. You need workstations; you only use treatment groups if you want to divide your treatments.
- Explanation
-
- Creating workstations. Go to Menu > Salon > Workstations tab, click the button with the plus signs at the top right and choose Workstations. Under Create workstations, choose how many you need (default 20) and whether they have Can be reserved via widget (default Yes). Click Save.
- Linking to employees. Open the employee and, at the Chairs step, choose the Workstations that person works at. Online, a guest only gets a chair that belongs to the chosen employee and is set to Yes under Can be reserved via widget.
- Changing the name. Change the name in the list and click Save; with Active you temporarily turn off a chair.
- Creating treatment groups. On the Treatment group tab, choose the plus and enter for example Women under Treatment group name. Then choose the group on the treatment in the For whom step.
- Do you need them? Without a workstation you cannot save an appointment in the dashboard (No chair selected!). If you have only one treatment group, the guest sees no choice when booking.
- Example
-
A salon with four chairs creates four workstations and links two chairs to each hairdresser. Treatment groups Women and Men split the offering.
- Related
-
What can you set for workstations and treatment groups?, How do I create a treatment?
Keywords: workstation salon, hairdresser chair, treatment group, target group women men children, create chairs
Related questions - What is a workstation in my salon?
- Do I need treatment groups?
- How do I prevent two customers from being in the same chair?
- What is the difference between a workstation and a treatment group?
Can customers choose an employee themselves when booking?
- Answer
-
Yes. In the online booking module, a guest first chooses the treatment and then an employee who does that treatment, or No preference. No preference is the default. You can also turn the choice off, in which case the guest always gets No preference.
- Explanation
-
- Linking an employee. An employee only appears for a treatment if you have ticked it under Treatments for the employee (or under Employee in the treatment).
- Times. The guest only sees times when the chosen employee works (Working hours with Active on), is free and is not on a break.
- No preference. Jimani then shows the times when at least one employee who does the treatment is free.
- Turning the choice on or off. Go to Settings > Guests and bookings > Widget, open your widget, choose the View tab and find the Salon block. Set Let guest choose practitioner to No: the guest then does not choose an employee and the appointment goes to whoever is free.
- Also visible. In the same block you can turn Show duration, Show price and Group by category on or off.
- Example
-
A customer books a haircut with Anouk and only sees Anouk's free times. Another customer leaves No preference selected and sees every time when one of the hairdressers is free.
- Related
-
Why don't customers see any available times online?, How do I add an employee and set when they work?
Keywords: choose employee online booking, choose hairdresser, no preference salon, choose specialist, choose practitioner, online hairdresser appointment
Related questions - Can a customer choose who they book an appointment with?
- How do I set it so customers cannot choose an employee?
- What does no preference mean when booking?
- Can I turn off the employee choice online?
Why don't customers see any available times online?
- Answer
-
Usually one of these things is not set up: the salon is set to Closed that day, the employee has no working hours with Active on, the treatment is not online or has no employee, or no workstation is free. Go through the list below.
- Explanation
-
- Opening hours. If the day is set to Closed, it cannot be chosen online. Check the Opening hours tab for that month.
- Working hours. If the employee has no working hours with Active on that day (new days are set to Active off), there are no times. See How do I add an employee and set when they work?.
- Within the opening hours. If the guest chooses a particular employee, the working hours of that day must fall entirely within the salon's opening hours. If someone works until 21:00 and the salon closes at 18:00, that day is not offered for that employee.
- Treatment. The treatment must be active, have Show in widget set to Yes, have a duration and be linked to an employee.
- Break or another appointment. A time that touches a break or an existing appointment is not offered. The treatment must also fit within the working hours: a one-hour treatment does not fit in the last 30 minutes.
- Workstation. A workstation must be free that belongs to the employee and has Can be reserved via widget set to Yes. Without a chair the guest cannot continue booking.
- Today. For today, the first free time starts at the next quarter of an hour. There are no times in the past.
- Booking ahead. The guest can book the next three months, up to the end of the third month.
- Holiday. If the employee has a recorded holiday that day, the day cannot be chosen for that employee.
- Example
-
A customer sees no times for Saturday. Saturday is set to Closed under Opening hours. If you set it to Open, the times appear as soon as the employee also has working hours with Active on.
- Related
-
How do I set my salon's opening hours?, How do I record breaks for an employee?, Can customers choose an employee themselves when booking?
Keywords: no times available online, cannot book appointment, salon widget no times, hairdresser online booking problem, times do not appear
Related questions - Why do customers not see free times to book online?
- My online calendar is empty, what is wrong?
- Why can nobody book an appointment with my employee?
- What do I check if online booking does not work?
How do I make an appointment for a customer myself?
- Answer
-
Go to Menu > Reservations and click Create reservation. Choose the treatment, the day and time, the employee and a workstation, fill in the guest and click Save. If the guest pays right away, use the banknote or the bank card under the form.
- Explanation
-
- Step 1. Open Menu > Reservations (in the POS: Menu > Salon) and click Create reservation at the top right.
- Step 2. Choose the Treatment group and then the Treatment.
- Step 3. Under Time, choose the day (highlighted days can be booked) and under From the start time, or click Available times and choose a free time. The end time (Until) follows from the duration.
- Step 4. Choose the Employees who are free at that moment and, under Workstations, choose a chair with the pencil.
- Step 5. Under Search, find the guest by email address or phone number, or fill in the guest details. If the customer is a walk-in, set Passer-by (no guest details) to Yes.
- Step 6. If needed, choose Products and fill in Extra information and an Internal memo.
- Step 7. Check Your invoice and click Save. The appointment gets the status Open. If the guest pays now, click the banknote button (cash) or the bank card symbol (other) and confirm with Pay.
- Guest is already here. Set Check in now to Yes: the day and time then become now and the appointment is set to Arrived. That choice only appears if it has been turned on for your salon.
- Confirmation. If the guest has an email address and a confirmation email has been set up for the salon (Settings > Communication > Email), the guest receives a confirmation with a PDF.
- Example
-
A customer phones for a colouring treatment on Friday at 14:00. You choose Treatment group Women, Treatment Colouring, Friday, 14:00, a free hairdresser and chair, find her by phone number and click Save.
- Related
-
How does the Add reservation screen work in the salon?, How do I change or reschedule an appointment?, How do I schedule a follow-up appointment?
Keywords: make appointment hairdresser, create reservation salon, schedule customer, book in appointment, manual appointment, walk-in appointment
Related questions - How do I schedule an appointment when a customer calls or walks in?
- Can the customer pay right away when I make the appointment?
- How do I choose the employee for a manual appointment?
- Where do I make a new appointment in the calendar?
How do I see which appointments there are?
- Answer
-
Go to Menu > Reservations. The Overview tab shows the day as a timeline per employee. The tabs List view, Weekly list, Last 100 reservations and Upcoming reservations show lists, and Totals counts per treatment.
- Explanation
-
- Choosing a day. At the top, choose the day with the date picker.
- Overview. Per employee, the appointments appear as blocks, with breaks in grey. With Select an employee you look at one person. Click a block to open the appointment.
- List view. The appointments of the chosen day in a list with, among other things, Reservation status, Treatment, Employees, Name, Workstations, Arrival time, Payment and Memo. You turn columns on or off with the column selector.
- Weekly list. The whole week; Last 100 reservations. The most recently made appointments; Upcoming reservations. Choose the month under Reservation for the month: and browse with Back and Next.
- Totals. Day totals and Week totals with the number of appointments per treatment.
- Filtering and searching. Choose a status or employee and type a name under Search by:. This requires the Filters permission.
- Printing and exporting. With Print you print the list and with the Excel icon you download it. This requires the Print and Export permissions (the owner always has them).
- Example
-
You want tomorrow's schedule on paper: choose tomorrow, go to List view and click Print.
- Related
-
How does the salon calendar work?
Keywords: view appointments salon, calendar per day, weekly list appointments, print appointments, hairdresser schedule, export appointments
Related questions - Where do I see today's appointments?
- Can I view the calendar per employee?
- How do I see next week's appointments?
- Where do I see how many appointments there are per treatment?
How do I set a customer to Arrived or Left?
- Answer
-
Click the appointment in the calendar. In the Reservation information window, the main button at the bottom right is Arrived as long as the guest is not there, and then Left. Both first ask for confirmation. You set a no-show with the Status drop-down in the full appointment screen.
- Explanation
-
- Arrived. Click the appointment and choose Arrived. After that you can no longer cancel the appointment in this window.
- Left. Later, click Left. The end time of the appointment (and of the workstation) then becomes the current time, so the chair is immediately free for the next guest.
- Onwards. After Left, the More menu has the button Schedule a new appointment for a follow-up appointment.
- No-show. Click the appointment, choose Open reservation and under Status choose the status No-show. If an SMS has been set up for no-shows, it is sent to the guest.
- After Left. If an SMS or a survey has been set up for after the visit, it is sent. See Does a customer get a survey after the appointment?.
- Checking in directly. If you make an appointment for a guest who is already there, set Check in now to Yes when making it.
- Example
-
At 10:03 your customer walks in: open the appointment, click Arrived and confirm. Afterwards you click Left.
- Related
-
How does the screen for viewing and changing a salon appointment work?, How do I schedule a follow-up appointment?
Keywords: set customer arrived, guest left, register no show, appointment status, complete appointment, check in salon
Related questions - How do I indicate that a customer has arrived?
- How do I set an appointment to left?
- How do I mark a customer as a no-show?
- Why does Jimani ask for confirmation for arrived?
How do I schedule a follow-up appointment?
- Answer
-
Set the appointment to Left, open it and choose More > Schedule a new appointment. In the Make a new appointment window, you choose the Time slot (1 to 6 days or 1 to 12 weeks later) and the employee, and continue to the calendar to choose a free time. Once made, you find it again with Next appointment.
- Explanation
-
- Step 1. In the calendar, click the appointment of the guest who is finished (status Left).
- Step 2. Choose More > Schedule a new appointment.
- Step 3. Under Time slot, choose how many days or weeks later the new appointment should be, and under Select an employee who does the treatment.
- Step 4. Click the button with the calendar and plus. Jimani opens the calendar to make the new appointment.
- Finding it again. The original appointment now has the button Next appointment, which goes to the new appointment.
- Without Left. The button Schedule a new appointment only appears on an appointment with the status Left. Otherwise you simply make a new appointment with Create reservation.
- Example
-
After a colouring treatment the customer wants to come back in six weeks: choose 6 weeks under Time slot and the same hairdresser.
- Related
-
How do I set a customer to Arrived or Left?, How do I make an appointment for a customer myself?
Keywords: follow-up appointment salon, schedule next appointment, returning customer, repeat appointment, appointment in six weeks
Related questions - How do I schedule a new appointment right after the visit?
- Can I schedule an appointment a few weeks ahead for the same customer?
- Where do I find a customer's next appointment?
- How do I make a repeat appointment?
How do I change or reschedule an appointment?
- Answer
-
Click the appointment in the calendar, choose Open reservation and change the treatment, time, employee or workstation. Then click Save. Jimani checks whether the employee and the workstation are free at that time.
- Explanation
-
- Step 1. In Menu > Reservations, click the appointment. The Reservation information window opens.
- Step 2. Click Open reservation. The full screen opens.
- Step 3. Change what is needed: Treatment group and Treatment, Time (the day), From (the time, choose a free time via Available times), Employees and Workstations. You can also change Language, Reservation name, Products and the Internal memo.
- Step 4. Click Save.
- Is the time taken? If the employee already has an appointment at that time, you get This employee already has an appointment at this time. If the workstation is taken, you get Chair not available!. Then choose another time or chair.
- Attachment. On the Attachment(s) tab you add a file with the plus: choose the Subject, a Description and the file.
- No longer changeable. For an appointment set to Left and for a cancelled appointment, Save is missing; you can no longer change those.
- Example
-
The customer wants Thursday at 15:00 instead of 14:00: open the appointment, click From, choose 15:00 in Available times and click Save.
- Related
-
How does the screen for viewing and changing a salon appointment work?, How do I cancel an appointment and what does the customer receive?
Keywords: reschedule appointment, change appointment hairdresser, different time appointment, switch employee appointment, adjust appointment
Related questions - How do I reschedule an appointment to another time?
- Can I change the employee of an appointment?
- How do I change the treatment of a booked appointment?
- Does Jimani check whether the employee is free when rescheduling?
How do I cancel an appointment and what does the customer receive?
- Answer
-
Click the appointment in the calendar and choose Cancel. Confirm the question Cancel your reservation? and give a reason. The appointment then appears under Cancellations. The guest receives a cancellation email if you have set one up. You refund afterwards in the Refunds overview.
- Explanation
-
- Step 1. In Menu > Reservations, click the appointment and choose Cancel at the bottom left.
- Step 2. Answer Are you sure you want to cancel the reservation? with Yes and enter the reason under Reason for cancellation.
- Combination. If the appointment belongs to a combination, Jimani asks whether you want to cancel only this part or the whole combination.
- What Jimani does. The appointment gets the reason, your name and the moment. A bill that was already made for the appointment in the POS is returned with it.
- Email and SMS. If the guest has an email address and you have set up a cancellation email for the salon, the guest receives it once. If an SMS has been set up for cancelling, that is sent too.
- No longer possible. If the guest has already Arrived or Left, Cancel is off in Reservation information with the explanation Guest is already inside; can no longer be cancelled or Completed; can no longer be cancelled.
- Finding it again. All cancellations of the last six months are in Menu > Cancellations, see How does the salon's Cancellations overview work?.
- Example
-
The customer phones to say she is ill. Open the appointment, click Cancel, confirm and enter Ill. The guest receives her cancellation email.
- Related
-
How do I refund a cancelled appointment?, How does the salon's Cancellations overview work?
Keywords: cancel appointment salon, customer cancels, call off appointment, cancellation email, reason for cancellation
Related questions - How do I cancel a customer's appointment?
- Does the customer get an email when I cancel the appointment?
- Where do I find cancelled appointments?
- Do I have to give a reason when cancelling?
How do I refund a cancelled appointment?
- Answer
-
First cancel the appointment. Then go to Menu > Refunds overview, find the appointment and click the red button. The full amount is already filled in; you can also enter a lower amount. Jimani refunds it via Mollie, provided your Balance is sufficient.
- Explanation
-
- Step 1. Cancel the appointment, see How do I cancel an appointment and what does the customer receive?.
- Step 2. Open Menu > Refunds overview. At the top is the Balance you have with Mollie.
- Step 3. Find the appointment in the list (cancelled appointments of the last six months). For a paid appointment, the Status column has two buttons.
- Step 4. Click the red button (Refund), check or adjust the amount and confirm. The amount may not be higher than what the guest paid and not higher than your Balance.
- Step 5. The Status column then shows the state of the refund, for example pending.
- Reversing. If the refund is still pending, the orange button (Cancel refund) takes it back after the question Are you sure?.
- No online payment. If no online payment was found for the appointment (for example cash), Jimani only sets the status to paid; you return the money yourself.
- Example
-
A guest paid a €20 deposit online and cancels. Open the Refunds overview, click the red button next to her appointment, leave €20.00 and confirm.
- Related
-
How does the salon's Refunds overview work?, How do I cancel an appointment and what does the customer receive?
Keywords: refund salon, refund deposit, cancellation refund, refund appointment, money back customer, mollie refund
Related questions - How do I give a customer their money back after a cancelled appointment?
- Can I refund only part of the amount?
- Why does refunding not work?
- Where is the refunds overview?
How do I resend an appointment confirmation to the customer?
- Answer
-
Click the appointment in the calendar, choose More > Send email and confirm the question. The confirmation is sent again to the guest's email address. That only works if the guest has an email address, the appointment has not been cancelled and a confirmation email has been set up for the salon.
- Explanation
-
- Step 1. In Menu > Reservations, click the appointment.
- Step 2. Choose More > Send email. You see Resend the confirmation to the guest? with the address.
- Step 3. Confirm with Send email. On success you get The email has been sent.
- Printing. If the confirmation has already been made, Print (PDF) opens it as a PDF.
- Does it not work? A cancelled appointment no longer receives a confirmation. If the guest has no email address, it says This guest has no email address. If no email has been set up, it says There is no confirmation email set up for the salon; create one under Settings > Communication > Email. If sending fails, it says The email was not sent.
- Example
-
The customer phones to say she has not received the confirmation. Open the appointment, choose Send email and confirm.
- Related
-
How does the screen for viewing and changing a salon appointment work?
Keywords: resend confirmation, appointment email not received, hairdresser confirmation email, pdf appointment confirmation
Related questions - The customer did not receive the confirmation email, how do I resend it?
- Why can't I resend the confirmation?
- How do I email the appointment confirmation once more?
- When does resending the confirmation not work?
Does a customer get a survey after the appointment?
- Answer
-
Yes, if you have turned on the Survey. Jimani then automatically schedules a survey email for the guest shortly after the appointment has ended. In Settings > Communication you set what is asked and how many hours after the visit the email is sent.
- Explanation
-
- Turning on. Go to Settings > Communication > Survey. Survey is a paid feature of €5 per month (excl. VAT), see Which features cost money?.
- When. Every minute Jimani looks at appointments that ended in the last ten minutes (the end time). If the appointment is not cancelled and a guest is linked to it, one survey email is scheduled. An email is never sent twice per appointment.
- What time. The email is sent at the moment you set for the Survey type (number of hours after the visit). If that is set to 0, it goes out after about five minutes.
- Only with a survey. There must be a survey for the salon and your business must be allowed to send surveys; otherwise nothing happens.
- SMS. If you set a guest to Left and an SMS has been set up for the survey moment, that is sent too. See Can I automatically send guests a text message, for example a reminder?.
- The questions themselves. How to write the survey and view the answers is in the Communication section.
- Example
-
An appointment ends at 15:30. If the survey email is set to 2 hours after the visit, it goes to the guest around 17:30.
- Related
-
Can I automatically send guests a text message, for example a reminder?, How do I set a customer to Arrived or Left?
Keywords: survey after appointment, customer feedback salon, review questions after visit, hairdresser satisfaction, survey SMS
Related questions - Can I send customers a questionnaire after their visit?
- How do I set up a satisfaction survey?
- How many hours after the visit is the survey email sent?
- Where do I change the survey questions?
How do I delete or copy an employee, treatment or product, and get it back?
- Answer
-
In the list, click Actions on the line. There you find Deactivate (or Activate), Create a Copy and Send to Trash. Send to Trash does not delete anything permanently: with Show only deleted items set to Yes you find it again and turn it back on with Activate.
- Explanation
-
- Temporarily turning off. Choose Deactivate, or untick Active in the list. The item remains but does not count.
- Copying. Choose Create a Copy and confirm the question Do you want to make a copy of this item?. You then see Copy created successfully.
- Deleting. Choose Send to Trash, or open the item and click Delete. Confirm the question; then it says Successfully removed!. The item is also set to inactive.
- Restoring. At the top right of Salon management, set Show only deleted items to Yes, find the item and choose Activate.
- Which parts. This works for employees, treatments and products; workstations, treatment groups and fields have their own Active tick and Delete in their window.
- Example
-
A hairdresser leaves the salon: put her away via Actions > Send to Trash. If she returns, you set Show only deleted items to Yes and choose Activate.
- Related
-
How does Salon management work in Jimani?
Keywords: delete employee salon, copy treatment, restore from trash, deactivate item, recover deleted
Related questions - How do I delete an employee or treatment?
- Can I restore a deleted treatment?
- How do I copy a treatment?
- How do I temporarily turn off an employee?
In Salon management you set up your salon: opening hours, employees, treatments, products, workstations, treatment groups and extra fields. Each part has its own tab with a list, and with the button at the top right you add a new item.
Where to find it: Menu > Salon (in a salon business) or Menu > Salon management (in the POS with the Salon integration on) (/Salon)
All buttons, settings and messages of this screen
For an employee you record who they are, which treatments they do, when they work, which breaks there are and which workstations they work at. You do that in the Employees window with seven steps. You save on the last step.
Where to find it: Menu > Salon > Employees tab > click an employee, or at the top right the button with the plus signs and then the tile Employee (/Salon)
All buttons, settings and messages of this screen
Under Breaks you record an employee's regular breaks, for example a lunch break on certain weekdays. During such a break a guest cannot book an appointment online with that employee. A break applies every week on the chosen days.
Where to find it: Menu > Salon > Employees tab > choose an employee > Breaks step (/Salon)
All buttons, settings and messages of this screen
A treatment is what a guest books, such as a haircut or a massage. You give it a name, colour, duration, price and the employees who do it. You do that in the Treatment window with five steps.
Where to find it: Menu > Salon > Treatment tab > click a treatment, or at the top right the button with the plus signs and then the tile Treatment (/Salon)
All buttons, settings and messages of this screen
A workstation is a workplace or chair in your salon. A treatment group is the target group of a treatment, such as women, men or children. You manage both in Salon management on their own tab.
Where to find it: Menu > Salon > Workstations tab or Treatment group tab (/Salon). You also create a new workstation or a new treatment group with the plus signs at the top right.
All buttons, settings and messages of this screen
Under Products you create extra products that you can sell with a treatment, such as a shampoo or care set, and transaction costs. You give them a name, price and VAT, and then link them to a treatment.
Where to find it: Menu > Salon > Products tab > click a product, or at the top right the button with the plus signs and then the tile Products (/Salon)
All buttons, settings and messages of this screen
In the salon calendar you see all appointments, per day in a timeline per employee or in lists per day, week, the last 100 and the future. At the top you choose the date and with Create reservation you make a new appointment.
Where to find it: Menu > Reservations (in a salon business) or Menu > Salon (in the POS with the Salon integration on) (/SalonReservation)
All buttons, settings and messages of this screen
On the Add reservation screen you make an appointment for a guest yourself: you choose treatment, day, time, employee and workstation, fill in the guest and save. You open it with Create reservation in the calendar.
Where to find it: Menu > Reservations (or Salon in the POS) > button Create reservation (/SalonReservation/AddReservation). The same form is also at /SalonReservation/Add, which the calendar uses for follow-up appointments.
All buttons, settings and messages of this screen
Click an appointment in the calendar. You first see the Reservation information window with the buttons to set the guest to Arrived or Left, to cancel or to send an email. With Open reservation you open the full screen to change the appointment.
Where to find it: Menu > Reservations (or Salon in the POS) > click an appointment (/SalonReservation/UpdateReservation). The same screen also exists at /SalonReservation/Update, which the Cancellations and Refunds overview lists, among others, open.
All buttons, settings and messages of this screen
On Cancellations you see all salon appointments cancelled in the past six months, with who cancelled them and why. You mark them as read, so you know which ones you have already seen.
Where to find it: Menu > Cancellations (/SalonCancellations)
All buttons, settings and messages of this screen
In the Refunds overview you see the cancelled appointments of the last six months and you refund amounts paid online, in full or in part. The balance at the top shows how much is available with your payment provider to refund.
Where to find it: Menu > Refunds overview (/SalonRefunds)
All buttons, settings and messages of this screen
Hotel
Setting up your own booking fields, including dynamic fields
- What
- A business owner puts together extra fields for the booking form (for example a dietary requirement, a question about children, or a comments field), with its own type, required/optional, and visibility.
- Who it is for
- Hospitality, hotel and activity businesses.
- How it works
- Each field has a name, a type, choice options (for a choice field), a help text, and settings for whether the field is required, publicly visible, and whether it is shown in list overviews. A field can also be made **dynamic**: it then only appears when another field (the "main field") has a specific answer — for example a field "Number of children" that only appears when "Are children coming along?" is answered yes. A field can also be set to appear only when drawing up a quotation, not for a regular booking.
- Difference from competitors
- No public comparison material found on a comparable dynamic, conditional form mechanism at Lightspeed, unTill or SumUp specifically.
Keywords: own booking fields, dynamic field reservation, conditional form field, customise booking form
Related questions - Can I add extra fields to the booking form myself?
- Can a field appear only depending on the answer to another field?
- Can a field appear only for a quotation, not for a regular booking?
How do I block arrival or departure on certain days?
- Answer
-
There are two ways. For single days or a period, create a restriction under Hotel management > Time limit with the dates and choose whether check-in, check-out or both are blocked. For fixed weekdays on one rate plan, use No arrival on and No departure on in the plan.
- Explanation
-
- Time limit, step 1. Go to Hotel management > Time limit and click the plus. Give a Name (only for yourself, for example Public holidays or Maintenance) and choose Yes or No for Check-in is not possible on this day and Check-out is not possible on this day.
- Step 2. Choose which types or rooms the restriction applies to. Set Blocked by the room type to Yes to choose types, or to No to choose individual rooms or cottages.
- Step 3. Choose the dates: single days, weeks or months by clicking them. Click Save.
- Only arrival or only departure. If only one of the two is set to Yes, a guest cannot arrive (or depart) on that day in the widget. At the front desk, in Create reservation, it is allowed.
- Both Yes. Then the room is closed on those nights: nobody can book it, not even at the front desk. Handy for maintenance. If you have linked a room via iCal, Jimani also creates such a block by itself for nights that are occupied on another site.
- Per weekday in a plan. Open the rate plan and choose the weekdays under No arrival on or No departure on (Mon to Sun). That only applies to that plan and only online.
- Switching off temporarily. Set Active to No to turn off a restriction without deleting it.
- Example
-
You close room 7 from 10 to 14 March for painting work: Time limit Maintenance, Check-in and check-out both Yes, individual rooms, room 7, the dates from 10 to 14 March.
- Related
-
What can you set up under Time limitation in Hotel management?, What is a rate plan and how do I create a flexible or non-refundable rate?
Keywords: block room, no arrival on Sunday, close room maintenance, blocked days hotel, cta ctd, public holidays
Related questions - How do I make sure guests cannot arrive on Saturday?
- How do I block check-in on public holidays?
- Can I disallow check-out on certain days?
- How do I set no arrival on certain weekdays for one rate?
What does cancelling a hotel reservation cost?
- Answer
-
That depends on the rate plan the guest booked with. With a flexible plan, cancelling is free up to the number of days before arrival that you set; after that the guest pays the percentage you set under Cancellation fee after that. With a non-refundable plan there is no free period.
- Explanation
-
- Setting it up. Open Hotel management > Rate plans and click a plan. Under Cancel you find Refundable, Free cancellation until (days before arrival) and Cancellation fee after that.
- Free period. Up to that many days before arrival, cancelling is free. 0 means: free up to and including the day of arrival itself. The number of days ranges from 0 to 365.
- After that. The guest pays the percentage you entered, on the amount of the stay: the nights, the breakfast and the surcharges. The tourist tax does not count, because it is only due for a stay. 100 is the whole amount.
- Non-refundable. Set Refundable to No: there is then no free period and cancelling always costs the percentage (by default the whole amount).
- Recorded when booking. The rule of the plan is stored on the reservation when booking. If you change the plan later, existing reservations do not change.
- Cancelling itself. Open the reservation in Hotel and click Cancel. Jimani shows the cost at that moment (Cancellation fee according to the rate plan) or Cancelling is free now, and asks for the Reason for cancellation. Confirm with Yes, cancel. Cancelling is only possible as long as the guest has not checked in.
- Money. Cancelling sets the reservation to Cancelled and stores the reason and who cancelled it. Jimani shows the cancellation fee, but does not settle it itself and does not refund anything either. What the guest already paid and what they owe in fees, you arrange yourself.
- No-show. After the day of arrival the percentage always applies, even if the plan had a free period.
- Example
-
Flexible plan with 2 days free and 100% after that, a stay of 3 nights at €100. If the guest cancels 3 days before arrival, it costs nothing. If they cancel 1 day before arrival, it costs €300.
- Related
-
What is a rate plan and how do I create a flexible or non-refundable rate?, How do hotel reservations, the room planner and the Create reservation side panel work?
Keywords: cancel hotel reservation, hotel cancellation fee, free cancellation, non-refundable, hotel no-show
Related questions - What does a guest pay when they cancel their room booking?
- How do I set free cancellation up to a number of days before arrival?
- How does a non-refundable rate work when cancelling?
- What percentage can I charge if someone cancels too late?
Can I connect a channel manager such as Channex?
- Answer
-
Not yet. A connection with Channex, a channel manager that keeps prices and availability in sync automatically, is not available in Jimani. What you can do is connect Booking.com, Airbnb and other sites with iCal calendars. If you want more, ask us about the Channex connection.
- Explanation
-
- What exists now. iCal calendars per room or cottage only exchange occupied and free and are updated every 15 minutes. See How do I connect Booking.com or Airbnb to my rooms?.
- What iCal cannot do. Prices, minimum stay and availability are not passed on, and if someone books the same night on another site within those 15 minutes, that can cause a double booking. Jimani does report it, but cannot prevent it.
- Channex. In the iCal calendars window there is the tip: Do you rent out through more sites and want to keep prices and availability in sync right away without double bookings? Ask us about the Channex (channel manager) connection. A tile or setting for Channex does not exist yet.
- Until then. Keep your number of sites small, leave the iCal calendars on and check the Double booking message on your rooms.
- Questions. If you want to know when the Channex connection will come, contact Jimani.
- Example
-
You rent out through your own widget, Booking.com and Airbnb. With iCal your nights are closed everywhere after at most 15 minutes. You keep setting prices yourself on each site.
- Related
-
How do I connect Booking.com or Airbnb to my rooms?, How do I turn on the hotel module and what do I get?
Keywords: channex, channel manager, booking.com integration, airbnb integration, channel management, sync prices
Related questions - Can I connect a channel manager to Jimani?
- Is there a connection with Channex?
- How do I keep prices and availability in sync with Booking.com?
- Which connections with booking sites are there now?
How do I turn on the hotel module and what do I get?
- Answer
-
Under Settings > Add-ons turn on the Hotel module card. After that Hotel, Hotel management and Cleaning appear in your menu and you get the hotel tiles under Settings. The Hotel module has no monthly fee.
- Explanation
-
- Step 1. Go to Settings > Add-ons, find the Hotel module card and turn it on. Online check-in and iCal are separate cards under the same add-ons; turn them on if you want to use them.
- Step 2. Look at the menu: it now has Hotel (the reservations and the room planner), Hotel management (types, rooms, prices) and Cleaning.
- Step 3. In Hotel management start with a category, then a type, then the rooms and then the prices. The steps are in How do I create types and rooms or cottages?.
- Step 4. Look under Settings: the tiles Advanced, Online check-in, Codes & keys and iCal calendars under Guests and bookings, Online payment and Guest register & tourist tax under Money and figures, and Cleaning under Your business.
- What you get. A room planner with drag and drop, a side panel to book yourself, rate plans with seasonal prices, a hotel widget in which guests book and pay themselves, online check-in with guest register, tourist tax, cleaning, access codes and iCal.
- Cost. The Hotel module is free (see What does Jimani cost?).
- Who it is for. A hotel, B&B or holiday park. Under Settings > Guests and bookings > Advanced you choose whether you are a Hotel or a Holiday park; a park sees Cottage instead of Room everywhere.
- Example
-
A B&B with four rooms turns on the Hotel module, creates the category Rooms, two types (Double room and Family room), adds rooms 1 to 4 and fills in the prices. After that the team can make reservations in Hotel.
- Related
-
How does Hotel management work in Jimani?, How does a guest book a room or cottage online?
Keywords: turn on hotel module, hotel software, b&b booking system, holiday park software, rent rooms online, hotel module price
Related questions - How do I turn on the hotel module?
- What does the hotel module cost?
- What do I get when I turn on the hotel module?
- Where do I find Hotel management and Cleaning in the menu?
How do I connect Booking.com or Airbnb to my rooms?
- Answer
-
With iCal calendars. Turn on the iCal add-on under Settings > Add-ons and choose Settings on that card to open iCal calendars (or search "iCal" in Search for a setting…). For each room or cottage you paste the Export-adres at Booking.com or Airbnb (import calendar) and paste their calendar address under Add import address. Occupied nights then go both ways, every 15 minutes.
- Explanation
-
- Step 1. Under Settings > Add-ons turn on the iCal card. Without that add-on the window says The iCal integration is off.
- Step 2. Your calendar to the other site. Open iCal calendars. Each room or cottage has its own Export-adres. Click Copy and paste the address at Booking.com or Airbnb when importing a calendar. Do not share this address: anyone who has it can see when you are occupied. It only contains occupied or free, no names.
- Step 3. Their calendar to Jimani. At Booking.com or Airbnb, get the export address of the calendar of that room. Paste it at the room under Add import address and click the plus. Jimani adds the source (Booking.com, Airbnb, VRBO or the name of the site).
- What happens next. Jimani fetches each address every 15 minutes. Nights that are occupied there are closed at your end: nobody can book that room on those nights. Next to the address you see Picked up with the time and the number of blocked periods. With Fetch now you fetch it right away.
- Occupied nights to the outside. Your Jimani reservations and closed nights appear in the export address, from 30 days back to two years ahead.
- Double booking. iCal only exchanges occupied and free and is slow. If someone books the same night on another site within those 15 minutes, you have a double booking. Jimani reports it at the address as Double booking on the date, but cannot prevent it. Jimani keeps the nights closed; you resolve it.
- Does fetching fail? Then it says Fetch failed with the reason and the old blocks stay in place. An address must start with https:// (or http://) and must not point to your own network.
- Keeping prices or availability in sync. iCal cannot do that. See Can I connect a channel manager such as Channex?.
- Example
-
You connect room 3 with Booking.com. A guest books 10 to 12 October via Booking.com. Within 15 minutes room 3 is closed in Jimani for those nights and nobody can book it any more.
- Related
-
What can you set under Codes & keys and iCal calendars?, Can I connect a channel manager such as Channex?
Keywords: ical hotel, connect booking.com, connect airbnb, synchronise calendar, prevent double booking, connect channels
Related questions - How do I synchronise my rooms with Booking.com or Airbnb?
- How do I prevent double bookings between different sites?
- What is an iCal connection and how do I set it up?
- Where do I paste the calendar link from Booking.com?
How do I check a guest in and out?
- Answer
-
Go to Hotel > List view. Under Arrivals today click Check in, under In house and Departures today click Check out. If an amount is still open at check-out, the till opens with the check-out bill; after settling up the guest is on Checked out.
- Explanation
-
- Checking in. In the List view, next to a guest under Arrivals today click Check in, or open the reservation and click Check in at the bottom right. The status becomes Checked in. That works for Confirmed, Option and No-show.
- Room not ready. If the room is not ready yet (Dirty, In progress, or Clean while you want to inspect first), Jimani asks Check in anyway? with for example Room 12 is not ready yet (Dirty). Choose Yes, check in to continue.
- Checking out with nothing open. Click Check out. If everything was paid in advance, the guest is immediately on Checked out.
- Checking out with an amount open. The till opens with the guest's check-out bill: the nights, extras, everything charged to the room, the tourist tax, minus what has already been paid. Settle up with the usual payment buttons. After that the guest is on Checked out.
- After check-out. The room gets the status Dirty and appears on the Cleaning page.
- Checked in online. A guest who checked in and paid online is checked in automatically on the day of arrival if the room is ready. If the room is not ready yet, the guest shows Waiting for cleaning and check-in happens automatically as soon as the room is ready.
- Did not show. If the day of arrival has passed, set No-show to Yes in the reservation. For a guest who is still undecided, use Option.
- Cancelling. You cannot cancel a guest who has already checked in.
- Example
-
A guest has paid the deposit and leaves today. You click Check out: the till opens with the remaining amount. After settling up he is on Checked out and his room goes to Dirty.
- Related
-
How do hotel reservations, the room planner and the Create reservation side panel work?, How does cleaning of rooms and cottages work?
Keywords: check in guest, check out guest, check-out bill, room dirty after departure, settle up hotel, no-show
Related questions - How do I check a guest in on arrival?
- How do I check a guest out and settle the bill?
- Where do I see who arrives or leaves today?
- What happens if an amount is still outstanding at check-out?
Where do I set the check-in and check-out times?
- Answer
-
Under Hotel management > Opening hours you can set a check-in time, check-out time, early check-in time and late check-out time per day. Please note: a new reservation currently gets the fixed times 15:00 check-in and 10:00 check-out, also in the hotel widget.
- Explanation
-
- Step 1. Go to Hotel management > Opening hours. At the top choose the year (this year and the next two) and the month.
- Step 2. For each day set the Check-out time, Late check-out time, Early check-in time and Check-in time with the time picker. With Check-out possible and Check-in possible you decide with Yes or No whether that is possible on that day.
- Step 3. You do not need to save anything: Changes are saved automatically. The late check-out time cannot be before the check-out time and the early check-in time cannot be after the check-in time.
- Many days at once. Download the days with the Excel icon, adjust the times and read the file back in with Select Excel file. The file must contain all days of this year and the two years after.
- What a reservation uses now. A reservation from the hotel widget or from Create reservation gets the fixed times 15:00 and 10:00.
- Times for guests. What you tell your guests about check-in and check-out times, you put in the Description of the type.
- Example
-
You set Early check-in time to 12:00 on Saturday. The Opening hours tab then shows 12:00 for that day.
- Related
-
How do the Opening hours of the hotel work?, How do I offer breakfast, early check-in or late check-out?
Keywords: check-in time, check-out time, opening hours hotel, early check-in time, late check-out time, set check-in time
Related questions - Where do I set the check-in time and check-out time?
- Can I set early check-in or late check-out per day?
- Why does a new reservation always say 15:00 check-in?
- Can I adjust the check-out time?
Can I use cottage instead of room for my holiday park?
- Answer
-
Yes. Go to Settings > Guests and bookings > Advanced and choose Holiday park under Type of business. Jimani then calls your units Cottage in Hotel management, the room planner, the widget and the till. You can still change the word separately under Word for a unit.
- Explanation
-
- Step 1. Open Settings > Guests and bookings > Advanced.
- Step 2. Under Type of business choose Hotel or Holiday park. A hotel rents out rooms, a holiday park cottages, lodges or chalets.
- Step 3. If needed set Word for a unit to Room or Cottage. If you choose Holiday park, the word switches to Cottage automatically.
- What changes. The Rooms tab is called Cottages, the Add room button becomes Add cottage, and in the widget the guest reads Book your cottage instead of Book your room.
- Saving. Every choice is saved immediately. Close the window with Done.
- Example
-
A holiday park with 30 chalets chooses Holiday park. The tab is then called Cottages and the guest books a cottage.
- Related
-
What can you set under Advanced, Online payment, Online check-in and Cleaning of the hotel?, How do I create types and rooms or cottages?
Keywords: cottage instead of room, set up holiday park, rent out chalets, lodge, change word room, holiday cottage software
Related questions - Can I change the word room to cottage for my holiday park?
- How do I set that I am a holiday park?
- Where do I change the word for a unit?
- Is cottage shown everywhere, also in the widget and till?
How do I move or extend a reservation in the room planner?
- Answer
-
Go to Hotel > Overview and drag the reservation's bar to another room to move it, or drag the edge of the bar to extend or shorten it. It is saved immediately. If it does not fit, you get a message and the bar jumps back.
- Explanation
-
- Moving. Drag the bar to another room. That is also allowed to a room of a different type; the price is then recalculated with the rate plan of the reservation.
- Extending or shortening. Drag the left or right edge of the bar. The price is recalculated for the new nights.
- Check. Jimani checks at the moment you let go whether the room is free on those nights. Occupied or closed is not possible; minimum stay, no arrival and no departure do not apply at the front desk.
- Already checked in. You can extend, shorten and move a guest who has already checked in, but the arrival date can no longer shift. You can no longer move a cancelled or checked-out reservation.
- View. Choose 7, 14 or 30 days, go back or forward a day with the minus and plus, and use Full screen for more room. A bar shows the guest's name in the colour of their status.
- Reservation without a room. If there is a reservation without a room (old, or booked via a type), it is at the top of the overview; click it for the window.
- Example
-
A guest wants to stay one night longer. You drag the right edge of their bar one day to the right. If the room is free that night, the new departure date is there immediately and the price is adjusted.
- Related
-
How do hotel reservations, the room planner and the Create reservation side panel work?, How do I check a guest in and out?
Keywords: move reservation, swap room, extend stay, room planner drag, move guest, shorten stay
Related questions - How do I move a guest to another room?
- How do I extend a stay in the room planner?
- Can I shorten a reservation by dragging?
- What happens if the new room is not free?
How do I add many rooms or cottages in one go?
- Answer
-
Go to Hotel management > Rooms (or Cottages) and click the double plus, Add multiple. Choose the type, fill in the first number at From number and the last at Up to and including number, and click Add. You can create at most 200 numbers at a time.
- Explanation
-
- Step 1. First create the type. The double plus only appears on the tab once there is a type.
- Step 2. Click the double plus and choose the Type. All new rooms get that type.
- Step 3. Fill in From number and Up to and including number, for example 101 and 120, or A1 and A12. The prefix and suffix (the letters) must be the same on both. Leading zeros are kept: H-01 up to and including H-10 gives H-01, H-02 and so on.
- Step 4. Optionally fill in Area and Floor; that applies to all new rooms.
- Step 5. Below the form it shows which numbers will be added. Click Add.
- Existing numbers. A number that already exists is skipped, the rest is created. If all numbers are already in use, you get This number already exists.
- Many rooms with Excel. The tab also has the buttons Import and Export to read rooms in from an Excel file.
- Example
-
A hotel with 20 identical rooms chooses the type Double room, fills in 101 and 120 and clicks Add: all 20 are there in one go.
- Related
-
How do the Rooms and Cottages tabs and the Add multiple window work?, How do I create types and rooms or cottages?
Keywords: add multiple rooms, rooms in bulk, series of room numbers, create 20 rooms, add cottages at once
Related questions - How do I add 50 rooms at once?
- Can I create a series of room numbers in one go?
- How many rooms can I add at most in one go?
- How do I create many cottages at once?
How do I get the guest register and the tourist tax for the municipality?
- Answer
-
Go to Settings > Money and figures > Guest register & tourist tax and click the Guest register or Tourist tax button. Choose the period and download the Excel file. You can also download them with the Excel icon at the top of Hotel.
- Explanation
-
- Guest register. Per stay in the period the main guest and the accompanying guests, with nationality, date of birth and ID from online check-in. Cancelled reservations and guests who did not come (no-show) do not count.
- Tourist tax. The tourist tax per month over the nights in the period. The amount of a reservation is divided over the months in proportion to the nights, so that the months together are exactly the amount of the reservation.
- How to download them. Open the Guest register & tourist tax tile and at the bottom click Guest register or Tourist tax. The export window opens with the period; choose the dates and download. Or click the Excel icon in Hotel and choose the kind of export: reservations, guest register or tourist tax.
- A good guest register. Let your guests check in online: then they fill in the guest register themselves. At the front desk you fill it in via Stay > Guest register > Edit. See How do I let guests check in online?.
- Exporting reservations. The same button in Hotel also exports the reservations themselves, with a filter on the status.
- Example
-
On the first of the month you fetch last month's guest register for the municipality and the tourist tax per month for your return.
- Related
-
How do I set up tourist tax for my hotel or holiday park?, What is in the Stay tab and what does the guest fill in under Online check-in?
Keywords: guest register, guest register municipality, tourist tax return, excel guests, foreigner registration, hotel export
Related questions - Where do I download the guest register for the municipality?
- How do I get an overview of the tourist tax paid?
- How do I export the guest register to Excel?
- Where do I find the tourist tax per period?
Can a guest pay only on arrival instead of online?
- Answer
-
Yes. Go to Settings > Money and figures > Online payment and choose None: the booking is then confirmed immediately and the guest settles up at the till. You can also choose Full (the whole amount online) or Deposit (a percentage now, the rest at departure).
- Explanation
-
- Step 1. Open Settings > Money and figures > Online payment.
- Step 2. Choose Full, Deposit or None. The choice is saved immediately.
- Step 3. If you choose Deposit, fill in at Deposit % the part the guest pays when booking (1 to 100). If you leave it empty, Jimani uses 30%.
- How it works. Online, the guest pays via Mollie in the hotel widget. If they do not pay within 15 minutes, the booking lapses and the room becomes free again. With Deposit they pay the rest on arrival or departure at the till.
- Without Mollie. If no Mollie is connected, the widget cannot take online payment. The booking is then confirmed immediately and the guest pays on arrival, even if you chose Full.
- At the front desk. In Create reservation, Payment only records what the guest paid: Pay now, Deposit or On arrival. You settle up at the till.
- Type temporarily not online. Do you want to temporarily not offer one type online? Set Show in widget to No on the type. At the front desk you can still book the type.
- Example
-
You choose Deposit with 30%. A stay of €400 gives an online payment of €120; you settle the remaining €280 at departure.
- Related
-
What can you set under Advanced, Online payment, Online check-in and Cleaning of the hotel?, How does a guest book a room or cottage online?
Keywords: pay on arrival hotel, hotel deposit, prepay room online, mollie hotel, hide room type temporarily
Related questions - Can a guest pay on arrival instead of online?
- How do I let guests pay only a deposit?
- Can I set that the full amount is paid online?
- Is the booking confirmed immediately if the guest does not pay online?
How does a guest book a room or cottage online?
- Answer
-
In the hotel widget on your website the guest goes through five to seven steps: Dates, Room (or Cottage), Rate, Spot, Extras, Details and Pay or Confirm. Spot and Extras only appear if you have set them up. All prices and availability come live from Jimani; the guest cannot book anything that is not free.
- Explanation
-
- Dates. Under When are you coming? the guest chooses an arrival day and a departure day in the calendar and under How many people? the number of Adults and Children. If they choose a day that is not possible, for example because of a Time limit or No arrival on, the widget says You cannot arrive on this day or You cannot depart on this day.
- Room or Cottage. They see your types with photos, facilities, Max. people and how many are still free (for example 1 room left). Only types with Show in widget set to Yes appear.
- Rate. For each type they see your rate plans that are Bookable online, with the price, the cancellation rule and whether breakfast is included. See What is a rate plan?.
- Spot. Only if you turned on the floor plan: they choose a room themselves, for the surcharge, or let Jimani choose. See Can a guest choose their own room or cottage on a floor plan?.
- Extras. Complete your stay with your Extra products, only if you have any. See How do I sell extras such as parking?.
- Details. First name, Last name, Email address, Phone number and a Comment or request (optional). They agree to the terms and the cancellation policy of this rate.
- Pay or Confirm. What the guest pays you set under Settings > Money and figures > Online payment: the whole amount, a deposit or nothing. See Can a guest pay only on arrival?. If they pay, Jimani holds the room for 15 minutes until the payment is in; after that the booking lapses.
- Afterwards. The widget shows Your booking is confirmed with the Booking number, and a confirmation is emailed to the guest. If Online check-in is on, the email contains the link to check in online. The tourist tax is in the total or separate, as you have set it.
- Double booking is not possible. The final check happens at the moment of booking. If the room has just been taken, the widget says so and the guest chooses again. If the price has just changed, it shows the new total.
- Example
-
A guest chooses Friday to Sunday for 2 adults, chooses the Double room with the Flexible plan, adds Parking, fills in their details and pays the 30% deposit. They receive a confirmation.
- Related
-
How do I turn on the hotel module and what do I get?, How do I let guests check in online?
Keywords: book room online, hotel widget, booking widget hotel, guest books room, reserve hotel website, book holiday cottage online
Related questions - How does a guest book a room via my website?
- Which steps does a guest go through in the hotel widget?
- Can a guest book a room that is not free?
- Do prices and availability come live from Jimani?
How do I let guests check in online?
- Answer
-
Under Settings > Add-ons turn on the Online check-in card. After that every guest receives in their confirmation email a link to the Online check-in page, where they fill in the guest register, take a photo of their ID and, if needed, pay the outstanding amount. You can also email the link yourself.
- Explanation
-
- Step 1. Turn on the Online check-in add-on. Then open Settings > Guests and bookings > Online check-in.
- Step 2. Choose whether you Ask for a photo of ID, whether the guest has to pay the outstanding amount (Collect outstanding balance), and after how many days the photos are deleted under Keep ID photos (days after departure, default 30). Everything is saved immediately.
- What the guest does. They open the link, and under Details for everyone fill in First name, Last name, Nationality and Date of birth, for the main guest and adults also the ID and Document number, and for the main guest City and Country. Then come ID (the photo) and Pay or Finish. The page saves every step, so they can continue later.
- Guest register. The guest register (name, nationality, date of birth, ID) is always required for online check-in. You can export it for the municipality.
- Paying. If the guest pays online, that goes via Mollie. Without Mollie they pay on arrival.
- Sending the link yourself. Open the reservation in Hotel, go to the Stay tab and copy the Online check-in link, or click Email link if there is an email address.
- Seeing whether the guest is done. On the Stay tab it says Checked in online on with the date, or Not checked in online yet. You see the guest register, the ID photos and can set ID checked to Yes.
- Afterwards. On the day of arrival a guest who checked in online and paid everything is checked in automatically as soon as the room is ready. Their access code can be emailed at the same moment, see How do I send guests an access code for the room?.
- When it is no longer possible. If the stay has been cancelled or has ended, the guest sees This booking has been cancelled or This stay has ended.
- ID photos. Only you see them. They are deleted automatically after the retention period.
- Example
-
A guest receives the link with their confirmation, fills in the register 3 days before arrival and takes a photo of their passport. On arrival they only have to pick up the key.
- Related
-
What is in the Stay tab and what does the guest fill in under Online check-in?, How do I get the guest register and the tourist tax for the municipality?
Keywords: online check-in hotel, guest register online, id photo guest, check-in link, digital check-in, legal guest registration
Related questions - Can guests check in online beforehand?
- How do I let guests upload their ID before arrival?
- How does the guest get the link for online check-in?
- Can a guest also pay the outstanding amount during online check-in?
How do I offer breakfast, early check-in or late check-out?
- Answer
-
You create breakfast under Hotel management > Products and include it in a rate plan, such as With breakfast; the price applies per person per night. You create Early check-in and Late check-out in the same place with a price. In the current booking flow (widget and Create reservation) a guest can only choose breakfast via a rate plan and Extra products; if you want to sell late check-out online, create an Extra product with that name.
- Explanation
-
- Creating breakfast. Go to Hotel management > Products, click the plus and choose Breakfast. Fill in Name, Description, Standard price, Online booking price and VAT and click Save. The price is per person per night.
- Breakfast in a plan. Go to Hotel management > Rate plans, open the plan (for example With breakfast) and choose your breakfast under Breakfast. The plan then adds breakfast times people times nights to the stay. The guest sees Breakfast included. The default plan With breakfast is off if there was no breakfast when it was created: then set it to Active.
- Online price. If the guest books online themselves (widget or website) and you fill in more than 0 at Online booking price, that price applies. Empty or 0: the standard price applies online too. In the dashboard and the till the standard price always applies.
- Early check-in and Late check-out. Under Products > plus choose Early check-in or Late check-out and fill in Name, Description, Standard price, Online booking price and VAT. The times at which that is possible you set under Opening hours (Early check-in time and Late check-out time).
- Selling online. In the hotel widget the guest chooses from your Extra products at the Extras step. So for a paid late check-out, create an Extra product with a clear Name and Description, see How do I sell extras such as parking with a stay?.
- Switching off or removing. Set Active to No so a product can no longer be chosen, or delete it.
- Example
-
You create Breakfast at €12 per person per night. A guest books the With breakfast plan for 2 people and 3 nights: the breakfast adds €72.
- Related
-
What can you set up under Products: Breakfast, Early check-in, Late check-out and Extra product?, What is a rate plan and how do I create a flexible or non-refundable rate?
Keywords: breakfast hotel, breakfast per person, late check-out, early check-in, late checkout, extra with room
Related questions - How do I offer breakfast with a stay?
- How do I charge for early check-in or late check-out?
- Can a guest choose breakfast via a rate?
- Does the breakfast price apply per person per night?
Can a guest choose their own room or cottage on a floor plan?
- Answer
-
Yes. Under Hotel management > Floor plan upload an image of your hotel or park, drag your rooms or cottages to their place and set Guest chooses their own spot to Yes. In the widget the guest then gets the Spot step and chooses themselves; if they do not want to, Jimani picks a free unit for them. A self-chosen spot can cost a surcharge.
- Explanation
-
- Step 1. Go to Hotel management > Floor plan. Under Background choose an image (jpg, png or webp up to 5 MB).
- Step 2. Drag the numbers from the Rooms (or Cottages) list to their place on the image. The cross removes a number again. Dragging works with mouse and finger.
- Step 3. Under Choose a spot yourself set Guest chooses their own spot to Yes. Fill in the amount at Surcharge and choose Per stay or Per night at Surcharge applies.
- What the guest sees. After Rate the widget shows Choose your own room (or Choose your own cottage) with the floor plan. Units that are free appear as a choice; occupied ones cannot be chosen. If there is a surcharge, it says: Choosing yourself costs {bedrag} extra. If you do not want to choose, we will choose for you. They can also choose Skip, choose for me.
- Which units. The guest can only choose units of the chosen type that you have placed on the floor plan. The step only appears once at least one number is on the floor plan.
- Surcharge. In the total the surcharge appears as a separate line: Surcharge for own room choice (or Surcharge for own cottage choice).
- Example
-
A holiday park puts 20 cottages on the map and charges €10 per stay for a choice of their own. Whoever wants to be by the water chooses cottage 7 and pays €10 extra.
- Related
-
What can you set up under Floor plan in Hotel management?, How does a guest book a room or cottage online?
Keywords: choose room yourself, hotel floor plan, choose cottage on map, choose spot holiday park, surcharge own choice
Related questions - Can a guest choose their own cottage on a map of the park?
- How do I upload a floor plan of my hotel?
- Can I charge a surcharge for a self-chosen spot?
- What happens if the guest does not want to choose a spot?
How do I set the price per night and the seasonal prices?
- Answer
-
Go to Hotel management > Rate plans and in the Seasons & prices table fill in the Base price for each type. For a high season create a Season with a period and fill in the seasonal price for each type, and optionally a higher price for Friday and Saturday (Fri/Sat). Every amount is saved immediately.
- Explanation
-
- Step 1. First create your types. Without a type the table is empty.
- Step 2. Base price. Under Base price (outside a season) fill in the price per night. It applies to all nights that fall in no season.
- Step 3. Season. Above the table click Add season. Give a Name (for example High season), a First night and a Last night (both count) and optionally a Priority. Click Save.
- Step 4. Seasonal price. In the table the season now appears as a column with its period. Fill in the price per night for each type. If you leave a cell empty, the base price applies for that type in that season.
- Step 5. Weekend. Under the seasonal price at Fri/Sat fill in a higher price for the Friday and Saturday night. First fill in the price per night, otherwise you get Enter the price per night first.
- Step 6. Extra people. At the end fill in under Extra adult and Extra child what an extra person costs per night. For how many people the price applies, you set on the type, at Price applies to.
- Overlap. If two seasons overlap, the season with the highest Priority applies; with equal priority the shortest season. A season may last two years at most.
- What the guest sees. Jimani calculates each night separately: season or base price, then the rate plan, then the surcharge for extra people. The sum is the accommodation amount.
- Other rates. A rate plan such as Non-refundable deducts a percentage or amount from this price, see What is a rate plan and how do I create a flexible or non-refundable rate?.
- Example
-
Base price €100. High season from 1 July up to and including 31 August: €140, Fri/Sat €170. A guest who stays two nights from Friday 3 July pays €170 plus €170 for the Friday and Saturday night: €340 (two people, the price applies to two).
- Related
-
What can you set up under Rate plans, Season and Seasons & prices?, How do I charge for an extra adult or child?
Keywords: price per night, seasonal price hotel, high season low season, weekend price hotel, set room rate, rates by date
Related questions - How do I set a higher price for the high season?
- Can I set a separate price for Friday and Saturday?
- Where do I fill in the base price per night?
- How do I create a season?
How do I create a hotel reservation myself?
- Answer
-
Go to Hotel and click Create reservation at the top right (or click an empty cell in the room planner). Choose the dates and number of people, choose a type and rate plan, fill in the guest's name and click Save. At the front desk minimum stay and no arrival do not apply; a room that is occupied or closed cannot be booked.
- Explanation
-
- Step 1. Open Hotel and click Create reservation. A side panel opens. If you clicked an empty cell in the Overview, room and date are already filled in.
- Step 2. Choose Arrival and Departure (the departure date must be after the arrival) and the number of Adults and Children.
- Step 3. Under Type and rate you see for each type how many are free and for each rate plan what the whole stay costs. Choose a type and a plan.
- Step 4. Under Room (or Cottage) choose a number yourself, or leave Automatic (first available).
- Step 5. Set Provisional (not yet confirmed) to Yes if the guest is still undecided: an option holds the spot, but the reservation is not yet confirmed.
- Step 6. Under Guest fill in First name, Last name, Email and Phone. The last name is required. If the guest has an email address, you can send an email later.
- Step 7. Under Payment choose Pay now, Deposit (fill in the Deposit amount) or On arrival. This only records what the guest paid; you settle up at the till.
- Step 8. Check the Total and click Save. Cancel closes the panel without saving.
- Overbooking is not possible. If the room has just been taken by someone else, you get the message and nothing is saved.
- Example
-
A guest calls for 2 nights with 2 adults. You choose the Double room, the Flexible plan, Room Automatic and Payment On arrival, fill in the name and click Save.
- Related
-
How do hotel reservations, the room planner and the Create reservation side panel work?, How do I check a guest in and out?
Keywords: create reservation hotel, book room front desk, phone booking, manual booking hotel, option reservation, record deposit
Related questions - How do I book a room myself for a guest who calls?
- How do I create a reservation in the room planner?
- Can I book an occupied room?
- Do minimum stay and no arrival also apply at the front desk?
How does cleaning of rooms and cottages work?
- Answer
-
Every room or cottage has a cleaning status: Clean, Dirty, In progress, Inspected or Out of order. After check-out it is Dirty. Your cleaners set it to In progress with Start and to Clean (or Inspected) with Done on the Cleaning page. You see the status in the room planner, under Rooms in Hotel management and on the Cleaning page.
- Explanation
-
- Step 1. Setting up. Open Settings > Your business > Cleaning. Set Review first to Yes if a manager has to inspect every room, and Daily cleaning to Yes if rooms where a guest is staying must go to Dirty every morning.
- Step 2. Cleaners. Give your cleaners their own login with the Cleaning role under Settings > Your business > Users and permissions. They only see the Cleaning page, on their phone.
- Step 3. Working. The cleaner opens Cleaning, sees To clean today and taps Start and then Done. With Note or photo they report, for example, a broken lamp.
- Inspecting. With Review first set to Yes the room is on Clean after Done. You or a manager then tap Inspected; only then is the room ready for the next guest. Without inspection it is on Inspected immediately after Done.
- Setting by hand. On the Rooms tab in Hotel management you choose a status yourself under Cleaning, and on the Cleaning page you use Set status.
- Out of order. Set a room to Out of order if it is temporarily not used for a guest.
- What Jimani does itself. After check-out Jimani sets the room to Dirty. With Daily cleaning also every morning from 05:00 to Dirty for occupied rooms. If a room is not ready yet when a guest checks in, Jimani warns you. A guest who checked in online is checked in automatically as soon as the room is ready.
- Order. On the list, rooms with a departing and an arriving guest are at the top.
- Example
-
The cleaner taps Start on room 12 and Done after the work. With Review first the room is now on Clean. You tap Inspected and the room is ready for the next guest.
- Related
-
How does the Cleaning page work?, How do I check a guest in and out?
Keywords: cleaning rooms, housekeeping, room dirty clean, cleaner login, room status, inspected
Related questions - How do my cleaners know which rooms are dirty?
- Which cleaning statuses does a room have?
- What happens to the room status after check-out?
- How does a cleaner set a room to clean?
What is a rate plan and how do I create a flexible or non-refundable rate?
- Answer
-
A rate plan is a way to offer the same room at a different price and conditions, for example Flexible and Non-refundable. You create it under Hotel management > Rate plans. A plan is the base price or deviates from it by a percentage or amount, and has its own cancellation rule, breakfast and minimum stay.
- Explanation
-
- Default plans. A business without plans gets four plans the first time it opens the tab: Flexible (the base plan, free cancellation up to 2 days), Non-refundable (10% below Flexible, cancelling costs the whole amount), With breakfast and Minimum stay (weekend) (5% below Flexible, minimum 2 nights at the weekend). With breakfast is off if no breakfast existed at that time.
- Step 1. Click the plus at Rate plans (Add rate plan) or click an existing plan.
- Step 2. Price. Give the plan a Name, as the guest sees it. At Derived from choose the plan the price comes from; Nothing: this is the base price means the price comes from Seasons & prices. At Deviation in choose Percentage or Amount and fill in a number at Deviation, for example -10 for 10% cheaper. Under Breakfast choose a breakfast if needed.
- Step 3. Cancelling. Set Refundable to Yes or No, fill in the number of days at Free cancellation until (days before arrival) and at Cancellation fee after that the percentage the guest then pays. See What does cancelling a hotel reservation cost?.
- Step 4. Stay. Fill in Minimum number of nights and Maximum number of nights (0 = no limit). With Weekends only the minimum only applies to a stay with a Friday or Saturday night. With No arrival on and No departure on you choose weekdays on which that plan is not possible.
- Step 5. Types. Set For all types to No and under Only for choose the types the plan applies to, or leave it on Yes. Set Bookable online to Yes to show the plan in the widget and choose whether the plan is Active. Click Save.
- At the front desk. Guests you book yourself can get any active plan. The rules Minimum number of nights, No arrival on and No departure on only apply to online booking.
- Removing a plan. With Send to Trash in the Actions menu you remove a plan. Plans that were derived from it then hang on the plan above.
- Example
-
You edit Non-refundable and set the deviation to -15 instead of -10. A room that costs €100 at Flexible now costs €85 per night, and cancelling costs the whole amount.
- Related
-
What can you set up under Rate plans, Season and Seasons & prices?, How do I set the price per night and the seasonal prices?
Keywords: rate plan hotel, flexible rate, non-refundable, discount plan, minimum stay, weekend rate, rate plan
Related questions - How do I offer a flexible and a non-refundable rate?
- What is a rate plan?
- How do I create a rate with breakfast?
- Can I set a minimum stay per rate?
How do I send guests an access code for the room?
- Answer
-
Go to Settings > Guests and bookings > Codes & keys. Under When to send choose when the code is emailed to the guest, and fill in the fixed code per room or cottage, or let Jimani create a new code for each stay. Jimani is not connected to a lock: you set the code in the lock yourself.
- Explanation
-
- Step 1. Open the Codes & keys tile.
- Step 2. Under When to send choose: A number of hours before arrival, After online check-in and payment, or Manual only. With the first, fill in under Hours before check-in time how many hours before the check-in time the email is sent (default 24).
- Step 3. Under Code type choose Fixed per room (or Fixed per cottage) or New per stay. With New per stay Jimani creates a code when sending, with the number of digits you choose under Number of digits (4 to 8), never all the same digits or a sequence like 1234.
- Step 4. With Fixed per room fill in under Codes per room the code for each room, and optionally Key box or locker. With the magic wand you create a code. This is saved immediately.
- Step 5. Under Extra text in the email type what else the guest needs to know, for example where the key box hangs.
- Sending manually. Open the reservation in Hotel, Stay tab, and click Email code under Access. Under Access code you can also change the code or have a new code created with Create. Next to it it shows whether the code has already been sent: Sent on {datum} or Not sent yet.
- Conditions. The guest must have an email address. With After online check-in and payment the code is only sent once the guest has checked in online and nothing is outstanding.
- Every five minutes. Jimani checks every five minutes who should receive a code and sends only one per stay.
- Example
-
You choose A number of hours before arrival with 24 hours and Fixed per room. A guest arriving at 15:00 receives the code for their room by email the day before at 15:00, with your text about the key box.
- Related
-
What can you set under Codes & keys and iCal calendars?, How do I let guests check in online?
Keywords: room access code, email door code, key box, code per stay, keybox code, hotel lock code
Related questions - How do I send guests the code for the room lock?
- Can I have a new code created automatically for each stay?
- Is Jimani connected to my key safe or lock?
- When is the access code emailed to the guest?
How do I set up tourist tax for my hotel or holiday park?
- Answer
-
Go to Settings > Money and figures > Guest register & tourist tax. Set Charge tourist tax to Yes, under Calculation choose an amount Per person per night or a Percentage, fill in the Amount and choose whether the tax is Included in the price. Jimani then includes it with every booking.
- Explanation
-
- Step 1. Open the Guest register & tourist tax tile and set Charge tourist tax to Yes. If your municipality does not charge tourist tax, leave it on No.
- Step 2. Under Calculation choose Per person (a fixed amount per person per night) or Percentage (a percentage of the price of the overnight stay).
- Step 3. Under Amount fill in the amount or the percentage.
- Step 4. Under Included in the price choose Yes if the tax is already in your prices. Jimani then does not add it to the total again. With No it comes on top separately.
- Step 5. Set Children free to Yes if children pay nothing. Under Up to the age of fill in the limit: children younger than this age are free, 0 means all minors.
- How it is calculated. Per person per night: the amount times the number of paying people times the number of nights. Percentage: a percentage of the amount for the overnight stays, without breakfast and surcharges.
- Visible. In the widget the tourist tax is shown with the total. In a reservation you see it on the Stay tab, with whether it is included or separate, and on the check-out bill at the till.
- Guest register. If guests check in online and fill in their date of birth, Jimani calculates the tourist tax per person from the guest register. See How do I get the guest register and the tourist tax for the municipality?.
- Example
-
A municipality charges €1.50 per person per night, children up to 12 free. You choose Per person, fill in 1.50, set Children free to Yes and Up to the age of to 12. Two adults and a child of 8 for 3 nights pay 2 × 3 × €1.50 = €9.
- Related
-
What can you set up under Guest register & tourist tax?, How do I get the guest register and the tourist tax for the municipality?
Keywords: set up tourist tax, tourist tax per person per night, children free tourist tax, included, municipality
Related questions - How do I pass tourist tax on to guests?
- Can I set tourist tax as a percentage?
- Can I have the tourist tax included in the price?
- Where do I turn on tourist tax?
How do I create types and rooms or cottages?
- Answer
-
Go to Hotel management and first create a category (for example Rooms), then a type (the kind of room with photos, capacity and facilities) and then the actual rooms with their number. The type determines what the guest sees and what the room costs, the room is the unit they book.
- Explanation
-
- Step 1. Category. Go to Hotel management > Categories, click the plus and give the category a name, for example Rooms, Suites or Holiday cottages. Without a category you cannot save a type.
- Step 2. Type. Go to Hotel management > Types and click the plus. Fill in Name, Description, Category and Beds, add photos with Add photo and choose the capacity: Adults, Children, Maximum number of guests and Price applies to. Under Facilities set to Yes what comes with it, such as Wi-Fi or Air conditioning. Click Save.
- Step 3. Rooms. Go to Hotel management > Rooms (for a park Cottages) and click the plus. Choose the Type and fill in the Number, for example 101. Area, Floor and Name are optional. For many rooms at once use Add multiple, see How do I add many rooms or cottages in one go?.
- Step 4. Prices. Under Hotel management > Rate plans fill in the Base price per type in the Seasons & prices table. See How do I set the price per night and the seasonal prices?.
- Difference. A type is a kind (Double room), a room is an actual unit with a number (room 101). Prices, photos and capacity are on the type, the number and the cleaning status on the room.
- Temporarily not renting out. Set Active to No on the room, or Show in widget to No on the type to only not offer the type online. At the front desk you can still book the type.
- Example
-
You have 12 rooms of two kinds. You create the category Rooms, the types Double room and Family room, and add the numbers 1 to 8 to the first and 9 to 12 to the second type.
- Related
-
How do the Types tab and the Type window work in Hotel management?, How do the Rooms and Cottages tabs and the Add multiple window work?, What can you set under Categories and Label in Hotel management?
Keywords: create room type, add room, room type, add cottage, room category, set up rooms
Related questions - How do I set up my hotel with rooms?
- What is the difference between a type and a room?
- In what order do I create categories, types and rooms?
- Where do I put photos and facilities of a room?
Hotel management is the screen where you set up everything for your rooms or cottages: opening hours, categories, types, rooms, rate plans with prices, products, fields, labels, the floor plan and time limits. You find it in the left menu under Hotel management.
Where to find it: Menu > Hotel management (/Hotel). The menu shows Hotel (the reservations), Hotel management and Cleaning as soon as the Hotel module is on under Add-ons.
All buttons, settings and messages of this screen
A category groups your types, such as Rooms or Holiday cottages, and is required for every type. A label is a feature with an icon, such as Sea view. You manage them on the Categories and Label tabs of Hotel management.
Where to find it: Menu > Hotel management > Categories and Menu > Hotel management > Label (/Hotel).
All buttons, settings and messages of this screen
Under Codes & keys you decide when a guest receives their access code by email and which code and key belong to which room. Under iCal calendars you connect each room with Booking.com, Airbnb or another site, so that occupied nights go both ways. Codes & keys is under Settings > Guests and bookings; you open iCal calendars with Settings on the iCal card under Settings > Add-ons.
Where to find it: Settings > Guests and bookings > Codes & keys. iCal calendars requires the iCal add-on: under Settings > Add-ons choose the Settings button on the iCal card, or search "iCal" in Search for a setting….
All buttons, settings and messages of this screen
A room or cottage is the actual unit a guest books, with its own number and a type. You manage them on the Rooms tab of Hotel management, or Cottages if you choose cottages under Advanced. With Add multiple you create a whole series of numbers in one go.
Where to find it: Menu > Hotel management > Rooms (or Cottages) (/Hotel).
All buttons, settings and messages of this screen
Under Settings you find four tiles for your hotel: Advanced (hotel or holiday park, room or cottage), Online payment (what the guest pays when booking online), Online check-in (what the guest fills in before arrival) and Cleaning. Every choice is saved immediately.
Where to find it: Settings > Guests and bookings > Advanced, Settings > Guests and bookings > Online check-in, Settings > Money and figures > Online payment and Settings > Your business > Cleaning. The tiles appear if the Hotel module is on.
All buttons, settings and messages of this screen
A Room rate is a table with prices per day, which you can download and read in with Excel. A price in that table takes precedence over the base price of the type, but not over a seasonal price. You create it on the Products tab.
Where to find it: Menu > Hotel management > Products > plus > Room rate (/Hotel).
All buttons, settings and messages of this screen
On the Opening hours tab of Hotel management you can set a check-in time, check-out time, early check-in time and late check-out time per day, and set whether check-in or check-out is possible that day. Every change is stored immediately. You can also download and read in the times with Excel. Please note: a new reservation currently gets the fixed times 15:00 check-in and 10:00 check-out.
Where to find it: Menu > Hotel management > Opening hours (/Hotel). This is the first tab and is open by default.
All buttons, settings and messages of this screen
On the Floor plan tab you place your rooms or cottages on an image of your hotel or park, and you decide whether a guest may choose a spot there themselves, for a surcharge. Everything on this tab is saved immediately.
Where to find it: Menu > Hotel management > Floor plan (/Hotel).
All buttons, settings and messages of this screen
On the Products tab of Hotel management you create everything a guest can book with their stay: a Breakfast, Early check-in, Late check-out and Extra product. For each product you set the name, description, price and VAT.
Where to find it: Menu > Hotel management > Products > plus (/Hotel). A tile opens the product for editing.
All buttons, settings and messages of this screen
Under Hotel in the menu you see all reservations in the room planner (Overview), in lists per day, week or month and as totals. There you create a reservation yourself with Create reservation, and with a click on a reservation you open the Reservation information window.
Where to find it: Menu > Hotel (/HotelReservationViews). Jimani remembers the tab you used last.
All buttons, settings and messages of this screen
On the Cleaning page your cleaners see which rooms or cottages they have to do today. For each unit they tap Start when they begin and Done when they are finished, and they can add a comment or photo. As the manager you can also see the page and set the status yourself.
Where to find it: Menu > Cleaning (/Schoonmaak) for you. An employee with the Cleaning role sees only this page, without a menu, with the business, their name and Log out at the top. The page is made for the phone.
All buttons, settings and messages of this screen
On the Rate plans tab you set the price per night, per type and per season, and you create rate plans with their own cancellation rule, breakfast and minimum stay. A plan is the base price or deviates from it by a percentage or an amount.
Where to find it: Menu > Hotel management > Rate plans (/Hotel). At the top are your plans, below them the Seasons & prices table.
All buttons, settings and messages of this screen
With a Time limitation you block check-in, check-out or both on fixed days, for certain types or individual rooms. This way you can, for example, close a room for maintenance or let nobody arrive on public holidays.
Where to find it: Menu > Hotel management > Time limitation (/Hotel).
All buttons, settings and messages of this screen
Under Settings > Money and figures > Guest register & tourist tax you set how Jimani calculates tourist tax: per person per night or as a percentage, with or without children, separately on the bill or included in the price. There you also download the guest register and the tourist tax for the municipality.
Where to find it: Settings > Money and figures > Guest register & tourist tax.
All buttons, settings and messages of this screen
A type is a kind of room or cottage, for example Double room or Lodge for 4 people. You record its name, photos, capacity and facilities once, and all real rooms of that type share that information. You create types on the Types tab of Hotel management.
Where to find it: Menu > Hotel management > Types (/Hotel). You create a new type with the plus on that tab or via What would you like to add? > Types.
All buttons, settings and messages of this screen
On the Fields tab you create extra questions that a guest can answer when booking, for example an arrival time or an allergy. For each field you choose the kind, the name, whether it is required and where it is shown.
Where to find it: Menu > Hotel management > Fields (/Hotel).
All buttons, settings and messages of this screen
In the Stay tab of Reservation information you manage a guest's guest register, ID and access code. The guest fills in the same details themselves on the Online check-in page, which they open via a link in their confirmation email.
Where to find it: Menu > Hotel > click a reservation > Stay tab. The guest page Online check-in is opened by the guest with the link from their email (without logging in).
All buttons, settings and messages of this screen
Account, settings and devices
How do I add an employee and decide what they may do?
- Answer
-
Go to Settings > Your business > Users and permissions and click the plus button. Enter name, email, phone, language and the role (the field is called Rights) and click Save. What a role may do is set by the owner per section to Yes or No on the User rights tab. You give a PIN for the POS in the same window, if Log in on the till is on.
- Explanation
-
- Step 1. Go to Settings > Your business and open Users and permissions. You land on the Users tab with a card per employee. You can create an unlimited number of users.
- Step 2. Click the plus button at the top right. The Manage user data window opens. In the Employee block enter the First name, Last name, Email, Phone (a mobile number is required), Language and Rights (the role). Click Next.
- Step 3. Optionally enter Postal code, Address and Place of residence and click Save. You see Created. The employee receives an email to confirm their email address; after that they create their own password.
- Step 4. If you want to decide what a role may do, open the User rights tab. Under Role choose the role and set Yes or No per section. With All you set a whole block in one go. A change is saved immediately.
- Roles. The roles are Owner, Manager and User. With Add role, four more are added: User2, User3, User4 and User5. A business with a hotel also has the role Housekeeping. The Owner may always do everything; those rights are fixed on.
- Who may give what. Only the owner can change rights; others only see on User rights what each role may do. Whoever has the Users right can add users, but only with a role that is lower than their own role (Owner above Manager above User). You can never change your own role yourself.
- Rights at the POS. In the POS and orders block there are, among others, Give discounts, Open cash drawer without a sale, Record own consumption and Deposit/withdraw cash. In the Reports and accounting block there is View revenue and reports: without that right an employee sees no revenue, no amounts of the day closing and no charts on the dashboard, and starts at the POS after logging in.
- Register device. Under Role the last item is Register device. That is the fixed role of a linked POS on which nobody is logged in with a PIN. By default it may only do POS work: POS, orders, reservations, search, announcements and, of the settings, only the day closing. Sections marked Not for a register device (such as Users, Everything about payments and Integrations) cannot be turned on for this role. With Back to default you reset your own choices for the register device. If someone logs in with their PIN, their own rights apply.
- PIN. Under Settings > Your business > Your team set Log in on the till to Yes. The employee's window then has the field POS PIN code: exactly 4 digits, not 0000 and not the same as a colleague's. If you leave it empty for a new employee, they get 1015, or a free code if 1015 already belongs to someone.
- Hiding guest details per role. Under Settings > Guests and bookings > Guests set the line Guest details: who sees what to Yes. User rights then has the Guest details block with, per field (name, email, phone, address and your extra fields), a Yes or No per role. No means that role sees 'hidden', also in search, exports and details. The owner always sees everything.
- Example
-
You want your waiting staff to be able to check out but not give discounts. On User rights choose the role User and set Give discounts to No. A colleague with the right can still give a discount on that POS with their own PIN.
- Related
-
What is on Users and User rights?, How do employees track their hours in Jimani?, How do I book money in or out of the cash drawer?
Keywords: add employee, create user, employee permissions, set roles, POS PIN, staff permissions, hide guest details
Related questions - How do I add an employee?
- How do I give an employee a PIN for the POS?
- How do I decide what an employee may and may not see?
- How do I create a role with limited rights?
- How many employees can I add?
How do employees track their hours in Jimani?
- Answer
-
Turn on the Time tracking add-on (€15 per month, excl. VAT) and turn on Clocks hours for each employee. When that employee logs in with their PIN on the POS or handheld, Jimani asks whether they want to clock in or clock out. You see the hours under Settings > Your business > Time tracking (the Hours overview), and with File for the payroll provider you download them as CSV.
- Explanation
-
- Step 1. Go to Settings > Add-ons, look for Time tracking (category Team) and turn it on.
- Step 2. Under Settings > Your business > Your team set Log in on the till to Yes: clocking happens when logging in with the PIN.
- Step 3. Open Users and permissions, click an employee and in the Employment details block turn on Clocks hours. Also fill in Staff number, Employed from and Contract hours per week here if your payroll provider needs them. For someone who never stands behind a screen, turn off Can log in; clocking is still possible then.
- Step 4. At the POS: after logging in with the PIN the POS asks Do you want to clock in? with the buttons Clock in and Not now. Someone who is already clocked in is asked whether they want to clock out, with the time since they clocked in. If clocking fails once, the POS simply opens.
- Step 5. View the hours under Settings > Your business > Time tracking: that opens the Hours overview. Choose From and To and click Search. You see per week and per employee Worked, Break, Evening, Night, Saturday, Sunday, Public holiday, Extra hours and Overtime, and below that The shifts.
- Step 6. Click File for the payroll provider. You get a CSV file with a line per employee per day, in the form that Loket.nl and Nmbrs use.
- Who sees what. The owner sees everyone's hours, a manager those of their own point of sale and a user only their own hours. An employee also sees their own hours on My hours.
- Locking. Once the hours of a week have been processed, click Lock for that week. It then says locked and the hours of that week no longer change.
- Note the labels. A shift can say corrected (adjusted by hand) or automatic (nobody clocked out; the night closing closed the shift). For young people Please note can appear with a rule from the Dutch Working Time Act: Jimani warns, but does not stop anything.
- If Time tracking is off, you see Time tracking is turned off. Turn it on under the paid options to track hours.
- Example
-
Lisa logs in at 17:58 with her PIN and taps Clock in. After her shift she logs in again and chooses clock out. In the Hours overview her shift is under The shifts, with Where (POS or handheld).
- Related
-
How do Hours overview, My hours and Revenue per employee work?, How do I add an employee and decide what they may do?, Which features cost money?
Keywords: time tracking, clock in POS, clock out, staff hours, export hours, payroll provider, Loket, Nmbrs
Related questions - How do I let my staff clock in and out?
- Can Jimani keep track of the hours employees have worked?
- How do I download the hours for the payroll administration?
- What does time tracking cost?
How do I see the revenue per employee?
- Answer
-
Go to Settings > Money and figures > Reports and open the Revenue per employee tab. Choose a Period and you see per employee the receipts, the items and the revenue including and excluding VAT. This report belongs to the Salon add-on, which has no monthly fee.
- Explanation
-
- Step 1. Make sure the Salon add-on is on (Settings > Add-ons, category Modules). If Salon is off, the report is not there, not even for the owner.
- Step 2. Go to Settings > Money and figures > Reports and choose the Revenue per employee tab.
- Step 3. Under Period choose Today, This week, This month, Last month or Custom. With Custom you fill in From and Up to and including.
- What counts. Paid receipts in the period, on the employee of each receipt line. What is on pay later does not count yet. Lines without an employee are at the bottom as No employee.
- Who may see it. The right is called Revenue per employee (block Reports and accounting on User rights). The owner may always.
- Hours next to revenue. With the Time tracking add-on you also see Revenue per hour worked in the Hours overview, per week for the whole business.
- Example
-
You want to know what each hairdresser made this month. Choose This month: you see per hairdresser the number of receipts, the items and Revenue excl. VAT.
- Related
-
How do Hours overview, My hours and Revenue per employee work?, How do employees track their hours in Jimani?
Keywords: revenue per employee, revenue per hairdresser, employee revenue, salon revenue, employee report
Related questions - How do I see how much an employee has sold?
- Where do I find the revenue per hairdresser or practitioner?
- Why don't I see the revenue per employee report?
- How do I compare the performance of my staff?
How do I turn an add-on on or off?
- Answer
-
Go to Settings and click the Add-ons tile. At the add-on click Turn on and then on the right in Your invoice click Pay. You turn it off with Deactivate on the same card; a paid add-on then keeps working until the end of the month.
- Explanation
-
- Step 1. Go to Settings and click the last tile, Add-ons. The tile shows how many add-ons are on.
- Step 2. Find the add-on with Search for an add-on… or choose a category, such as Restaurant and kitchen or Communication. With the i button you read what it does.
- Step 3. Click Turn on. The button becomes Selected and the add-on appears on the right in Your invoice, with the price, the quantity and the total including VAT.
- Step 4. Click Pay. A paid add-on is charged automatically per month; this month you only pay the days that are left. A free add-on costs nothing.
- Step 5. The card now shows Settings (to the add-on's screen) or On.
- Turning off. Click Deactivate. A paid add-on keeps working through the last day of the month; the card then shows Runs until. A free add-on goes off immediately.
- Only works together with. Some add-ons need another one, for example Kitchen screen asks for Courses and Courses asks for Restaurant. Handheld Terminal, Tap to Pay, Products and down payments and Transaction costs ask for a Mollie connection. The card says what you must turn on first.
- Free features without their own screen (Log in on the till, Customer details on the POS, Keep track of tips and Guest details: who sees what) are not under Add-ons but are Yes/No in their group under Settings.
- Who may do this. You need the Integrations right. A POS without a PIN can never turn on add-ons.
- Example
-
You want a kitchen screen. First turn on Restaurant (free), then Courses (€10 per month; free until 1 January 2027 if you already use it), then Kitchen screen (€5 per month per screen). Amounts exclude VAT.
- Related
-
Which add-ons does Jimani have and what do they cost?, Can I try a paid feature first, and how do I cancel it?
Keywords: turn on add-on, activate integration, turn off feature, deactivate, turn on connection, cancel feature
Related questions - How do I turn on an extra feature?
- How do I turn a paid add-on off again?
- Where do I find the add-ons?
- Until when does an add-on work after I turned it off?
- Do I still have to pay something after turning it on?
How do I set the VAT rate of my products?
- Answer
-
Give each product a VAT group. A VAT group has a name and a VAT rate, and you create it under Settings > Till and products > VAT groups. The VAT rates themselves (such as 9% and 21%) are already available; Jimani sets them.
- Explanation
-
- Step 1. Go to Settings > Till and products > VAT groups.
- Step 2. Click the plus button. Enter the Name of the VAT group, for example Food, and choose the rate under Select tax. Click Save. The card then shows the name with the percentage.
- Step 3. Open the product under Point of sale and products and choose the right group under VAT group (Select a VAT group).
- Many products at once. With the Import and export add-on turned on, you can import VAT groups with Choose a file and download them as a list.
- VAT number. You enter your own VAT number under Company details (field VAT number); it appears on your invoices.
- Example
-
A lunchroom creates two groups: Food (9%) and Alcohol (21%). A sandwich gets Food, a glass of wine gets Alcohol.
- Related
-
How do you set VAT rates?, What do you enter under Company details?
Keywords: set up VAT, change VAT product, create VAT group, 9% VAT, 21% VAT, low rate
Related questions - How do I set 9% or 21% VAT for my products?
- Where do I choose the VAT rate of a product?
- How do I create a new VAT group?
- Why can't I add a VAT percentage myself?
Which languages does Jimani work in?
- Answer
-
Jimani works in 13 languages: Dutch, English, Danish, German, Greek, Spanish, Finnish, French, Italian, Norwegian, Polish, Portuguese and Swedish. These are the same languages as the Jimani website. You choose which languages your guests see (at most five at a time), and each employee chooses their own language for the dashboard.
- Explanation
-
- Your own dashboard. Each user has their own Language under Users and permissions. If you change it, you log in again and see Jimani in that language.
- The widgets and emails for guests. Go to Settings > Your business > Languages. Choose the Main language, the language under General settings (the fallback) and set the languages you want to offer to Visible. At most 5 languages can be visible.
- Translating your products and texts. With the Extra languages add-on, Jimani translates your products, categories, supplements and labels. A language can only become visible once everything in it has been translated; until then it shows how many are already done. Extra languages has no monthly fee.
- Your website. The Multilingual (website) add-on puts your website in at most two extra languages. For the website you choose from Dutch, English, Deutsch, Français, Español and Italiano. The AI translates the texts and you improve them per text. That costs €10 per month and only works together with Website (€29 per month). All amounts exclude VAT.
- Paying. A guest pays online in the Mollie payment screen in their own language, as long as Mollie supports that language. Mollie does not support Greek; the guest then sees English.
- Example
-
A hotel on the coast with German and Danish guests sets German and Danish to Visible, with Dutch as the main language and English under General settings. A Swedish guest then sees English.
- Related
-
What do you set under Languages?, Which features cost money?
Keywords: jimani languages, english POS, multilingual widget, website in german, how many languages, product translation
Related questions - Which languages does Jimani support?
- Can I use Jimani in English or German?
- How do I set up my widget in multiple languages for foreign guests?
- Can each employee choose their own language?
How do I prepare an announcement for my employees?
- Answer
-
Go to Announcements in the menu and click the plus button. Enter a Name and the Description, choose the Type of communication and the Date and End date, and click Save. Your employees see the announcement on those days in the help centre, or at the top of the reservation screen if you set Visible when booking to Yes.
- Explanation
-
- Step 1. Open Announcements in the menu (or Settings > Communication > Announcements).
- Step 2. Click the plus button at the top right. The Add announcement window opens.
- Step 3. Enter the Name (only for yourself, to find it again) and the text for your team under Description.
- Step 4. Set Cannot be deleted to Yes if nobody may click it away; it then stays visible until the end date.
- Step 5. Set Visible when booking to Yes if the announcement is about reservations, for example "No tables outside today".
- Step 6. Under Type of communication choose Informative, Warning or Beware!, enter the Date and the End date and click Save.
- Who may do this. The permission is called Announcements. Employees without that permission do see the announcements, but cannot create any.
- Announcements are internal. Guests do not see them.
- Example
-
You set "Supplier arrives at 10:00, back door open" from today to today, type Informative. Your team sees it in the help centre today and can click it away once it has been read.
- Related
-
How do Announcements work in Jimani?, How do I add an employee and decide what they may do?
Keywords: announcement, team message, internal announcement, employee notification, announcement when booking
Related questions - How do I let my staff know something in Jimani?
- How do I create an announcement that appears when booking?
- Can I show a message for my team on a certain day?
- How do I post a memo for employees?
What makes Jimani different from other POS systems?
- Answer
-
With Jimani the POS is free and you only pay for extra features that you turn on yourself. POS, reservations, appointments, activities, ticket sales, hotel, webshop and website are in one system with one dashboard. You turn components on or off per month under Add-ons.
- Explanation
-
- Free basis. The first POS and the modules (online reservations, appointments, activities and hotel) have no monthly fee. Ticket sales cost €0.49 per ticket sold. At the start you pay a one-off €279 onboarding costs. All amounts exclude VAT.
- Pay per feature. A fixed list of extra features costs €5 to €29 per month, such as Courses (€10; free until 1 January 2027 if you already use it), Time tracking (€15) or Website (€29). You see the price on the card before you turn it on. A paid feature that you turn off runs until the end of the month.
- Everything in one. In the POS you turn on Restaurant, Activities, Salon, Ticket sales or the Hotel module; a block of its own is then added to the menu. The online webshop, the widgets for your website and a ready-made website are also included.
- On your own devices. The POS works in the browser, as a Phone App and as POS for Windows; you connect handhelds, kitchen screens and buzzers to it.
- In 13 languages. The dashboard, the widgets and the website are available in 13 languages.
- Card payments via Mollie. Without a subscription you pay 1.5% per card transaction. With the card subscription €20 per month per card terminal plus €0.06 and 0.2% per transaction.
- Example
-
A café with the free POS, two handhelds and a kitchen screen pays 2 × €5 for the handhelds and €5 for the kitchen screen: €15 per month excl. VAT, plus a one-off €279 at the start.
- Related
-
What does Jimani cost?, Which add-ons does Jimani have and what do they cost?
Keywords: why jimani, what makes jimani unique, free POS, compare POS systems, everything in one system
Related questions - Why should I choose Jimani and not another POS system?
- How does Jimani differ from other POS systems?
- Can I use POS, reservations and webshop in one system?
- Is Jimani an all-in-one package for my hospitality business or shop?
Why does Jimani ask for a text message code when logging in?
- Answer
-
If you are the owner and have confirmed your mobile number, Jimani asks for a 6-digit code by text message when you log in on a computer or phone that Jimani does not know yet. Enter the code under Enter code and optionally choose Remember this device for 30 days; Jimani then does not ask for a code on that device for 30 days.
- Explanation
-
- Step 1. Log in as usual with your email address and password and press Log in.
- Step 2. If Jimani does not know the device, you see the screen Enter code with the text "You are logging in on a device we don't know yet. We have sent a 6-digit code to your mobile number."
- Step 3. Type the code from the text message in the field Code from the text message. Check Remember this device for 30 days if it is your own computer or phone.
- Step 4. Press Log in. Didn't receive a text message? Press Send a new code. With Back to login you start again.
- Who it is for. Only for the role Owner, and only if the owner's mobile number has been confirmed. Employees with a different role do not get this question. POS devices that have been paired with a pairing code do not log in via this screen.
- Verify mobile number. Open your own user details via the Profile button at the top right. Under the phone number is Verify mobile number. Press Verify, enter the code from the text message and press Confirm. After that it says Verified. The number is only used for login help and pairing a POS, never for advertising.
- On or off. After confirming, the owner sees the choice SMS code when logging in on a new device with Yes or No. After confirming it is set to Yes. Only the owner can change it on their own account.
- The code. A code is valid for 10 minutes. After 5 wrong codes you have to log in again. At most 3 codes per hour are sent to the same number.
- Text message not working? Then Jimani sends the code to your email address. You then see "We couldn't send a text message. You have received a 6-digit code by email."
- Different number? If you change your mobile number, the confirmation lapses, and so does the remembered device. Confirm the new number again.
- If sending text messages has not been set up in Jimani yet, you do not see the Verify mobile number block and Jimani does not ask for a code either.
- Example
-
You log in at home on a new laptop. After your password you receive a text message saying "Your Jimani login code is ...". You type in the code, check Remember this device for 30 days and you are in. For the next 30 days that laptop does not ask for a code.
- Related
-
I forgot my password, how do I set a new one?, How do logging in, logging out and the security of your account work?, Which details are kept for a user and how do you confirm a mobile number?
Keywords: sms code login, two-step verification jimani, code when logging in, log in new device, verify mobile number, verification code sms
Related questions - Why do I get a text message code when I log in?
- How often do I have to enter a text message code?
- How do I remember my device so that I no longer have to enter a code?
- I'm not getting a text message with a login code, what now?
I forgot my password, how do I set a new one?
- Answer
-
On the login screen, click Forgot your password?, enter your email address and press Send. You receive an email with a link that works for 24 hours and once. If you have a confirmed mobile number, you can also choose Send code by text.
- Explanation
-
- Step 1. Go to the login screen and click Forgot your password?.
- Step 2. Enter your email address and press Send. You see the screen Confirmation: "If we know this address, you will receive an email within a few minutes." You always see that text, even for an unknown address, so nobody can find out who has an account.
- Step 3. Open the email and click the button Create a password. You arrive at Password recovery with the text New password for and your email address.
- Step 4. Type your new password under Password and once more under Confirm password. Under Your password needs: the requirements are ticked off while you type, for example at least 6 characters, a capital letter, a lowercase letter, a digit, a punctuation mark (such as ! ? # or @) and both passwords the same.
- Step 5. Press Reset. You return to the login screen with "Password changed, you can now log in." and your email address is already filled in.
- By text message. In step 2, press Send code by text instead of Send. If the account has a confirmed mobile number, you receive a text message with a 6-digit code (valid for 10 minutes). On the next screen, enter your email address, the Code from the text message and your new password twice and press Reset. If the account has no confirmed number, you still receive the email with the link. The button Send code by text only appears if sending text messages has been set up in Jimani.
- Link expired? You see "This link has expired or has already been used. Request a new one." Press Request new link. If you requested more than one link, always use the newest email: a new link invalidates the previous one.
- Blocked after wrong attempts? After a new password the block is lifted immediately.
- Never had a password? For example if you signed up without a password or your confirmation email had expired: enter your email address on the login screen and press Log in. You see "You don't have a password yet. We have sent you an email to create one." Forgot your password works too, and setting a password immediately confirms your email address.
- Example
-
You click Send twice. You receive the email only once within half a minute; the link in that email works. If you click again an hour later, only the link in the newest email works.
- Related
-
Why does Jimani ask for a text message code when logging in?, How do logging in, logging out and the security of your account work?
Keywords: forgot password, new password jimani, reset password, link expired, password by text message, can't log in
Related questions - I can't log in anymore, I lost my password.
- How do I request a new password?
- The link to reset my password no longer works, what now?
- Can I reset my password with a text message?
How do I delete my Jimani account?
- Answer
-
Go to the page Delete account (/Auth/DeleteAccount on the address of your dashboard), enter your email address and password, check I understand that this is permanent. and press Delete my account. Your login account is then deleted immediately and you are logged out. This cannot be undone.
- Explanation
-
- Step 1. In your browser, open the address of your dashboard with
/Auth/DeleteAccount after it. You see Delete account and "We are sorry to see you go." - Step 2. Read the warning under Please note: "If you delete your account, your profile is permanently erased. This cannot be undone."
- Step 3. Enter your email address under Email and your password under Password.
- Step 4. Check I understand that this is permanent. Only then can you press Delete my account.
- Step 5. Done: you see "The request to delete the account has been sent." and you are logged out. You can no longer log in with this email address and password.
- Is the email address or password wrong? Then you see "Invalid email or password." Entering a wrong password too often counts towards the temporary block of your account, just as when logging in.
- Not working? With "Unable to delete account." nothing has been deleted. Try again later or contact Jimani.
- Only your login. This page deletes your login account. Your business and your subscription are not cancelled by this. Deleting an employee is done by the owner or manager under Users.
- Example
-
A former employee wants to get rid of their account. They open /Auth/DeleteAccount, enter their details, check the box and press Delete my account. Their login is gone; the business where they worked notices nothing else.
- Related
-
How do logging in, logging out and the security of your account work?, How do I add an employee and give them permissions and a PIN code?
Keywords: delete account, cancel jimani account, erase profile, delete data, delete login, permanently delete account
Related questions - How do I delete my account at Jimani?
- Can I permanently erase my login account?
- I want to stop using Jimani and have my data removed, how do I do that?
- Can I undo deleting my account?
How does the advice session when signing up work and what is on the quote?
- Answer
-
After signing up, Settings shows the step Advice for your business under Set up your business. You answer a few short questions; on the right you see Your advice with equipment, card payments and integrations and what it costs. With Send quote, Jimani turns on the free integrations and emails you the quote. The first line on the quote is the onboarding costs of €279 one-off (excl. VAT), followed by the equipment and the features with their monthly price.
- Explanation
-
- Step 1. Go to Settings. At the top is Set up your business with the steps in this order: Fill in business details, Connect Mollie for payments, Advice for your business, Set up logo and branding, Add your menu or products, Add staff, Set up online booking and Publish your website. Click Advice for your business.
- Step 2. Answer the questions; with Next and Previous you go back and forth. You can always stop and continue later. On the right (at the bottom on a phone) Your advice grows along: What we advise, with the prices from the Jimani shop.
- Step 3. Look at the cards in Your advice: Onboarding, Tills and equipment, Card payments with Mollie and Integrations. For an integration you choose Remove or Add, for equipment you adjust the quantities. Under Tills and equipment you choose a Fixed register or Laptop or tablet (the web POS in your browser, No purchase).
- Step 4. Click Send quote. You see the question Send quote? with We turn on the free integrations and email you the quote. You then accept and pay it online. With Save only you save the advice without an email.
- Step 5. The quote is in the email. You accept and pay it online. With Download as PDF you save it; if you changed something afterwards, use Resend quote.
- What is on the quote. As the first line Onboarding costs, €279 one-off: we set up your POS, products and equipment for you and help you personally until you can continue on your own. Then the equipment that suits your business; with Continue without equipment, I work from my laptop or tablet you leave that out. Then the modules and features with their monthly price. There is no helpdesk line and no discount on the onboarding costs.
- Card payments with Mollie. Without a subscription you pay 1.5% per transaction, no fixed costs. With a subscription €20 per month per card terminal (as many times as there are card terminals on the quote), plus €0.06 + 0.2% per transaction.
- Trial. You try a paid feature on the quote free for 14 days after you have paid the starter package.
- Who. Only the owner or a manager sees the advice session.
- Example
-
A café chooses a fixed register and two handhelds in the advice. The quote shows Onboarding costs €279 one-off, the register and the handhelds as equipment, and the handheld feature at €5 per month per handheld.
- Related
-
What do I pay one-off at the start?, Can I try a paid feature first, and how do I cancel it?, How does signing up for Jimani work, step by step?
Keywords: advice session, jimani quote, onboarding costs, starter package, advice for your business, equipment advice, sign-up costs
Related questions - How do I get a quote from Jimani?
- What is the advice session when signing up?
- Which equipment suits my business and what does it cost?
- What is on the quote and what are the onboarding costs?
- How do I ask for advice on card payments and POS equipment?
I sign up via a dealer: what do I pay and how does it work?
- Answer
-
You sign up on your dealer's sign-up page, or the dealer signs you up themselves. Your POS is then set up as a copy of the dealer's demo shop. If the dealer settles the starter package at their shop, the onboarding costs on your quote are €0, with the dealer's name next to them. Otherwise you pay the starter package to Jimani yourself; the onboarding costs are then €279 one-off (excl. VAT).
- Explanation
-
- Step 1. Open the link you received from your dealer. At the top are the dealer's logo and Jimani's, with You are signing up via ... and Your POS is set up immediately as a copy of the demo shop of ....
- Step 2. Enter Your Chamber of Commerce number and click Search by KvK number: name and address are then filled in and you can still change everything. Also fill in Your business name, Your email address and optionally Street and house number, Postal code, City, Your VAT number, Your phone number and Your website.
- Step 3. Check the terms and conditions and click Sign up. You see Please wait a moment: your POS is being set up, followed by Check your email. Click the link in the email to confirm your email address; that also logs you in.
- If the dealer signs you up themselves, your shop is ready immediately and you receive the same confirmation email. The dealer then chooses whether to settle the starter package at their shop, or whether you pay Jimani yourself.
- The quote. If the dealer has settled it, the first line is called Onboarding costs (settled at the dealer's name), for €0. The rest of the quote (equipment, features with monthly price) works as with any sign-up.
- Your dealer's suppliers. With a dealer you get the button Suppliers at the top with the suppliers your dealer has set up for you: contact person, phone, email, address and a button to the website. Your dealer maintains that list.
- If it doesn't work, Signing up via this page is not possible yet. Contact ... may appear: the dealer has not chosen a demo shop yet. Then contact your dealer.
- Example
-
You buy your POS from a dealer and settle the starter package there. The dealer signs you up. Your quote shows Onboarding costs (settled at your dealer) €0, and the features you choose with their monthly price.
- Related
-
What do I pay one-off at the start?, How does signing up for Jimani work, step by step?
Keywords: dealer, sign up via dealer, starter package dealer, onboarding dealer, settled at dealer, POS via reseller
Related questions - I am being signed up by my supplier or dealer, what do I pay?
- What are the onboarding costs if I start via a dealer?
- What is a copy of the dealer's demo shop?
- Do I have to pay the starter package myself if my dealer signs me up?
I still work in the old Jimani: how do I switch to the new Jimani?
- Answer
-
Your business is already set up in the new Jimani, with your future reservations available to view. Log in and click Switch now in the bar at the top, or go to Switch to the new Jimani and click Switch now. After that the reservation widget on your website automatically moves to the new Jimani and you only work there. Only the owner can switch, and there is no way back.
- Explanation
-
- Step 1. Log in to the new Jimani with your usual email address and password: your password from the old Jimani has been carried over. If you had no password there, use the button Set password from the email or Forgot your password.
- Step 2. At the top it says Your reservations still come from the old Jimani and are only here to view. Take your time looking around: as long as you have not switched, you work in the old Jimani.
- Step 3. Click Switch now. The page Switch to the new Jimani shows what happens: first we carry over the latest changes from the old Jimani, then the reservation widget on your website moves to the new Jimani (you don't need to change anything on your website) and from that moment you only book and change here.
- Step 4. Click Switch now and confirm the question. You see Switch in progress and then You've switched. For a week the top shows Switched to the new Jimani. From now on you only work here.
- An option from the old Jimani is called a Request in the new Jimani, and you have to confirm it.
- Reminders to guests that fall after the moment of switching are scheduled by the new Jimani itself.
- What it costs. You get the regular rate of the new Jimani, without a trial period. Reservations (Restaurant and Online reservations) are turned on immediately, and Activities if you had them in the old Jimani. See What does Jimani cost?
- Emails. Jimani can send you emails about the switch, such as {zaak} is ready in the new Jimani and reminders with a date on which you switch automatically at 6:00. Jimani sends these emails by hand per business; if a date is stated, that date applies.
- Example
-
You open the new Jimani, already see your reservations for next week and click Switch now. A minute later it says You've switched; a guest who books on your website now ends up in the new Jimani.
- Related
-
What is on the page Switch to the new Jimani?, I forgot my password, how do I set a new one?
Keywords: switch to new jimani, old jimani, V1 to V3, switch now, move reservation widget, jimani migration
Related questions - How do I switch from the old to the new Jimani?
- Can I go back to the old Jimani after switching?
- Will my reservations be kept if I switch?
- Who may switch to the new Jimani?
- Is my password the same in the new Jimani?
What is demo mode and how do I try the POS without it counting?
- Answer
-
A new shop starts in demo mode: every sale is a practice receipt, card payment is simulated and nothing counts as revenue. At the top of the POS it then says Demo mode with the button Go live. You can also try a device later, with the button Demo in the Jimani webshop or in your advice: that opens Try it yourself, a practice copy of your shop with your own products.
- Explanation
-
- Recognising it. In demo mode the top of the POS says Demo mode – practice sales don't count, card payments are simulated, with the button Go live.
- The demo of your own POS. In the Help centre open Tutorials and click Try your own POS yourself (only in demo mode). A window opens with your POS and, where that fits your business, the handheld, the kitchen screen, the receipt and the payment terminal side by side. On the right are the Tasks; they tick off automatically as you do them. When you are done you see Done! Continue with your steps.
- Receipt and card payment in the demo. Check something out on the POS, and the receipt appears with PRACTICE RECEIPT – not a valid receipt. Choose Card on the POS, and the simulated payment terminal shows Payment successful.
- Go live. Click Go live: you arrive at your steps (the to-do list). You can go live when all steps have been completed or skipped and paid. When you go live, the practice reservations and the demo devices disappear; from then on every sale is real revenue.
- Try it yourself (a device). In the Jimani webshop and in Your advice, a device has the button Demo (Try this device with your own products). The first time you see Your demo is being set up with your own products..., then the device as a real Jimani screen. Nothing counts: no revenue, no stock, no email, no printer, and the card payment is simulated. With Order this device you order it straight away.
- Please note. Try it yourself works on a computer and stays open for an hour. If you don't have any products yet, the demo shows example products for your type of business.
- Example
-
You are unsure about a handheld. In the Jimani webshop click Demo on the handheld, take an order with your own products and watch it arrive on the POS. If you like it, click Order this device.
- Related
-
What do you see in the demo and under Try it yourself?, How does signing up for Jimani work, step by step?
Keywords: demo mode, practice POS, practice receipt, go live, demo POS, try it yourself, try the POS
Related questions - Can I try out the POS without it counting?
- What does it mean when it says Demo mode at the top of the POS?
- How do I go live with my POS?
- Why is the card payment not real in the POS?
- How do I try a device before I buy it?
Where do I find my notifications, my steps and help in Jimani?
- Answer
-
Everything is behind the round button Help at the top right of the dashboard. The number on that button counts your open notifications and the improvement points of your shop; if the button is red, something is urgent. In the Help window you find the tiles Notifications, Your steps to go live, Try it yourself, Balance, Integration advice, Explanations and videos, Ask Jim and Contact helpdesk.
- Explanation
-
- Step 1. Click Help at the top right. The window opens with the text Can't remember? Here you find your notifications, your steps, demos, explanations and help.
- Step 2. Open the tile Notifications. At the top are the notifications you still need to check or deal with; click a notification away when you are done. Below it is Store check with what you can still improve. With the bell you snooze a warning; with the button ... snoozed warnings show again you bring them back. A point often has Fix it now, which takes you to the place where you fix it.
- Step 3. Open Your steps to go live for your to-do list. With See all steps you go to the page Your steps to go live. There you tick off each step (Done), skip it (Skip) or restore it (Restore). As long as you are in demo mode, sales are practice sales. When everything is done and your starter package is paid, you click Go live: from then on every sale counts.
- Step 4. On the tile Balance see how much AI credit and text message credit you have. An orange dot (Almost used up) means that one of the two is almost used up: less than 10% of your last top-up or bundle, or, without an earlier top-up, less than €1 of AI credit or fewer than 10 text messages. Here you choose Top up, Buy bundle and set Automatic top-up and Auto top-up to Yes or No.
- Step 5. If you have a question, choose Ask Jim (or the button Ask Jim at the bottom right). Jim is Jimani's assistant: you ask your question in plain language and Jim looks it up or makes a proposal with the button Apply. After applying you can choose Undo. Jim uses your AI credit and does not work on the POS screen.
- Step 6. If you can't work it out, open Contact helpdesk: Get help (the helpdesk on the internet), Create a ticket, Ask your question (chat) or Question from guest.
- What stays at the top of a page. Only what holds back your POS, such as an outstanding invoice or a POS that works in a limited way, still stays at the top of every page. Everything else is in Help.
- Example
-
The Help button says 4. In Notifications it says Your logo is still missing. Add it, then it appears on the receipt and in your webshop. You click Fix it now, add your logo and the counter goes down.
- Related
-
How do the Help window, Jim and the helpdesk tickets work?, How does the dashboard work?, What does using AI in Jimani cost?
Keywords: jimani help, dashboard notifications, to-do list, steps to go live, Jim assistant, orange dot balance, helpdesk ticket
Related questions - Where do I find help in Jimani?
- What does the number on the round button at the top right mean?
- Where do I see my notifications?
- How do I ask Jim a question?
- How do I contact the helpdesk?
How do I put my products or other data into Jimani in one go with Excel?
- Answer
-
Go to Settings > Till and products > Import and export. Under the type (for example Products) choose Example file or Export, fill in the Excel or CSV file and choose Import. You first see per row what will happen; only when you press Import in step 3 is anything saved. Import and export is free.
- Explanation
-
- Step 1. Open Settings > Till and products > Import and export. Per group (Till and products, Guests and reservations, and your modules such as Hospitality, Salon, Ticketing and Hotel) each type has the buttons Import, Export and Example file.
- Step 2. Choose Export to see what is currently in Jimani (Excel or CSV), or Example file for an empty file with the right columns, an example row and a tab with explanation. Tip: export first, adjust the file and put it back. Empty cells leave what was there.
- Step 3. Choose Import. The window has four steps: File, Check, Confirm and Done. Drag your file into the box or click to choose: Excel (.xlsx) or CSV (with ; or ,).
- Step 4. Under Check each row shows New, Changed, Unchanged or Error, with what is wrong. Nothing has been saved yet. Columns that Jimani does not know are skipped.
- Step 5. Under Confirm you see for example 12 new, 30 changed, 2 errors (will be skipped). Press Import to save the rows.
- Step 6. Under Done you see how many rows have been saved. If there were incorrect rows, choose Download incorrect rows: you get an Excel with a column What's wrong. Correct those rows and import that file again.
- Recognition. An existing product is recognised by the EAN code, otherwise by the name. Many types have a column Number (do not change); with it you can also change the name. Guests are recognised by their email address: one guest per address, no duplicates.
- Export only. Some types you can only download, such as Users, Reservations and orders, Events and the hotel lists Guest register and Tourist tax per month.
- Permissions. You only see the types for which you may manage the screen; exporting guests and reservations requires the permission Export.
- Also above the lists. Above many lists are the buttons Import (CSV/Excel) and Export (CSV/Excel) with the same window.
- Example
-
You want to raise all your prices. Under Products choose Export, adjust the price column in Excel and import the file. Under Check the adjusted products show as Changed; after Import the new prices are in Jimani.
- Related
-
What is on Import and export?, Which features cost money?
Keywords: import products, excel import, import csv, export products, example file, incorrect rows, import guests
Related questions - How do I import my products from Excel?
- Can I upload my product list in one go?
- How do I export my data to Excel or CSV?
- Where do I find an example file for importing?
- Does importing cost anything?
How do I connect Mollie to Jimani?
- Answer
-
The owner goes to Settings > Money and figures > Payments (Mollie) and chooses Connect with Mollie. You log in at Mollie with your own account (or create one), approve the permissions in one go and automatically return to Jimani. Mollie then checks your details; this usually takes 1 to 3 working days.
- Explanation
-
- Step 1. Go to Settings > Money and figures. Under the heading Pay you find Payments (Mollie). You can also type "Mollie" in Search for a setting…. The Mollie window opens.
- Step 2. Choose Connect with Mollie. As long as you are not connected, this is the only button in the window. Jimani sends you on to Mollie.
- Step 3. Log in at Mollie, or create an account there. If you come via the button in the Mollie email or via Continue to Mollie, your company details from Jimani (name, address, country, KvK and VAT number) are already pre-filled at Mollie.
- Step 4. Approve the permissions. Jimani asks for all permissions in one go: payments, refunds, payouts, card terminals and payment methods. After that you automatically return to the Mollie window.
- Step 5. Look in the window to see what is still needed. At the top is the status, for example "Mollie is reviewing your details." or "Mollie still needs details from you.". Under What's still needed there is a button Finish at Mollie for each step, sometimes with a date Due by. As soon as Mollie is done, Jimani automatically makes your store live: it then says "Your payments are on.".
- Owner only. Connecting Mollie determines where your guests' money goes. That is why only the owner may do this. An employee gets the message "Only the owner can connect Mollie.".
- Connection link by email. As a new business you receive an email with the subject "Connect Mollie and receive payments from day one", with the heading "Receive payments with Mollie" and the text "Your account at Jimani is ready. Your payments go through Mollie; we have already filled in your details for you.". The email is signed "Team Jimani". The button Connect Mollie in that email also works without logging in and always gives a fresh link. Jimani can also email you that connection link again later.
- Test phase. A new store can first try everything out with test payments: "Your store is in the test phase." Guests then do not really pay yet. When you start selling for real (opening your webshop, turning on payment for reservations or buying hardware), Jimani asks "Ready to start receiving real payments?" with the buttons Continue to Mollie and Later.
- Old connection. If you were connected before but have not yet approved the current permissions, the window only says "One more step: approve permissions at Mollie" with the button Approve permissions. Without that step, card payments, Tap to Pay and View my Mollie do not work.
- Example
-
You open a new business and receive the Mollie email. You click Connect Mollie, create a Mollie account and approve the permissions. Two days later the Mollie window says "Your payments are on." and guests can pay online.
- Related
-
What can you set in the Mollie window?, Where do I see my Mollie balance, payouts and payments in Jimani?, What do card payments cost with Jimani?
Keywords: connect mollie, mollie connect, receive payments, mollie account jimani, connect with mollie, approve permissions mollie, connection link mollie
Related questions - How do I connect Mollie to my POS?
- How can I turn on online payments and card payments?
- How long does it take before Mollie has approved my account?
- I don't have a Mollie account yet, can I create one via Jimani?
- Who may connect Mollie?
Where do I see my Mollie balance, payouts and payments in Jimani?
- Answer
-
In the Everything about payments screen: Settings > Money and figures > Payments (Mollie). There you see, in tabs, your balance, payouts, payments, refunds, payment methods and the invoices from Mollie. You can also refund a payment and turn a payment method on or off there, without logging in at Mollie.
- Explanation
-
- Step 1. Go to Settings > Money and figures and under Pay choose Payments (Mollie). If your Mollie account is connected, Everything about payments opens. The Mollie window also has the button View my Mollie; it opens the same screen in a new tab.
- Step 2. Choose a tab: Balance, Payouts, Payments, Refunds, Payment methods or Mollie invoices.
- Balance. Available is what Mollie sends to your account with the next payout. Pending has been paid, but not yet released.
- Refund. Go to the Payments tab. For a paid payment from which something can still be refunded, there is the button Refund. Jimani asks "How much do you want to refund? At most ... euros." with the highest amount already filled in; you can also refund part of it. After that it says "The refund is ready at Mollie." and the screen refreshes. The refund then also appears in the Refunds tab.
- Payment methods. For each method you see whether it is on, with the button Turn on or Turn off. You see "The payment method is turned on." or "The payment method is turned off.". Some methods have to be approved by Mollie first; Mollie then does not accept the change.
- Bank account. You manage your bank account and your company details at Mollie itself, not in Jimani.
- Who may do this. The owner always. Other employees only with the role permission Everything about payments in Users and permissions. That permission is off by default, also for the Manager.
- Example
-
A guest paid a €60 deposit online and cancels. You look up the payment in the Payments tab, choose Refund and enter 60. After a few seconds the refund appears in the Refunds tab.
- Related
-
How does Everything about payments work?, How do I connect Mollie to Jimani?
Keywords: mollie balance, mollie payout, view mollie payments, refund mollie, turn on payment method, turn on ideal, everything about payments
Related questions - Where do I see my Mollie balance?
- How do I view my payouts from Mollie?
- Can I refund a payment without logging in at Mollie?
- How do I turn a payment method such as iDEAL or Bancontact on or off?
- Where do I find the invoices from Mollie?
How do I view and export my revenue over a period?
- Answer
-
Go to Settings > Money and figures > Reports. Choose the Financial reporting tab (reservations) or, in the POS, the Financial overview. Set the period, click Search and choose Export for Excel or Print for a pdf.
- Explanation
-
- Step 1. Go to Settings > Money and figures and under Figures choose Reports. At the top are the tabs you may see, such as Financial reporting and Progress report.
- Step 2. If your business has more modules, choose the module at the top, for example Restaurant or Activities.
- Step 3. Choose From date and Date to. With minus and plus you shift one day. Optionally filter by reservation type, Availability or Payment method.
- Step 4. Click Search. You see the total revenue (with In advance, Register and Open), the number of reservations and guests, the averages and the payment methods, with the reservations below that.
- Step 5. Choose Export for an Excel file with a tab per section, or Print for a pdf. Both use the filters you have chosen.
- In the POS. In the POS view Export and Print are not there; open the report in the dashboard instead.
- Permissions. An employee only sees this with the role permissions Financial reporting and View revenue and reports.
- Example
-
Your accountant asks for the revenue of the third quarter. You choose 01-07 up to and including 30-09, click Search and then Export, and email the Excel file.
- Related
-
How does Financial reporting work?, Can I connect Jimani to my accounting package?
Keywords: view revenue, export revenue, excel report, revenue per month, financial report, quarterly revenue
Related questions - How do I view my revenue for this month?
- How do I download my revenue to Excel?
- Where do I find the financial overview?
- How do I print a revenue overview for my accountant?
How do I compare my revenue and reservations with last month or last year?
- Answer
-
With the Progress report: Settings > Money and figures > Reports, tab Progress report. Choose a Period, under Compare with choose Previous period, Last week, Last month or Last year and click Search. Jimani compares on the same weekdays.
- Explanation
-
- Step 1. Go to Settings > Money and figures > Reports and open the Progress report tab.
- Step 2. Under Period choose Today, This week, This month, This year or Custom period.
- Step 3. Under Compare with choose what you want to compare with. Below the field you see the dates of the comparison period.
- Step 4. Optionally choose a filter (reservation type, Source, Part of day) and the View per day, week or month. Click Search.
- Same weekday. Last week is 7 days back and last year 52 weeks: you compare a Saturday with a Saturday. Last month is the previous calendar month (October against September).
- No-shows and cancellations are not counted by default; turn them on with Include no-shows and Include cancelled.
- Save. Export with Export (Excel) or Print (pdf).
- Example
-
It is 20 October. You choose This month and Last year. Jimani places 1 up to and including 20 October next to the same weekdays of last year and shows the difference in percentages.
- Related
-
How does the Progress report work?, How do I view and export my revenue over a period?
Keywords: compare revenue, compare last year, revenue growth, progress, compare reservations, compare busy times
Related questions - How do I compare my revenue with last year?
- Am I making more revenue than last month?
- Where do I see whether my business is growing?
- How do I compare the number of reservations with last week?
Can I pass transaction costs on to my guests?
- Answer
-
Yes, for online payment for a reservation or ticket. Turn on the add-on Transaction costs, create transaction costs with a name and a price, and under a reservation type choose "Do you want to charge transaction costs?" Yes. The costs then appear on the guest's bill.
- Explanation
-
- Step 1. Turn on the add-on Transaction costs under Settings > Add-ons. Transaction costs only work with a connected Mollie account.
- Step 2. Create the transaction costs in your module. In Restaurant you choose Transaction costs with the plus button (What do you want to add); in the hotel the Transaction costs card is among the products.
- Step 3. For each language enter the Name (at most 50 characters) and the Description. Choose Next.
- Step 4. Enter the Price and choose the VAT group. Choose Save.
- Step 5. Open the reservation type. Under Payment set "Do you want to receive a payment for this reservation?" to Yes. Below it is "Do you want to charge transaction costs?": choose Yes and under Transaction costs choose which costs this reservation gets.
- Turning off. Open the transaction costs and set Active to No: they can then no longer be chosen. Or choose Delete.
- Without Mollie you cannot enter a price; the price field is then off with a warning.
- Example
-
You create "Online payment service fee" of €0.50 and choose it for the reservation type Dinner. A guest who books and pays for a dinner online sees €0.50 transaction costs on their bill.
- Related
-
What can you set under Transaction costs?, How do I connect Mollie to Jimani?, Can I pass on transaction costs to the buyer of a ticket?, How do extra products and transaction costs work for an activity?
Keywords: transaction costs, service fee online payment, pass on costs to guest, transaction costs reservation, payment fees guest
Related questions - Can I pass the cost of online payment on to the guest?
- How do I charge service or administration fees on a reservation?
- How do I turn on transaction costs for tickets?
- Who pays the iDEAL costs for online reservations?
What does the red line "Refund needed" or "Underpaid" on a booking mean?
- Answer
-
That red line means something is wrong with the payment for that booking: a payment was made for a cancelled booking, too little or a different amount was paid, or a refund to the card failed. Resolve it (have the difference paid or refund it) and then choose Handled.
- Explanation
-
- Where you see it. At the top of the detail screen of a webshop order, reservation, activity, appointment or ticket order, and as a red label in the list. You also receive an email about it.
- Refund needed. "... received via payment ..., but the booking had already been cancelled. Refund the amount."
- Underpaid. "... received via payment ..., but ... was outstanding. Have the difference paid or refund it."
- Amount differs. "... received via payment ..., but the booking is set at .... Check it and have the difference paid or refund it."
- Card refund failed. A return at the POS did not go back to the customer's card: refund in cash.
- Refund not recorded. The money went back to the card, but the return is not in the POS: check the receipt.
- Step 1. Look up the payment with the payment number from the line, for example in Everything about payments (Settings > Money and figures > Payments (Mollie)).
- Step 2. Refund (in Everything about payments, button Refund) or have the guest pay the difference.
- Step 3. Choose Handled in the red line. The line turns green, showing who handled it and when. If that fails, you see "Couldn't complete. Please try again."
- Example
-
A guest cancels their reservation, but then still pays the €25 deposit. The reservation says "Refund needed". You refund the €25 in Everything about payments and choose Handled.
- Related
-
Where do I see my Mollie balance, payouts and payments in Jimani?, How does Everything about payments work?
Keywords: refund needed, underpaid, amount differs, red payment message, payment cancelled reservation, handled
Related questions - What does Refund needed mean on a booking?
- What does Underpaid mean on a reservation?
- Why is there a red label on an order?
- How do I get rid of the red message on a payment?
- A guest paid for a cancelled booking, what should I do?
How do I print a list or overview?
- Answer
-
Click the printer icon (Print) above the list. Jimani turns the list as it currently appears on your screen into a pdf and opens it in a new tab. There you print it or save it.
- Explanation
-
- Where. The icon is above the lists of, among others, Reservations (day, week, last and upcoming), appointments, activities, tickets, the hotel planner, Search Order and Day closing.
- What is on it. Exactly what is in the active view, with the same filters: only the visible columns and lines, and for a drop-down list the chosen value. So first adjust the filters, the date or the columns the way you want them on paper.
- Please wait. A tab opens immediately with Please wait... and then the pdf.
- Period. For a day or week, the chosen day or week (Monday to Sunday) is on the list. On the Last tab it says last 100 and for Upcoming it says upcoming.
- If it does not work. Then you see The print list could not be created. Please try again. Try again.
- Not the same as a receipt. This is an overview on paper or pdf; a till receipt or day closing on the receipt printer is printed by the POS itself.
- Example
-
You set the Reservations list to today, hide a column you do not need and click the printer icon. In a new tab there is a pdf with only today's reservations, without that column, with your business's logo on it.
- Related
-
How do I make a day closing myself and how do I download, email or print it?
Keywords: print list, print reservations, print overview, printable list, pdf of list, print daily overview
Related questions - How do I print an overview of my reservations?
- How do I print today's list?
- Can I save a list as a pdf?
- Why is there more or less in my printout than on my screen?
How do I get a ready-made website from Jimani?
- Answer
-
Jimani makes a website for your business at yourbusiness.jimani.site, with your menu or offer, opening hours and booking or ordering. You open it in Settings > Your business > Website, adjust texts and photos and click Turn on website. The website costs €29 per month and the first 14 days are free.
- Explanation
-
- Step 1. Go to Settings > Your business > Website. You end up in My website. A draft was already made when you signed up: the AI writes the texts based on your old website (if you entered one) and the details from the sign-up, and looks for photos from your old site or makes an atmosphere photo. If the AI fails, there are default texts that you adjust yourself.
- Step 2. Click a text, photo, button, the menu or the footer in the site and adjust it on the right. See How does My website work in Jimani? for all the tabs.
- Step 3. Click Test your website to view the site in a new tab. As long as you don't turn it on, visitors see nothing.
- Step 4. Click Turn on website. The website is then online and the first 14 days are free. After that the button is called Publish: use it after every change, so visitors see the new state.
- Your address. Your site is at yourbusiness.jimani.site; you change the part before .jimani.site on the Address tab. Connecting your own domain is also possible: see How do I connect my own domain to my Jimani website?.
- What comes from Jimani. The site takes prices, products and opening hours from Jimani itself. If you change them under Products or Opening hours, the site is automatically correct.
- Booking and ordering. The blocks Book, Order, Appointment, Tickets and Activities show the widget of that module on your homepage. If you have a module without an active widget, that page is not yet visible to visitors: first create a widget (see How do I put the widget on my own website?).
- More languages. With the Multilingual (website) integration, the AI translates your texts into a maximum of two extra languages.
- Stopping. You can always stop: Website is a paid feature that you can turn off again. A paid feature then stays on until the last day of the month; see Can I try a paid feature first, and how do I cancel it?.
- Example
-
A restaurant opens My website, adjusts the welcome text, chooses the main color under Style and clicks Turn on website. An hour later it changes the opening hours under Opening hours; the site shows them immediately.
- Related
-
What does the Jimani website cost?, How does My website work in Jimani?, How do I connect my own domain to my Jimani website?
Keywords: make a website, own website, jimani.site, ready-made website, turn on website, homepage
Related questions - Can Jimani make a website for my business?
- What does a website cost and how do I turn it on?
- How do I adjust the texts and photos of my website?
- Is there a trial period for the website?
- At which address will my website be?
What does the Jimani website cost?
- Answer
-
The ready-made website costs €29 per month, excluding VAT. The first 14 days are free and you can stop at any time. If you want the site in extra languages, Multilingual (website) is added: €10 per month for a maximum of two extra languages.
- Explanation
-
- Website: €29 per month. You get the site at yourbusiness.jimani.site or on your own domain, with your texts, photos, color, font and pages. Prices, products and opening hours come from Jimani.
- Multilingual (website): €10 per month. The AI translates all your texts into a maximum of two extra languages; visitors choose their language at the top of the site. It only works together with Website, and you can only turn it on when Website is on.
- Free trial. In My website the draft says: "Website: €29 per month, the first 14 days free. You can stop at any time." If you turn on the website with Turn on website, the 14-day trial begins; after that the website is added to your monthly invoice.
- What is free. Editing the draft costs nothing: you see your site first and visitors only see it after Turn on website. The widgets (online booking, online ordering, ticket sales) are also free and keep working on your own website, without a Jimani website.
- AI. Having texts written, making an AI photo and translating with AI are deducted from your AI credit; see What does using AI in Jimani cost?.
- Cancelling. Turn off the Website feature. A paid feature stays on until the last day of the month; see Can I try a paid feature first, and how do I cancel it?.
- Overview. All paid features are in Which features cost money?.
- Example
-
A salon turns on the website and pays nothing for the first 14 days. After that she pays €29 per month. If she also wants the site in English and German, €10 per month is added: together €39 per month excl. VAT.
- Related
-
How do I get a ready-made website from Jimani?, How does My website work in Jimani?
Keywords: website price, website cost, jimani.site cost, multilingual website price, what does a website cost, website trial
Related questions - What does a website via Jimani cost?
- Can I try the Jimani website for free?
- What does a multilingual website cost?
- Can I cancel my website at any time?
How do I connect my own domain to my Jimani website?
- Answer
-
In My website, go to the Address tab, enter your domain under Custom domain (preferably with www, for example www.yourbusiness.com) and add the two DNS records that Jimani shows at your domain registrar: a CNAME and a TXT. Then click Check now. As soon as the records are correct and the secure connection is there, your website is on your own domain.
- Explanation
-
- Step 1. Go to Settings > Your business > Website and open the Address tab. The website must be on; otherwise Jimani first asks for Turn on website.
- Step 2. Under Custom domain, enter your domain, for example www.yourbusiness.com. An address from Jimani itself (under .jimani.site) is not a custom domain. It is also possible without www, but most domain registrars cannot set a CNAME on a domain without www. Jimani then advises using www (button Use www.yourbusiness.com) and having your registrar forward the domain without www to www.
- Step 3. You see the step-by-step plan Connect domain. Under "Step 1: where is your domain registered?" choose your domain registrar: TransIP, Hostnet, Strato, Versio, one.com, GoDaddy or Other. You get a short explanation of where to find the DNS settings and a button to the login page of that party.
- Step 4. Under "Step 2: add these records at your domain registrar" are two records with Type, Name and Value, each with a Copy button. Record 1 is a CNAME with your domain as the name; record 2 is a TXT with
_jimani. before your domain as the name and a code starting with jimani- as the value. Add both records exactly like this at your registrar. - Step 5. Under "Step 3: check that it works" you click Check now. DNS changes can take a few hours. Jimani also checks itself every hour and emails you as soon as your website is on your own domain.
- Steps and messages. The status goes from "Waiting for DNS" to "Security (SSL) is being created" and then "Active". If a record isn't there yet, you see "The CNAME record isn't there yet." or "The TXT record isn't there yet." If checking doesn't work, it says "Checking didn't work just now. Try again later." Below the steps it says when it was last checked.
- Afterwards. As soon as the domain is active, the widget links of your site move along to the custom domain (where you haven't entered a link of your own for the widget).
- Remove domain. With the Remove domain button you detach the custom domain again; your site stays at yourbusiness.jimani.site.
- Help. If you can't work it out, contact the helpdesk via the Contact the helpdesk button. Never send your login details.
- Example
-
Your domain www.bistro-voorbeeld.nl is with TransIP. You choose TransIP, copy the CNAME record and the TXT record _jimani.www.bistro-voorbeeld.nl to the DNS tab at TransIP and click Check now. After a few hours you get an email that your website is on your own domain.
- Related
-
How do I get a ready-made website from Jimani?, How does My website work in Jimani?
Keywords: connect own domain, set up dns website, cname txt, jimani.site, domain name website, forward www
Related questions - How do I connect my own domain name to my website?
- Which DNS records do I have to add at my domain registrar?
- How do I make sure my website is at www.mybusiness.com?
- Why doesn't my domain work yet after connecting it?
How do I set my logo, colors and font?
- Answer
-
Go to Settings > Your business > Branding. Upload your logo, choose a ready-made brand style or take the colors from your own website, adjust the eight colors, the corner radius and the font if needed and click Save. Your widgets, website, emails and receipt follow that branding.
- Explanation
-
- Step 1. Go to Settings > Your business > Branding.
- Step 2. Under Logo, click Choose logo and choose a png, jpg, webp or gif of at most 5 MB. The logo is stored immediately and is the same logo as in your business details.
- Step 3. Under Choose a brand style, choose one of the thirty examples, or under From your website enter the address of your website and click Get from my website. The latter costs AI credit (see What does using AI in Jimani cost?). You first see the result on the right in the preview.
- Step 4. If needed, under Colours and fonts adjust the Main color and the other seven colors, the Corner radius and the Font. Type a color code or choose with the color swatch.
- Step 5. On the right under Preview, look at Website, Widget, Mail and Receipt. If there is a message about too little contrast, click Make readable.
- Step 6. Click Save.
- What follows the branding. Widgets follow it by default. Per widget you can choose own colors: go to Settings > Guests and bookings > Widgets, open the widget, choose Change colors > Edit and set Custom colours to Yes. If Custom colours is set to No, the widget changes along when you adjust the branding.
- All widgets the same again. If widgets have own colors, there is a message at the top of Branding with the button Apply to all widgets.
- Website and webshop. The website uses the main color from your branding and then shows "The color comes from your branding. Change it there; your site, widgets, emails and POS then follow." The webshop editor has the choice Branding or Custom colours under Style.
- Receipt. A receipt printer prints in black and white: your logo (in shades of grey) and your name appear on the receipt, no colors.
- Example
-
You choose the brand style Warm bistro, upload your logo and click Save. Your booking widget then has the same red buttons and the same font as your confirmation email.
- Related
-
How does Branding work in Jimani?, How do I put the widget on my own website?
Keywords: set branding, upload logo, widget colors, font, brand color, change colors
Related questions - How do I put my logo and colors in Jimani?
- How do I change the font of my widget and website?
- Can I take over the colors of my own website?
- Where do I upload my business logo?
- How do I make my receipt and emails appear in my branding?
How do I put the widget on my own website?
- Answer
-
Go to Settings > Guests and bookings > Widgets, click the tile of your widget and choose View code. Copy the code with Copy code and paste it into your website where the widget should appear. If you can't paste code, use the separate Link, or have Jimani email the code to your web developer with Send to web developer.
- Explanation
-
- Step 1. Go to Settings > Guests and bookings > Widgets. For the webshop the screen is called Online webshop. If you have widgets for more modules, choose the module at the top.
- Step 2. If you don't have a widget yet, click Add widget and go through the three steps (see Can I create multiple widgets?).
- Step 3. Click the tile of the widget. The widget overview opens.
- Step 4. Choose View code. You see a piece of code with
<script src='.../v2/script.js'>, a spot <div id='jimaniReservation'></div> and below it CallWidget({ ... }) with the number of the widget (id), the language of your business (lang), the type (restype), fixed: 'relative' and your key (key). Click Copy code. - Step 5. Paste the code into your website where the widget should appear, for example in an HTML block of your website builder. The widget then sits in the middle of the page and grows with the content.
- Step 6. In the widget overview, click Test to see the widget in a new tab as a guest sees it.
- Only a link. Below the code is Link, with the Copy button: "Use this link behind a button or in the menu of your website." The guest then lands on the widget page itself.
- Web developer. Under Send to web developer, enter the email address and click Send. Jimani emails the code and the link, with the name of your business. The reply address is that of your business.
- Return page. For activities, tickets and the webshop, the guest returns after paying to the page from the field Link to the widget (Edit). If you leave this empty, it is the page on your Jimani website where the widget is, otherwise the widget itself. For table and appointment widgets you redirect the guest afterwards with Redirect on the View tab.
- Your Jimani website. If you have the Jimani website, you don't need to paste anything: the blocks Book, Order, Appointment, Tickets and Activities show the widget themselves. See How do I get a ready-made website from Jimani?.
- QR code. Jimani does not make a QR code of the widget itself: there is no button for it in the widget overview. If you want one, put the Link in a QR generator. The QR codes under Settings are for tables, see Can a guest order and pay at the table with a QR code?.
- Colors and texts. The widget follows your Branding; see How do I set my logo, colors and font?. You adjust texts and buttons on the View tab.
- Example
-
A restaurant copies the code of the Book a table widget and pastes it into an HTML block on the Book page of its website. The booking screen appears on the page in the style of the restaurant.
- Related
-
How does the Widgets overview work in Jimani?, Can I create multiple widgets?, How do I get a ready-made website from Jimani?
Keywords: widget on website, embed widget, widget code, widget link, booking on own website, webshop on website
Related questions - How do I get the booking button on my website?
- How do I paste the widget code on my site?
- My web developer has to place the code, how does he get it?
- Can I also just share a link to my widget?
- Where do I find the embed code of my widget?
Can I create multiple widgets?
- Answer
-
Yes, you can create as many widgets as you like. Each widget has its own name, its own settings, its own code and its own link. Handy for example for a separate widget for your homepage, a landing page or the terrace. Go to Settings > Guests and bookings > Widgets and click Add widget.
- Explanation
-
- Step 1. Go to Settings > Guests and bookings > Widgets (for the webshop the screen is called Online webshop). If you have more than one module with widgets, choose the module at the top.
- Step 2. Click Add widget at the top right. You go through three steps: Step 1 of 3: name and type, Step 2 of 3: what the guest chooses, Step 3 of 3: layout.
- Step 3. Give the widget a name (only you see it, in the list of widgets) and choose the type. In step 2, choose what the guest may choose in this widget; everything is on and you remove what is not allowed. In step 3, choose the colors and click Save.
- Or copy. If you want a widget with the same settings, click the tile of the widget and choose Make a copy. The copy takes over the settings and the branding; give it a name and click Save.
- Different per widget. Each widget has its own reservation types (for the restaurant), its own texts on the View tab, its own Link to the widget and its own colors (Custom colours).
- Which types. Depending on your module: Book a table, Buy tickets, Book an activity, Make an appointment, Online ordering, Opening hours, Cancel reservation, Survey, Kiosk, Preparation screen, Scan, Confirm, Combination or Book a room (hotel). With Combination you merge several widgets into one, each with a title.
- Main widget. Per module the main widget comes first in the list: the oldest active widget of the main type of that module.
- Placing. You place each widget separately; see How do I put the widget on my own website?.
- Example
-
A restaurant makes a widget Booking on the website for lunch and dinner and a second widget Terrace with only the reservation types for the terrace. Each widget gets its own code for its own page.
- Related
-
How does the Widgets overview work in Jimani?, How do Add widget and Edit widget work in Jimani?
Keywords: multiple widgets, add widget, widget copy, extra widget, widget limit, widget terrace
Related questions - Can I have more than one booking widget?
- How do I make a separate widget for my terrace?
- How do I add a new widget?
- Is there a limit to the number of widgets?
How do I change the texts and buttons of my widget?
- Answer
-
Open your widget in Settings > Guests and bookings > Widgets, choose Edit and go to the View tab. Under Texts, fill in per language the Headline, Intro text, Start button, Booking button, Confirmation text and Checkbox text. If you leave a field empty, the default text stays, already translated into every language. Then click Save.
- Explanation
-
- Step 1. Go to Settings > Guests and bookings > Widgets and click the tile of the widget.
- Step 2. Choose Edit and open the View tab (next to Settings).
- Step 3. Under Language and logo, choose which language the guest sees: Default (the language from the code on your website), Automatic (the language of the guest's browser, if your business has that language) or a fixed language. Set Show logo to Yes if your logo should be at the top.
- Step 4. Under Texts, choose the tab of the language and fill in the fields. Each language of your business has its own tab. Maximum lengths: Headline 120 characters, Intro text 1000, the two buttons 60, Confirmation text 2000, Checkbox text 300.
- Step 5. If you want to change the color of the headline or the intro text, enter a color code under Color of the headline or Color of the intro text. Empty is the color of your branding, or white on a photo.
- Step 6. Check in the Live preview on the right that it is right and click Save. Guests only see the change after Save.
- What the guest has to fill in. Under Guest details you choose which fields are required (Salutation, Last name, Phone number, Address, Postal code, City, Country) and whether there is a checkbox for your terms. Name and email address are always required.
- Afterwards. Under Afterwards you choose whether the guest goes after five seconds to a page of your own website (Redirect), for example a thank-you page.
- Webshop. For a webshop widget you adjust the homepage and the menu in the webshop editor (Edit webshop). The texts for the pickup or delivery screen and the confirmation screen are in Settings > Guests and bookings > Delivery and pickup > Webshop settings (or type "Webshop settings" in Search for a setting…). See How does the Webshop settings window work?.
- Example
-
For Start button you enter "Reserveer een tafel" in Dutch and "Book a table" in English. The guest sees the button text in the language that suits them.
- Related
-
How does the View tab of a widget work?, How does the Widgets overview work in Jimani?
Keywords: widget texts, widget button text, confirmation text, widget welcome text, widget language, change widget text
Related questions - How do I change the text on the button of my booking widget?
- How do I adjust the confirmation text of a reservation?
- Can I set the texts in the widget per language?
- How do I change the headline or intro text of my widget?
Is the Jimani widget accessible to people with a disability?
- Answer
-
Partly. Since 14-10-2026 the Jimani widgets have been adapted to the European accessibility rules (EAA, WCAG 2.1 AA): they can be operated with the keyboard, buttons have a name for screen readers and fields clearly show the focus. An accessibility statement and a full measurement of all screens do not exist yet. Jimani does check the colors you choose yourself for readability.
- Explanation
-
- What is built into the widget. Categories, the category grid and product choices in the webshop can be chosen with Tab and Enter or space. Buttons without text have a name for a screen reader: the arrows in the menu, Back, the language choice and the country code at the phone number. The name of the fields Guests and Date contains the visible value and a date is read out as a date (also with day 1 up to and including 9). An input field clearly shows the focus. The widget has a main area (main landmark), so a screen reader can jump straight to it. A chosen type, time or date gets readable text: if the set text color is too weak (less than 4.5:1), it becomes dark or white.
- Your colors. In Settings > Your business > Branding and on the colors page of a widget (Change colors > Edit), Jimani tests the colors against WCAG 2.1 AA. If a color pair is too weak, you see "contrast x:1, needed y:1" with the button Make readable and a suggestion. If everything is fine, it says "All colors are easy to read (WCAG AA)." In My website, Jimani warns at a button or text: "This text is hard to read on this background." with the button Use a readable colour. Jimani does not force the readable color: the choice stays with you.
- What does not exist yet. An accessibility statement with a contact point (for example a page /toegankelijkheid) does not exist yet. Only the start and checkout screens of six widgets have been measured (hospitality, salon, ticketing, activities, webshop and webshop checkout); the steps after that, hotel, the kiosk and the websites of customers have not been measured yet. At the last measurement, small points remained; the biggest was the contrast in colors that a business chooses itself.
- Do you have to comply? The European directive has applied since 28-06-2025 to, among others, online shops and booking. Micro-enterprises (fewer than 10 employees and at most €2 million turnover or balance sheet total) are exempt. This is not legal advice; if in doubt, ask an adviser.
- What you can do yourself. Choose readable colors and have Jimani check them, and test your own page with the keyboard.
- Example
-
A restaurant chooses orange with white text for its buttons. On the Branding page it sees the message about too little contrast, clicks Make readable and gets a darker orange suggested.
- Related
-
How does Branding work in Jimani?, How do I set my logo, colors and font?
Keywords: accessibility, eaa, wcag, screen reader, keyboard widget, color contrast, accessibility statement
Related questions - Is my booking widget accessible to blind and visually impaired people?
- Can the widget be operated with the keyboard?
- Does my website have to comply with the accessibility law (EAA)?
- Does the widget work with a screen reader?
- Does Jimani have an accessibility statement?
Can I have my own app made for my guests in Jimani?
- Answer
-
Not via Settings. The Your App module, with which guests could download an app of your business via the Google Play Store and the Apple App Store, is marked as outdated and is no longer shown in Settings. Your guests now book and order via the widget on your own website or via the Jimani website, which also works on a phone.
- Explanation
-
- What Your App was. The screen promised: "Launch your own app that guests can download via the Google Play Store and the Apple App Store. With this app guests can book directly, follow the latest news and easily find all your business information." It had parts such as App data (logos, icon and menu or price list as a pdf), blogs and a final check.
- What there is now. The Your App tile no longer appears in the Settings list and there is no menu entry or button to it anymore.
- Alternative 1: the widget. Put the booking or ordering widget on your own website; it adapts to phone and computer. See How do I put the widget on my own website?.
- Alternative 2: the Jimani website. A ready-made website with news (blocks and a blog), opening hours and booking, which you can view on a phone with the Phone choice in My website. See How do I get a ready-made website from Jimani?.
- Branding. You set your logo and colors in one place: How do I set my logo, colors and font?.
- Example
-
A restaurant wanted an app with news and booking. It turns on the Jimani website and adds the Book block; guests book there from their phone.
- Related
-
How do I put the widget on my own website?, How do I get a ready-made website from Jimani?
Keywords: own app, app for guests, your app, app store, google play, guest app
Related questions - Can I have my own app made for my business?
- Where did the Your App module go?
- How can guests book or order via their phone?
- Can my business be in the App Store or Google Play?
How do I put my website in more languages?
- Answer
-
First turn on the Multilingual (website) feature (€10 per month, only together with Website). Then in My website go to the Languages tab, choose a language under Add language and click Translate with AI. The AI translates all your texts; you can add a maximum of two extra languages. Visitors choose their language at the top of the site.
- Explanation
-
- Step 1. If Multilingual (website) is still off, you see on the Languages tab: "Do you want your website in more languages? Turn on the Multilingual integration." with the button Go to Integrations. Turn on the feature. It costs €10 per month excl. VAT and is only possible when Website is on; see What does the Jimani website cost?.
- Step 2. Go to Settings > Your business > Website and open the Languages tab. At the top is your Main language.
- Step 3. Under Add language, choose a language from the list and click Translate with AI. You see "Translating..." and then the language is in the list. The translation costs AI credit; see What does using AI in Jimani cost?.
- Step 4. Adjust texts per language. Click a text or button in the site; the panel shows above the text which language you are editing (for example Language: EN). Each language has its own text and button text.
- Step 5. Click Publish. Visitors choose their language at the top of the site.
- Translate again. The magic wand icon at a language translates that language again. Note: that overwrites all texts of that language, including what you had adjusted yourself. With the trash icon you remove a language.
- Maximum. If you have two extra languages, it says "You have reached the maximum of two extra languages."
- Which languages. The website knows six languages: Dutch, English, German, French, Spanish and Italian. Your main language plus a maximum of two extra languages.
- Widgets. You set the language of the booking or ordering widget separately on the View tab of the widget; see How do I change the texts and buttons of my widget?.
- Example
-
A hotel with Dutch as its main language adds English and German. The AI translates the texts; the hotel improves the German welcome text by hand and publishes. If the hotel translates German again later, that also overwrites that improvement of its own.
- Related
-
What does the Jimani website cost?, How does My website work in Jimani?
Keywords: multilingual website, website in english, translate with ai, extra languages website, multilingual website
Related questions - How do I put my website in English?
- Can my website be translated automatically?
- How many languages can my website have?
- What does a bilingual website cost?
How do I measure the visitors of my Jimani website with Google Analytics?
- Answer
-
In My website, go to the More tab and enter your measurement ID under Google Analytics or Tag Manager, for example G-AB12CD34EF. Then publish your website. Jimani then loads Google Analytics on your published site. The site has no cookie banner, so consent is set to declined in advance: Analytics places no cookies and you only see estimated visitor numbers.
- Explanation
-
- Step 1. Look up your measurement ID in Google Analytics. It starts with G-, GT-, AW- or DC- followed by 4 to 15 letters and digits.
- Step 2. Go to Settings > Your business > Website and open the More tab.
- Step 3. Enter the ID under Google Analytics or Tag Manager. Only the measurement ID, no script or code: the field takes a maximum of 20 characters.
- Step 4. Click Publish. The ID is stored with your draft and only works on the published site, not in the draft view.
- An invalid ID. If the ID doesn't fit the pattern, Jimani ignores it without a message. A container ID of Google Tag Manager (starts with GTM-) is therefore not accepted.
- What you see in Analytics. When loading, Jimani sets consent for storage, advertising and personalisation to declined (Google Consent Mode v2). No cookies and no advertising data come in; you see estimated numbers.
- Do you want to measure with cookies? That is only possible once the site gets a cookie banner. There isn't one now.
- Map. The route map loads Google Maps by default only after a click by the visitor; with Show map straight away it loads immediately, with cookies from Google. See How does My website work in Jimani?.
- Example
-
You enter G-AB12CD34EF, publish and after a day look at the visitor numbers of your site in Google Analytics, without visitors getting a cookie message.
- Related
-
How does My website work in Jimani?, How do I get a ready-made website from Jimani?
Keywords: google analytics website, measurement id, tag manager, measure visitors, cookie banner, consent mode
Related questions - How do I connect Google Analytics to my website?
- How do I see how many visitors my website has?
- Where do I enter my Analytics measurement ID?
- Does my Jimani website need a cookie banner?
- How do I use Google Tag Manager on my site?
Can a guest pay on arrival instead of online when booking?
- Answer
-
Yes. Set Pay afterwards to Yes at the widget. The guest then does not have to pay anything online while booking and only sees an overview of the total costs that still have to be paid on arrival. It is possible for the widgets for tables, activities, salon and tickets, not for the webshop.
- Explanation
-
- Step 1. Go to Settings > Guests and bookings > Widgets and click the tile of the widget.
- Step 2. Choose Edit. On the Settings tab, in the first step, is Pay afterwards with Yes or No.
- Step 3. Set it to Yes and click Next and then Save. By default it is set to No.
- What the guest sees. The payment screen shows an overview of the total costs; the reservation is recorded with the payment method "pay later" instead of online.
- When handy. For higher amounts, for example a package or a group booking, where you would rather settle at the door.
- Per widget. The choice applies to that one widget. So you can have a widget with and a widget without online payment; see Can I create multiple widgets?.
- Example
-
A restaurant makes a separate widget Group dinner and sets Pay afterwards to Yes there: the group books online and pays on arrival.
- Related
-
How do Add widget and Edit widget work in Jimani?, How does the Widgets overview work in Jimani?
Keywords: pay afterwards, pay on arrival, no online payment, pay later widget, no payment when booking
Related questions - Can a guest pay only when they are there, instead of online in advance?
- How do I let guests pay on the spot for a reservation?
- How do I turn off online prepayment?
- Can I turn on pay afterwards for my webshop?
How do I schedule a visit at the customer's home, for example to take measurements?
- Answer
-
Switch on the add-on Customer visits (€10 per month). Set up your visit types, the travel time and your service area under Customer visits > Settings and give your employees working hours. Then you schedule in the Customer visits menu with New visit: customer, visit address, type, employee and a free time. Jimani keeps the travel time before and after the visit free.
- Explanation
-
- Step 1. Go to Settings > Add-ons and switch on Customer visits. The menu item Customer visits is added.
- Step 2. Open Customer visits > Settings, tab Visit types, and choose Add. Fill in the name (such as Measuring curtains), the Duration (minutes), the Price or call-out fee (may be 0), the Travel time before (minutes) and the Travel time after (minutes). By default the travel time is 30 minutes. Tick the employees who do this visit; nothing ticked = all employees.
- Step 3. Tab Employees: these are the same employees as in Salon. Add them with Add and set the working hours of each employee to Open, with breaks and days off. Visits are only scheduled within those working hours.
- Step 4. Tab Service area: fill in the four digits of the postcodes, individually or as a range, separated by commas (for example 4300-4399, 4400). Empty means everywhere.
- Step 5. Open the Customer visits menu and choose New visit. Search for the customer by name, phone, email or postcode, or choose New customer. The Visit address is the customer's address by default; change it if the visit is somewhere else. The address is required.
- Step 6. Choose the Visit type, the Employee (or No preference) and the Date. Under Time you only see the times at which the visit, with the travel time before and after, fits into the employee's schedule. Choose a time and Save.
- Outside the service area. If the address is outside your service area, you see a warning. You can still save.
- The schedule. One row per employee, time from left to right. Grey with a little car is the Travel time; hatched is Not scheduled (outside working hours, a break or a day off).
- The customer. If the customer has an email address, they immediately get a confirmation ("Our employee will come on ... at ... to ...") and a reminder the day before the visit.
- Example
-
Measuring curtains takes 75 minutes with 30 minutes of travel time before and after. If there is already a visit at 10:00, the employee is busy from 09:30 to 11:45 and the next visit can start at 12:15 at the earliest.
- Related
-
How does Customer visits work in Jimani?, How do I let customers schedule a home visit themselves?
Keywords: customer visit, taking measurements, home visit, on location, travel time, service area, technician, adviser
How do I let customers schedule a home visit themselves?
- Answer
-
In addition to Customer visits, also switch on Online booking (Customer visits) (€10 per month). For the visit types that customers may schedule themselves, set Bookable online to Yes, and place the widget from Customer visits > Settings > Book online on your website. The customer chooses the visit, fills in postcode and house number and chooses a free day and time.
- Explanation
-
- Step 1. Settings > Add-ons: switch on Online booking (Customer visits). This is only possible together with Customer visits.
- Step 2. Customer visits > Settings > Visit types: open a type and set Bookable online to Yes. Only those types appear in the widget.
- Step 3. Tab Book online: copy the Link to the widget or the Code for your website and put it on your website.
- What the customer does. They choose the visit, fill in postcode and house number (street and city usually fill in automatically), choose a day and a time, fill in their details and choose Schedule visit.
- Service area. If the address is outside your service area, the widget stops with the message "Unfortunately we do not come to this address. Please contact us." and your phone number.
- Times. The widget only shows times at which an employee who does the visit is free, including the travel time before and after. When scheduling, Jimani checks this once more.
- Confirmation. The customer sees "Our employee will come on ... at ... to ..." and gets a confirmation by email and a reminder the day before. The visit is immediately in your schedule.
- Example
-
A customer in 4331 AB chooses Measuring curtains on Saturday at 09:30. The visit goes to the first employee who is free then, with the travel time before and after blocked.
- Related
-
How do I schedule a visit at the customer's home?, How does Customer visits work in Jimani?
Keywords: online booking, widget, schedule home visit, measuring appointment, customer schedules themselves, website
On Users you create employees and change their details, role and PIN. On User rights the owner sets Yes or No per role and per section. Both are under Settings > Your business > Users and permissions, as two tabs.
Where to find it: Settings > Your business > Users and permissions (/CompanyUsers), User rights tab (/settings/roles)
All buttons, settings and messages of this screen
Hours overview shows the clocked hours per week and per employee, My hours shows an employee only their own hours, and Revenue per employee shows the POS revenue per employee of the salon. The first two work with the Time tracking add-on, the third with the Salon add-on.
Where to find it: Settings > Your business > Your team > Time tracking, which opens the Hours overview (/Urenoverzicht); My hours (/MijnUren); Settings > Money and figures > Reports, Revenue per employee tab (/Medewerkeromzet)
All buttons, settings and messages of this screen
Settings has five groups as large tiles: Your business, Till and products, Money and figures, Guests and bookings and Communication, with the Add-ons tile last. Click a group and you see Frequently used at the top and below it the parts per heading. With Search for a setting… you find everything, including what is not in view.
Where to find it: Menu > Settings (/Settings); you can open a group directly with, for example, /Settings?groep=Zaak
All buttons, settings and messages of this screen
Under Add-ons you turn features and connections on or off. Most are free; a fixed list costs €5 to €29 per month (excl. VAT), Repairs costs €150 one-off and ticket sales €0.49 per ticket sold. You open it with the Add-ons tile at the bottom of Settings.
Where to find it: Settings > Add-ons (/Settings/ExtraPaidOptions)
All buttons, settings and messages of this screen
Under Company details you enter the name, logo, type of business, address and contact details of your business. These details appear on your invoices, order and reservation confirmations and in the widget. You can find it under Settings > Your business > Business details and opening hours.
Where to find it: Settings > Your business > Business details and opening hours (Company details window, /Settings/CompanyInfo)
All buttons, settings and messages of this screen
The VAT rate of a product depends on its VAT group. You create the VAT groups under Settings > Till and products > VAT groups: a name and a VAT rate. Jimani sets the rates themselves and the currency; those tabs are hidden.
Where to find it: Settings > Till and products > VAT groups (/settings/vatsetup)
All buttons, settings and messages of this screen
Under Languages you choose in which languages your guests see your widgets and confirmations: which language is the Main language, which is the fallback (General settings) and which languages are Visible, at most five. You can find it under Settings > Your business > Languages.
Where to find it: Settings > Your business > Languages (/Settings/Languages)
All buttons, settings and messages of this screen
With Announcements you prepare a message for your employees, with a start date, an end date and a type (Informative, Warning or Beware!). An announcement appears in the help centre on the chosen days, or only at the top of the reservation screen if you set Visible when booking to Yes.
Where to find it: Menu > Announcements, or Settings > Communication > Announcements (/settings/alerts)
All buttons, settings and messages of this screen
These are the messages Jimani gives when something under Settings is not possible or fails, with the screen they belong to and what you do. Most of them say who may do something (often only the owner) or that an add-on must be turned on first.
Where to find it: Settings (/Settings) and the screens below it
All buttons, settings and messages of this screen
In the Reservation information of tickets, activities and the salon, you change the guest's details in the step Edit guest details, with their Language and a Comment. In the step Send email you choose an email and adjust the subject and text for this one email.
Where to find it: Open a reservation under Activities, Salon or Ticket sales > Reservation information
All buttons, settings and messages of this screen
You log in to the dashboard with your email address and password on the screen Welcome to Jimani. That is also where you find Forgot your password?. The owner with a confirmed mobile number receives a code by text message on an unknown device. After a few wrong attempts an account is temporarily blocked.
Where to find it: The login screen is the start address of the dashboard (/ and /Auth). Forgot password: /Auth/ForgotPassword. Logging out: in the menu, under the name of your business (/Auth/LogOut).
All buttons, settings and messages of this screen
For each user there are a name, address, phone numbers, email addresses, job description and language. You open your own details with the Profile button at the top right. Under the phone number you confirm your mobile number with Verify using a text message code; the owner also chooses there whether they want an SMS code when logging in on a new device.
Where to find it: Your own details: Profile button at the top right in the header, or /Account/UpdateUsers. Details of an employee: Settings > Your business > Users and permissions (/CompanyUsers), or via the Users list (/Settings/Users) and then the user (/Settings/Update).
All buttons, settings and messages of this screen
You sign up on the Register page with your email address and your website (or I don't have a website). You receive an email with a link that works for 48 hours. After the click, Jimani reads your website, asks a few short questions and sets up your shop. If you sign up via a dealer, you use that dealer's sign-up page and get a copy of their demo shop.
Where to find it: Register (/registreren); via a dealer the dealer's sign-up page (/start/<code van de dealer>); the older sign-up (/companyregistration/register)
All buttons, settings and messages of this screen
On this page a business from the old Jimani switches to the new Jimani, with the button Switch now. The page first says what happens; after the switch it says You've switched. You get there via the bar at the top of the dashboard or via the button in the switch email.
Where to find it: the bar at the top of the dashboard > Switch now (/V1Overstap)
All buttons, settings and messages of this screen
The demo shows your own POS on real screens side by side, with tasks that tick off automatically; it is only there as long as your shop is in demo mode. Try it yourself opens a device in a practice copy of your shop, even if you are already live. In both, nothing counts.
Where to find it: Help centre > Tutorials > Try your own POS yourself (/Demo); the button Demo at a device in the Jimani webshop or in Your advice (/Demo/Probeer)
All buttons, settings and messages of this screen
You schedule an introduction or online demo with Jimani yourself on the booking page: choose a day and a time, fill in your details and click Schedule appointment. The confirmation email contains the link for the call and the buttons to reschedule or cancel. You don't need an account for this.
Where to find it: the button for a demo on the Jimani website, or the link in an invitation (/boek/...); manage your appointment via the link in your confirmation email (/afspraak/...)
All buttons, settings and messages of this screen
You open the Help window with the round button Help at the top right. There you find your notifications, your steps to go live, demos, your balance, advice, tutorials, Jim the assistant and the helpdesk. You create a ticket for the helpdesk on the page Your ticket.
Where to find it: the button Help at the top right in the header; Jim with the button Ask Jim at the bottom right; tickets via Help > Contact helpdesk > Create a ticket (/HelpTicket); tutorials via Help > Explanations and videos (/Uitleg/Tutorials)
All buttons, settings and messages of this screen
The dashboard is Jimani's start screen with the figures of your business: revenue, products sold and charts per module. What you still need to deal with is no longer on the dashboard but in the Help window, under Notifications and Store check.
Where to find it: Menu > Dashboard (/Dashboard)
All buttons, settings and messages of this screen
On Import and export you put your data into Jimani in one go with an Excel or CSV file, or get it out. Each type has the buttons Import, Export and Example file. Importing happens in four steps and only saves anything when you press Import in step 3.
Where to find it: Settings > Till and products > Import and export (/ImporterenExporteren)
All buttons, settings and messages of this screen
Many buttons, lists and messages work the same on every screen of Jimani: the buttons at the bottom of a window, the search field and the paging buttons of a list, the names on icons and the error messages that say what is wrong. They are all collected here.
Where to find it: on all screens of the dashboard
All buttons, settings and messages of this screen
Under Documents you decide what appears on the PDFs your guests receive: which company details are at the bottom, whether the PDF is attached to the email, and the text per document and per language. On the right you immediately see a preview.
Where to find it: Settings > Communication > Documents (/Documenten)
All buttons, settings and messages of this screen
In the Mollie window you connect your own Mollie account, see how far Mollie is with checking your details, and arrange card payments: the card payment subscription, Tap to Pay and fetching your card terminals. The heading says: "Connect the system with Mollie, so that you can use products and deposits."
Where to find it: Settings > Money and figures > Payments (Mollie). If Mollie is already connected, that line opens Everything about payments; type "Mollie" in Search for a setting… then (/Settings/CompanyInfo?stap=4)
All buttons, settings and messages of this screen
Everything about payments shows "Your balance, payouts, payments and refunds at Mollie in one place." You read everything from your own Mollie account here and you can do two things: refund a payment and turn a payment method on or off.
Where to find it: Settings > Money and figures > Payments (Mollie), or the button View my Mollie in the Mollie window (/Molliebeheer)
All buttons, settings and messages of this screen
Financial reporting shows the revenue and the reservations of your reservation module (restaurant, activities, ticket sales, salon or hotel) over a period you choose. "Search by date, reservation type or availability and see all the information quickly and clearly." You can export the report to Excel or print it as a pdf.
Where to find it: Settings > Money and figures > Reports, tab Financial reporting (/Settings/FinancialReport)
All buttons, settings and messages of this screen
The Progress report shows how your business is developing: "See how your business is developing: reservations, guests and revenue, compared with an earlier period on the same weekdays." You choose a period, what you want to compare with and how you want to see it, per day, week or month.
Where to find it: Settings > Money and figures > Reports, tab Progress report (/Settings/ProgressReport)
All buttons, settings and messages of this screen
Transaction costs are "An amount that is added on top of the order, for example for a reservation or a payment method." You give them a name, a description, a price and a VAT group, and then choose them for a reservation type.
Where to find it: In your module when adding: in Restaurant the plus button > Transaction costs, in the hotel the card Transaction costs under the products. Only with the add-on Transaction costs (/TransactionCosts/Create)
All buttons, settings and messages of this screen
In My website you edit the ready-made website of your business: on the left you see the site, on the right is the panel with the tabs Edit, Blocks, Style, Pages, Languages, Address and More. Your changes are only visible to visitors once you click Publish.
Where to find it: Settings > Your business > Website (/Mijnwebsite)
All buttons, settings and messages of this screen
In Branding you set the logo, the eight colors, the corner radius and the font of your business in one place. Your widgets use this branding, unless you choose own colors for a widget. On the right you see a Preview of your Website, Widget, Mail and Receipt.
Where to find it: Settings > Your business > Branding (/Huisstijl)
All buttons, settings and messages of this screen
In the Widgets overview, every widget of your business is shown as a tile (for the webshop the screen is called Online webshop). A click on a tile opens the widget overview with everything you do with that widget: view code, make a copy, test, edit, change colors and add scripts. At the top right you add a new widget with Add widget.
Where to find it: Settings > Guests and bookings > Widgets (/Settings/WidgetsetupList)
All buttons, settings and messages of this screen
With Add widget you make a new widget in three steps: name and type, what the guest chooses, and layout. With Edit you adjust an existing widget on two tabs: Settings and View. What you see depends on the widget type and the module.
Where to find it: Settings > Guests and bookings > Widgets > Add widget, or open a widget and choose Edit (/Settings/WidgetsetupList)
All buttons, settings and messages of this screen
On the View tab of Edit widget you set which language the guest sees, which texts appear, how far ahead they can book, which details they must fill in and where they go afterwards. At the bottom is a block for the module itself (Restaurant, Activities, Ticket sales, Salon or the webshop). On the right you see a live preview.
Where to find it: Settings > Guests and bookings > Widgets > open the widget > Edit > View tab
All buttons, settings and messages of this screen
A visitor to yourbusiness.jimani.site (or your own domain) sees the pages of your site and a few fixed pages: the terms and conditions, a confirmation page for the newsletter, the withdrawal page of the webshop and a calm message if a page does not exist or the site is not active yet. These pages are for the visitor, not the dashboard; you adjust them in My website.
Where to find it: Visible on your website (jouwzaak.jimani.site); adjust in Settings > Your business > Website (/Mijnwebsite)
All buttons, settings and messages of this screen
With Customer visits you schedule visits by your employees at the customer's home, such as taking measurements, advice or installation. You see the schedule per employee, your employee has a day overview on their phone, and on the POS you see the visits and create the quote or order after the visit.
Where to find it: Menu > Customer visits (/Klantbezoeken); Settings > Guests and bookings > Customer visits (/Klantbezoeken/Instellingen)
All buttons, settings and messages of this screen